
Woohoo! We have a video for you today demonstrating how you can create fun backgrounds and flowers using the Tim Holtz Alcohol Inks. Check out the video and then try your hand at them!

The video below takes you through the entire process, step by step.
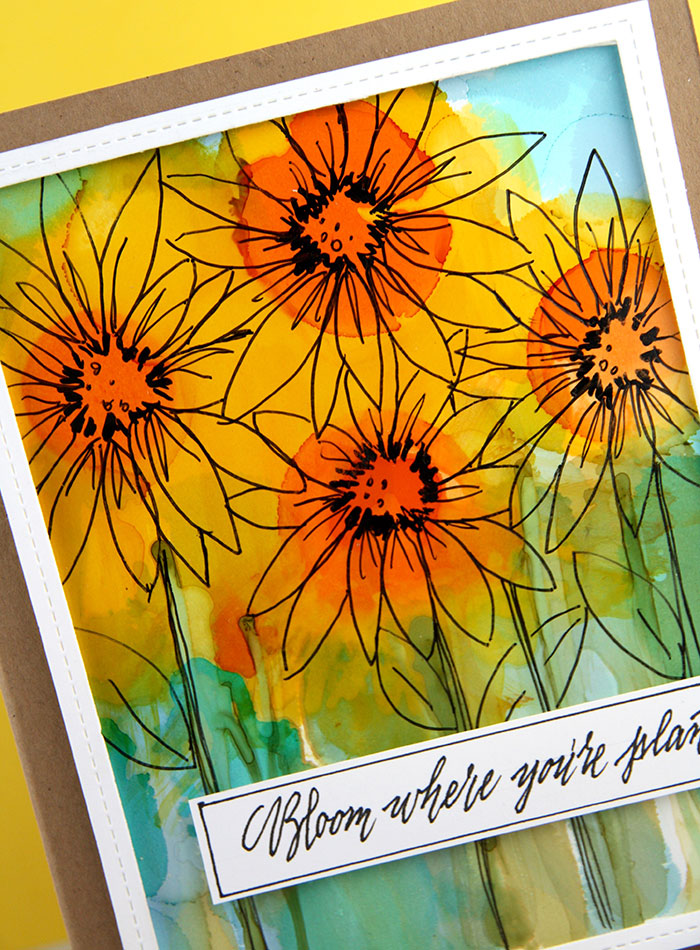
Alcohol ink background and flowers are usually a more abstract, impressionistic way of creating color. The colors are bright and lively. To get the inks to stay on top of the paper and not instantly absorb into the fibers of the paper, you must use specially designed papers for alcohol inks. These papers have a plastic characteristic and are slick. I used the Adirondack Alcohol Ink Cardstock for this project but Yupo paper is another good candidate.
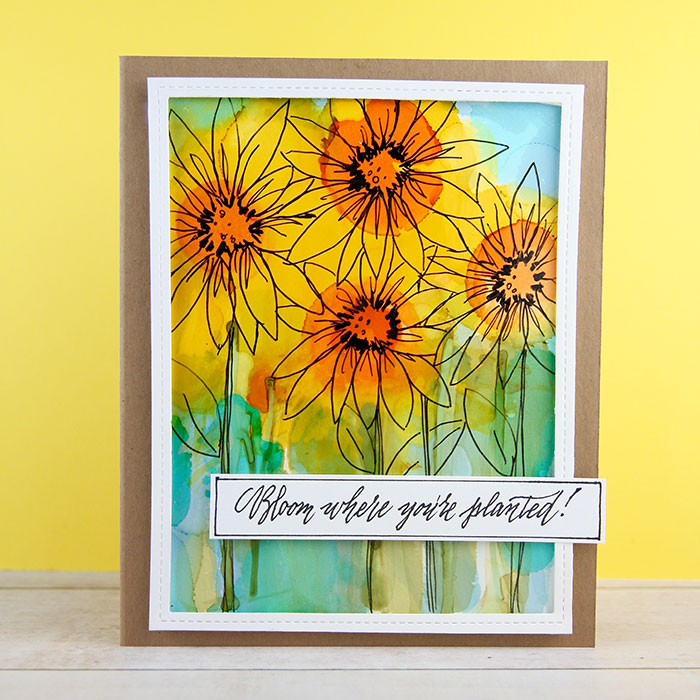
I usually start out with forming the background, then add the bright spots of color for the blossoms. The alcohol in the inks evaporates very quickly, causing the inks to dry so I had to work quickly, adding droplets of color until I was satisfied with the result.
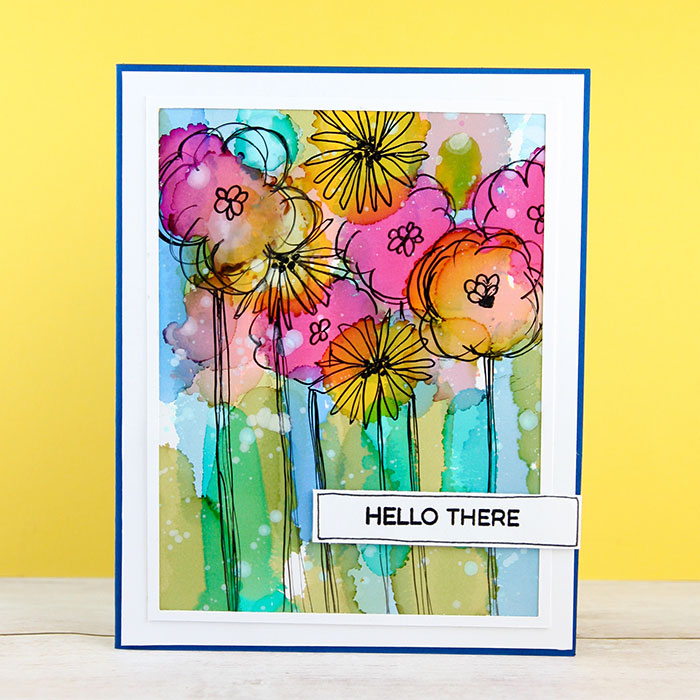
After the background and color for the blossoms were complete, I began forming the flowers by first starting to create the centers, then working out to the petals. I used a Medium Brush Mangaka pen for the centers and then the #2 Mangaka pen for the petals. The stems and leaves are added with a #5 Mangaka pen.
When all the flowers and leaves were completed, the panel was mounted onto a card base and a very narrow cardstock frame was added. In the case of the pink flowers, I first mounted a white panel on the front of the card base, then the alcohol ink panel.
The narrow frame was made by using the Lawn Fawn Outside In Rectangle Stackables and die cutting it from a piece of white cardstock. The inside panel was removed and saved for another project. After the outside edges of the frame was trimmed to the desired size, then thin strips of foam tape were added to the back to pop up the frame.
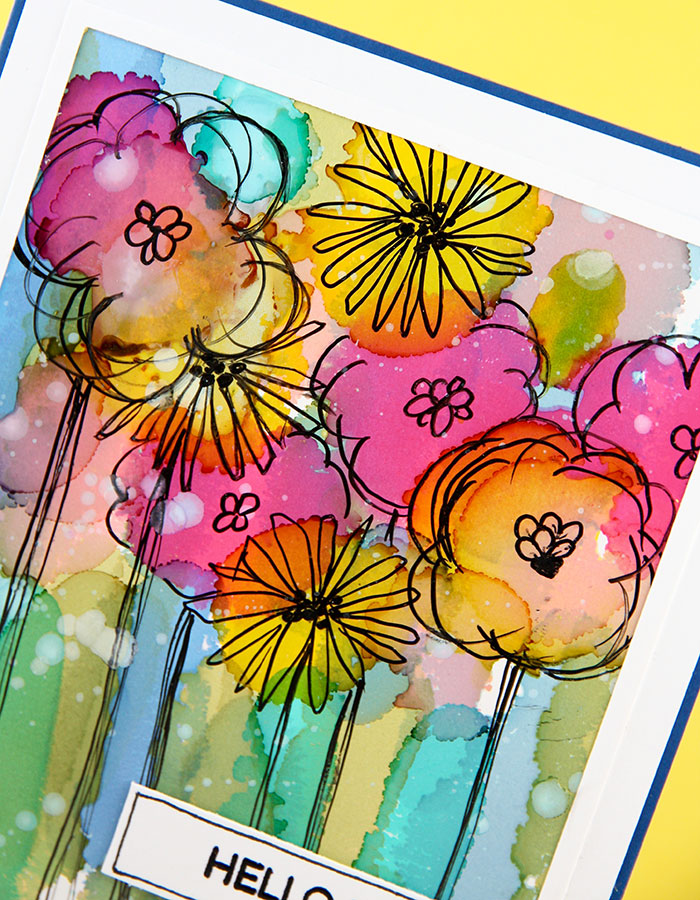
For the sunflower card, I hand-lettered the sentiment and framing box with a #2 Mangaka pen. The sentiment for the pink flowered card was stamped and heat embossed, with a framing box added. Foam tape was added to the sentiment, then mounted on the card.
Thanks so much for being my guest today. I hope you have enjoyed our video and will give us a thumbs up. If you haven’t already, please subscribe! Hope to see you again soon.

Supply List:
 Alcohol Ink Paper |
 Paper |
 Holtz Countryside Alcohol Inks |
 Holtz Lakeshore Alcohol Inks |
 Summit View Alcohol Ink |
 Holtz Beach Deco Alcohol Inks |
 Medium Brush Mangaka Pen |
 02 Cartoonist Mangaka Pen |
 05 Cartoonist Mangaka Pen |
 C-Thru L Ruler |
 Fawn Outside In Rectangles
|
 Favorite Things More Essential Sentiments |
 Card stock 100 lb. |
 Kraft Cardstock |
 110lb. Solar White card stock |
 Dimensional Tape |
 Arts Detail Black Embossing Powder |

The alcohol ink tutorial was really helpful. I have a drawer full of the inks from way back when and now I think I might make something of them. Really appreciate it.
These are so pretty! I love the bright colors! I have some yupo paper I haven’t tried yet… this has inspired me to get out my paper and alcohol inks!
Loved watching the YouTube video, and I am already a subscriber there!
What a fun technique! Makes me want to dig out my alcohol Inks and try it. Though I don’t think my flowers would look as lovely as yours and that’s one thing that adds wow to the cards.
I have the alcohol inks and Yupo paper and now, through your great video, have an idea of another technique to do. Thanks!
This is such an interesting technique. You’ve done an amazing job with your flowers. Thanks for sharing the video.
Thanks for sharing the great technique.
subscribed to YouTube
What awesome artworks, Shauna! Love your handwriting and drawing !!!
Thanks for the video on alcohol inks. I have a bunch but have really never used them. I have Yupo paper also so I may try to do this.
Loved the demo for these stunning cards