Hi Creative Friends,
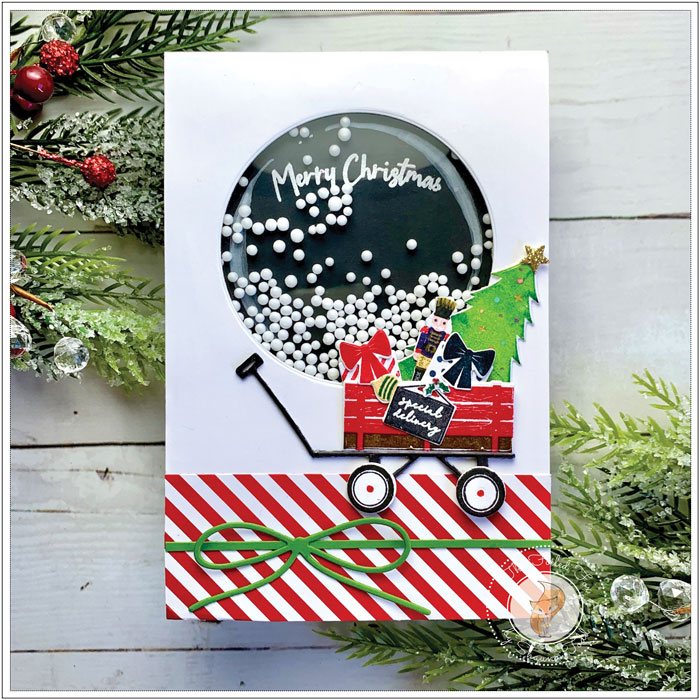
I am sharing a super fun card today. It features the awesome Holiday Wagon stamp and die set by Papertrey Ink. It has all the makings to stuff your wagon with all the Christmas delights.
Starting with the wagon, I cut out all the pieces, except the wagon handle and base that holds the wheels from Neenah white card stock. The hand and base were triple cut (meaning three of each were cut) from Licorice black card stock. I stacked and glued the handle and base, then set them aside.
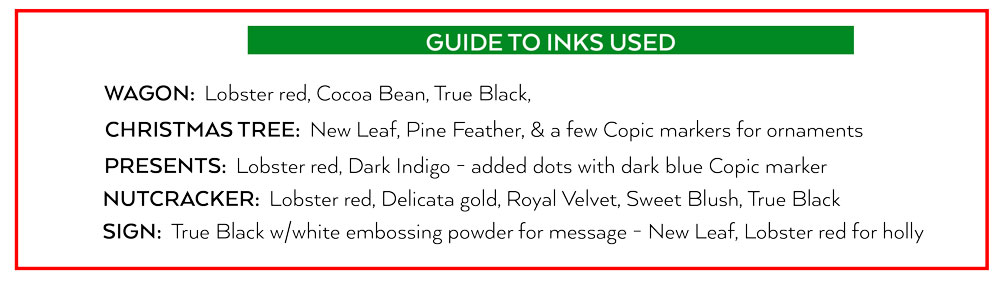
The remaining wagon pieces were stamped as shown in the graphic below.
Once all the pieces were finished, I assembled the wagon, stuffed it with all the gifts, tree, and nutcracker and glued them in place. When all was arranged, I added foam tape to the back, then set it aside while I made the card base.
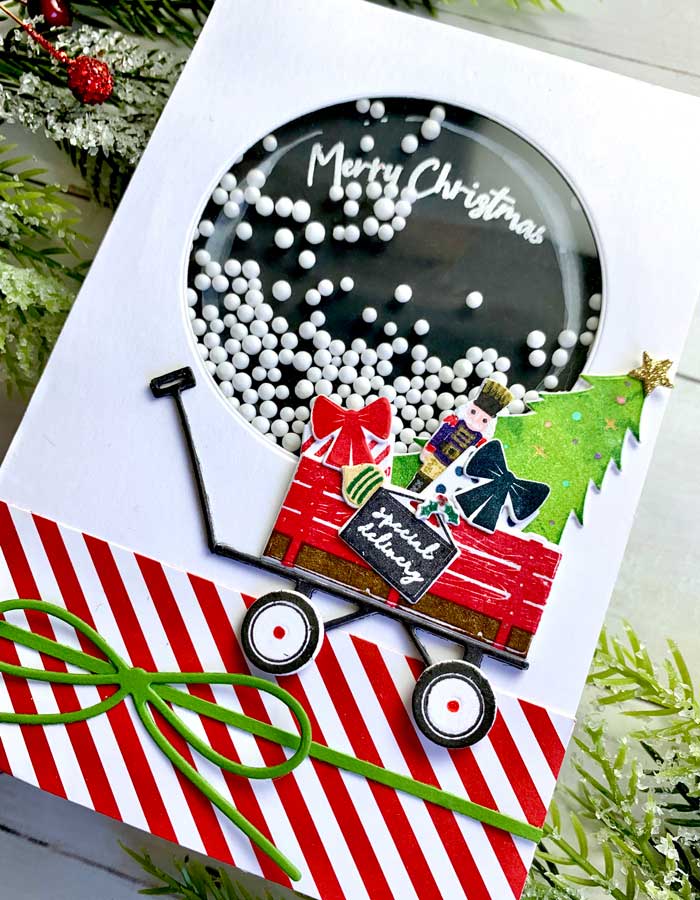
I haven’t done a shaker card in ages and since this wagon evokes fun and festiveness, I decided it would be a good addition to the card. So, I cut a circle from a white card panel. The panel was 4.25″ wide but a little longer than a standard A2 size.
Before I added the acetate to the back of the white card panel, I placed a piece of black cardstock behind the white panel and lightly traced the perimeter of the circle. This gave me a guideline to where to paint the white outline accents using Dr. Ph. Martin Bleedproof white ink – see pic below.
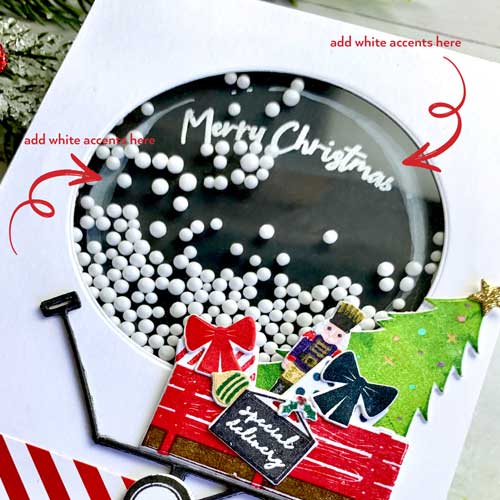
When the white accents were done, I stamped and white heat embossed ‘Merry Christmas’ to the black panel too.
Next, I mounted a piece of acetate to the back of the white card panel to cover the round circle hole. Since I was filling the shaker with tiny microfoam beads (click here for Amazon link), I then added a double layer of foam tape to the back.
A strip of striped paper was added to the bottom, along with a 1/8″ strip of New Leaf green cardstock and a bow I cut using the same green cardstock and the Modern Gift die set.
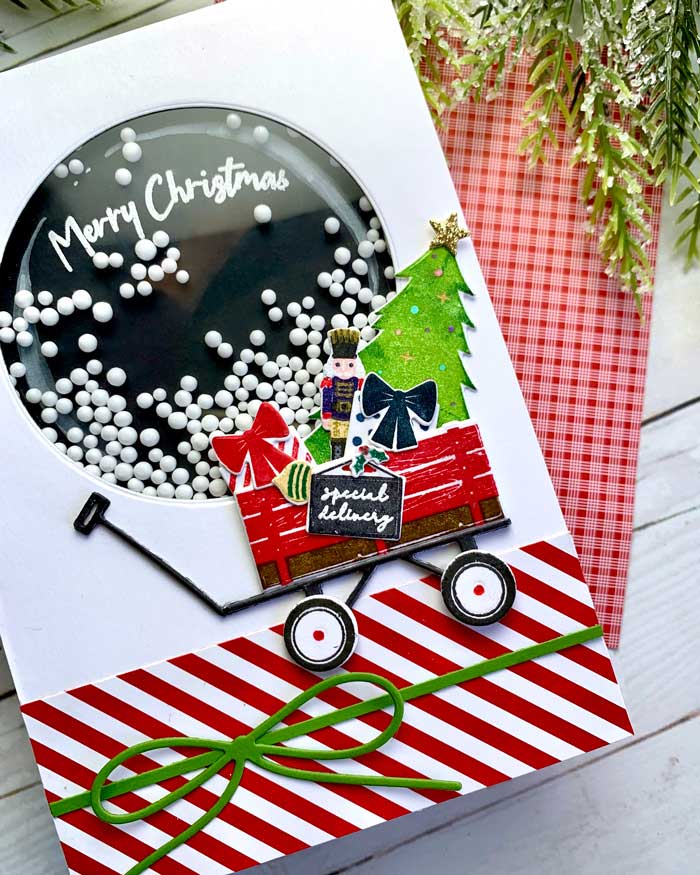
It was now time to assemble so I mounted the Merry Christmas embossed black panel to a white card base, then poured a small pile of microbeads in the center of the black panel, I peeled off the foam release tape on the back of the white panel and carefully pressed it in place. The wagon and handle were added… and that completes the card. ♥
Goodies Used: