
Hello Friends,
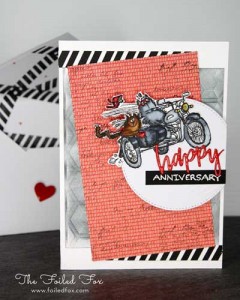
My anniversary was just a few days away and I didn’t have a clue what to do. I don’t know if you have the same trouble I do, but making a masculine card is not second nature to me. I have to really think about it….but this motorcycle sidecar card idea did the trick.
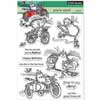
It was one of my ever-smart daughters that mentioned Penny Black’s You’re Retro stamp set. This would be perfect. My husband can not get enough of his motorcycles. He loves them all, but he has a particular fondness to our own vintage side car. So, you see, nothing could be better!
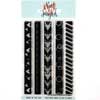
To create this Motorcycle Sidecar card, I first stamped the sidecar and the second cat (the one on the bicycle) for the passenger. I stamped them on Neenah’s solar white 110lb. card stock with black StazOn ink. Since I didn’t have any diagonally striped paper, I created my own by stamping with the same black StazOn ink, the diagonal stamp from the Neat & Tangled “On the Strip” . I stamped a bunch of these, just to make sure that I had enough.
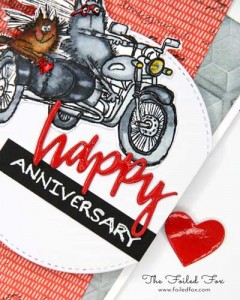
Next, I colored the side car and characters with Copic sketch markers. The gray cat was colored with C1,C3,and C5, side car with C5, C7, C9, C10 and the brown cat with E23, E25, E27 & E33 For the red accents, I colored the helmet and glasses with R27 and R29 and a tiny touch of R29 for the back tail light. The headlights were colored with Y15.
With all the coloring done, I fussy cut the side car and the brown cat (just the upper body and its tail and arm) – the tail and arm had to be separated so I could position them later. For an extra touch, I slathered on IrRESISTible Pico Embellisher – Clear to the helmet, eye glasses, and tail light. I added a swash of the IrRESISTible Pico Embellisher – Yellow to the head lights for a glossy accent.
There were a few more details to attend to before assemble of the card. First, I:
- Cut a slit in the seat section of the side car for the brown cat body to slip into. Glued the tail and arm to the body where appropriate.
- Die cut “Happy” from the Neat & Tangled “Happy Holidays” die and added some more of the IrRESISTIBLE Pico Embellisher- clear to give it a gloss finish.
- Cut a strip from a scrap of black card stock and wrote ‘anniversary’ with a white gel pen (I didn’t have an anniversary stamp the correct size so this worked perfectly.
- Die cut a circle from embossing white card stock.
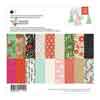
- Cut a piece, approx. 3 3/4″ x 6″ of red patterned paper. I thought the paper was a little plain so I stamped, in little mini sections, portions of a text stamp. (using the BG Romantic Background stamp)
- Using the Next Step Gemstone Dimensional embossing folder, a piece of white card stock. Then, with a blending tool added gray ink to hit the high points of the embossing.
- Trimmed the diagonal strips I had stamped earlier
Now, on to the assembly:
- Cut a 10″ x 7″ piece of white card stock, scored it at 5″ on the 10″ side for my card base
- Trimmed the gray embossed paper to 4.5″ x 5.5″, centered and adhered it to the card base.
- Adhered the red, DIAGONALLY, on top of the gray layer. Place the previously stamped diagonal strips on the top and bottom and trimmed the ends even with the card base
- Added foam to the back of the circle cut out and adhered the side car to circle
- Making sure the “Happy” was dry, I positioned and glued the “Happy” to the bottom of the side car with the black ‘anniversary’ strip glued below.
- Positioned the circle, offset from the card, and trimmed off the part hanging over the card base
Viola! the card is done …. ready for the sentiment inside.
For a finishing touch, I added a red piece of card stock with a diagonal strip for accent and hand wrote the sentiment in calligraphy but you could choose whatever sentiment is best.
![]()
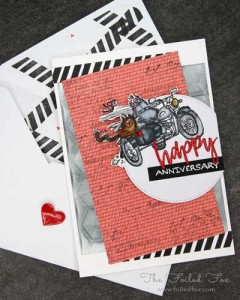
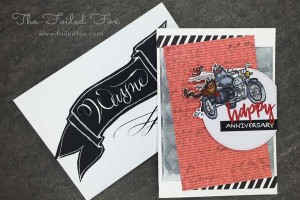
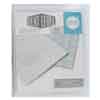
As a side note: I love handmade envelopes, especially when they are lined…. though truthfully, you could easily use a ready made envelope just as well. If you would like to line your own envelope, I find using the lighter weight paper the best. I use a piece of original copy paper from your printer and decorate away with a design of your liking. For this envelope liner I randomly stamped, using the same strip stamp from the card, a black and white design and added tiny red triangles with my red gel pen, cut it to the correct shape and size and used a tape runner only on the flap edge.
Supply List:
 |  |  |  |  |  |  |
 |
