
Hi Crafty Friends,
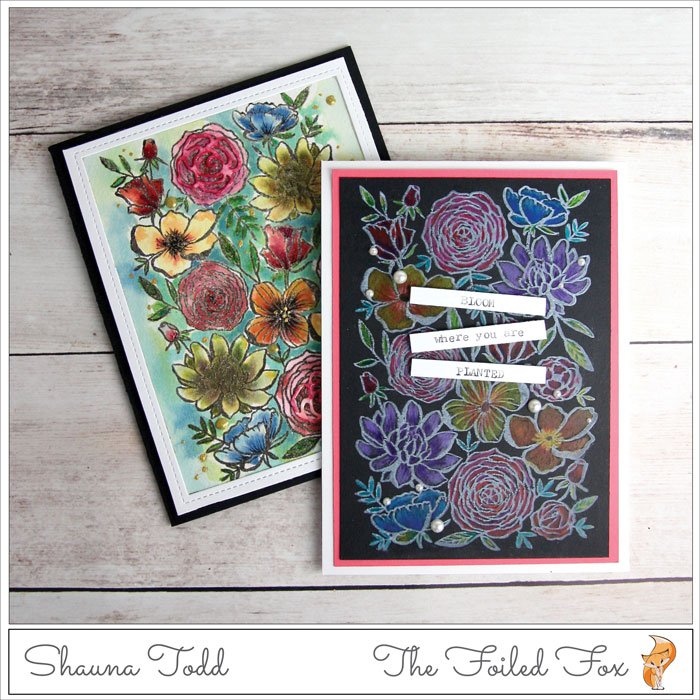
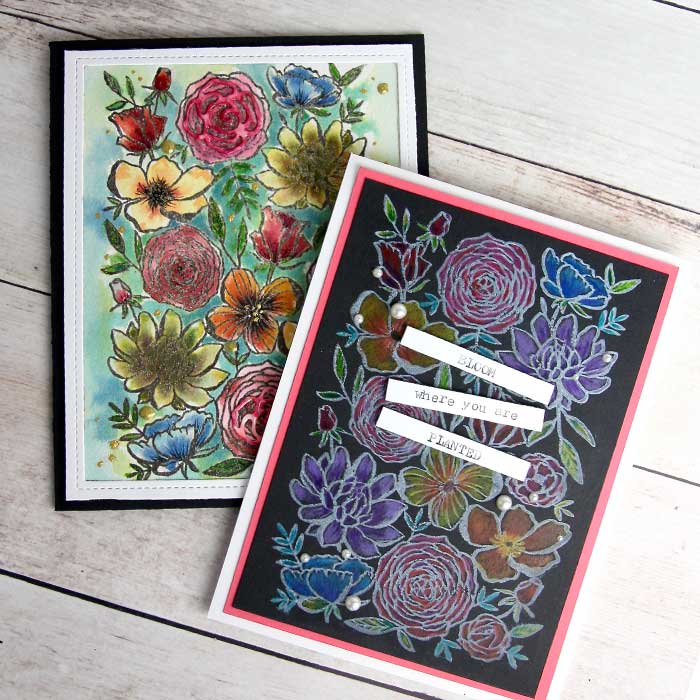
Pinkfresh is releasing lots of wonderful stamp sets and the Studio Floral Background is one of their first. To show off its floral splendor, I have created it two different ways. One is watercolored using Distress stains and on the other, I colored the flowers with watercolor pencils.
I started with a piece of hot press watercolor paper in my stamp positioner (like MISTI or the Stamp Platform) that had been first prepped with anti-static powder, I stamped the Floral pattern onto the paper using Smokey Grey Versafine ink. I stamped it a few times, reinking each time to make sure the ink was evenly applied. This is where the stamp positioner tool is AWESOME! How else can you keep restamping in exactly the same spot?
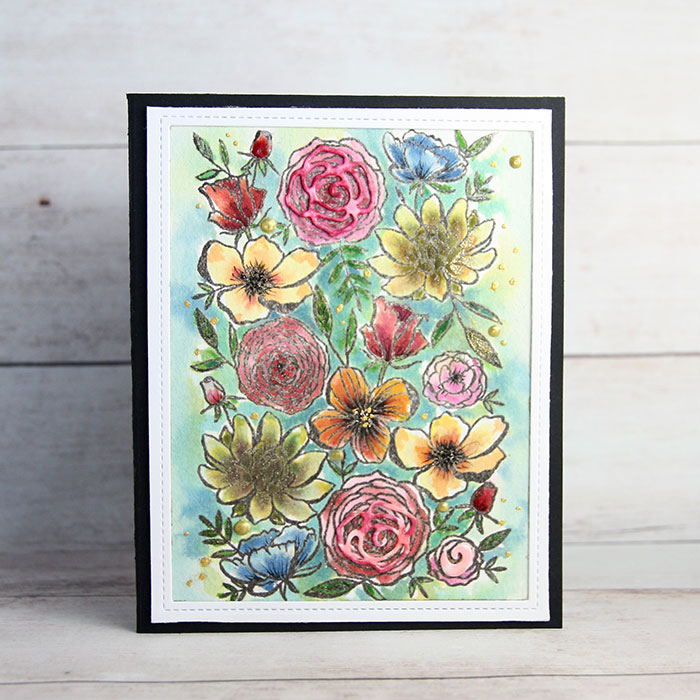
Next, I created a palette of colors by smooching a spot of each of the distress stains I planned to use onto my watercolor palette. (By the way, if you don’t have a watercolor palette and you want to use distress stains too, use a plate or piece of acrylic boards or acetate for your palette). Or, if you don’t have distress stains, grab any watercolors you may have and go for it!
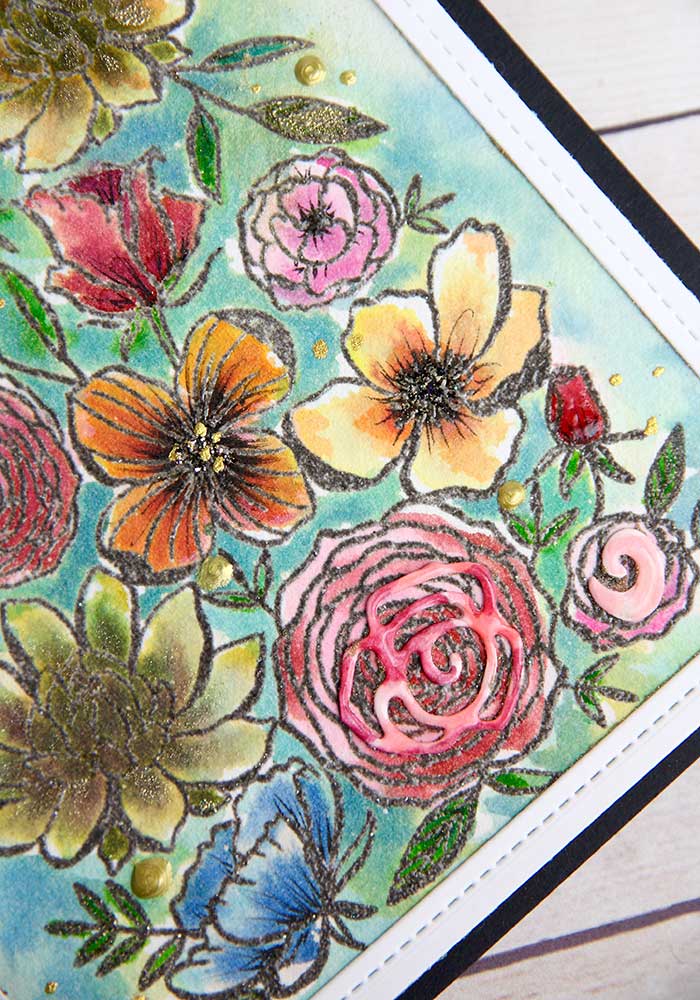
Each flower was painted by first brushing on a layer of clean water to a flower and then adding color. After all the flowers were colored, the background was colored the same way.
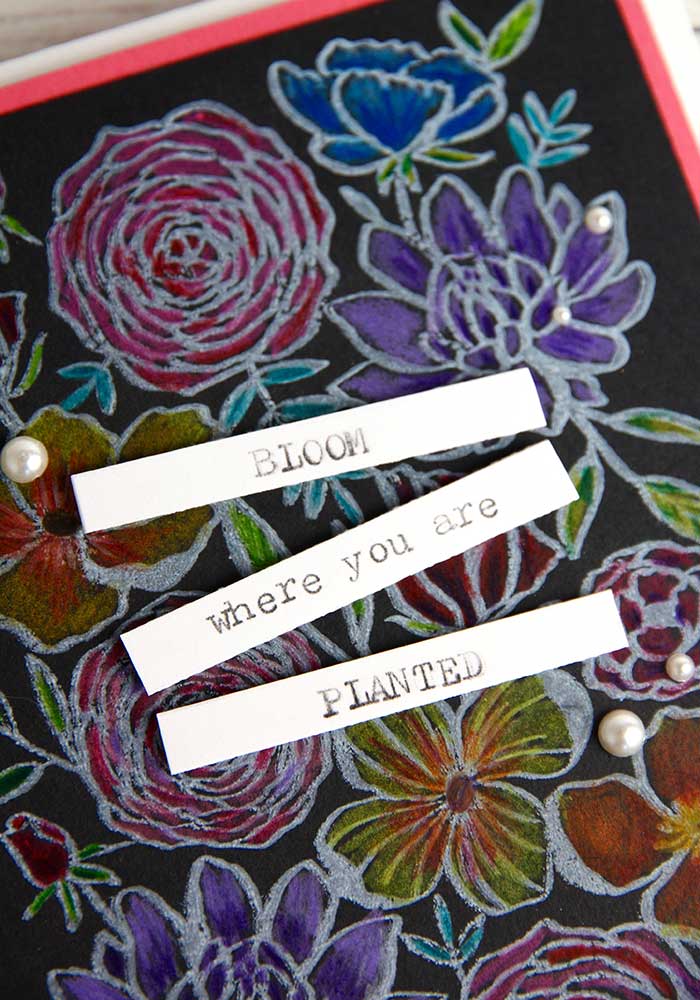
While the watercolor panel is drying, let’s get out our watercolor pencils. I used the Staedtler watercolor pencil set and a piece of black cardstock. Since I wanted it to have a chalkboard effect, I stamped the floral background image onto the black cardstock using the Lawn Fawn Yeti inkpad. This Yeti ink is very juicy and a very nice white ink!
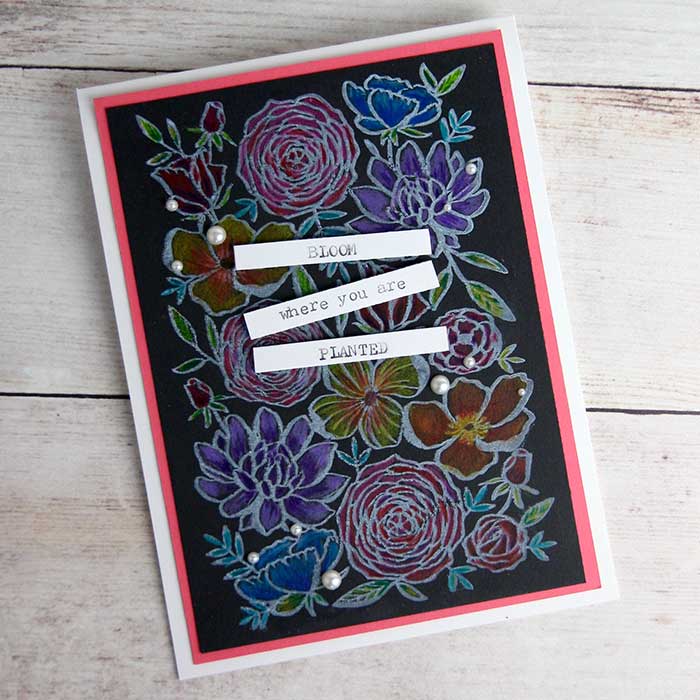
Making sure the ink was good and dry, I started with the rose-shaped flowers and used a pink, dark pink and purple pencils for shading. I continued on with each flower, using a lighter color, then a darker color for shading.
Now that each panel is finished, it is time for the finishing touches. The watercolor panel was mounted onto a black Licorice Twist card base and a narrow white frame was added. The frame was created compliments of the Lawn Fawn Outside In Stitched Rectangles and then trimmed it narrow. Foam tape was added to the back of the fame to pop it up. For a little embellishment, I added an extra layer by die cutting a few flower details from the Little B Bouquet Flower die set, colored it with coordinating watercolor and glued it to the top of a few flowers. The embellishments were then slathered with clear IrRESISTible Pico Embellisher and drops of Nuvo Metallic Bright Gold crystal drops were added!
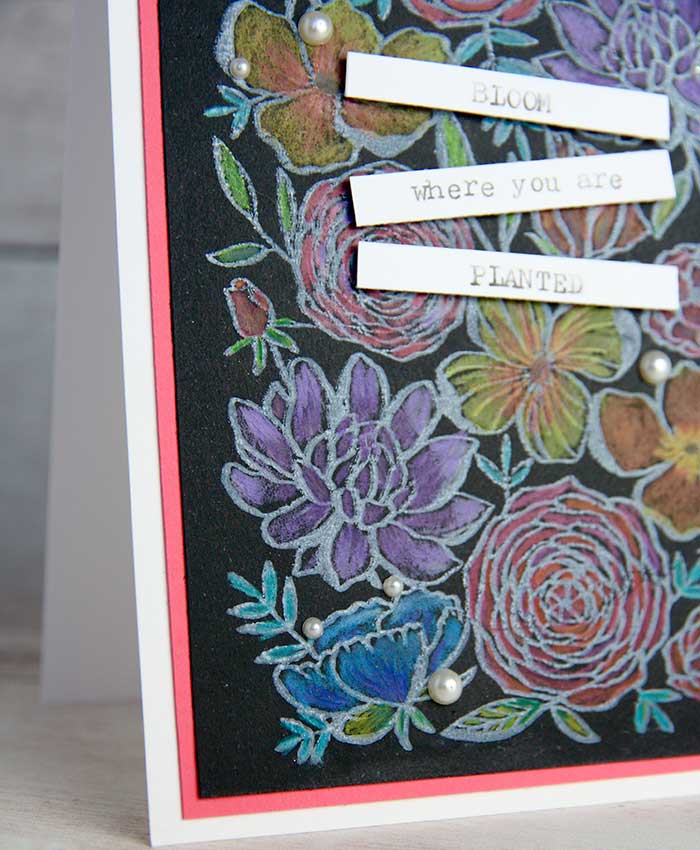
The blackboard panel was mounted onto Candy Hearts cardstock panel and then adhered to a white card base. I typed out the sentiment using the We R Memory Keepers typewriter and added the strips with a little foam tape. Tiny pearl embellishments were sprinkled about!
So, there you have it. I hope you have enjoyed your little visit with us today! See you next time! ♥
Goodies Used:
 Studio Floral Background Stamp |
 Bouquet Flowers Die Set |
 Fawn Outside In Rectangles |
 Tim Holtz Distress Stains |
 Watercolor Colored Pencils |
 Twist Heavy Black Card Stock |
 110lb. Solar White card stock |
 Hearts Card Stock |
 Smokey Gray |
 White Yeti Pigment Ink |
 Bright Gold Crystal Drops |
 Adhesive White Pearls |
 Dimensional Tape |
Pico Embellisher- Clear |
 Tape Gun |
 Memory Keepers Typewriter |
 Hot Press Watercolor Paper |
 Positioning Tool |
 Holtz Stamping Platform |
