IG-AT--Brighter-Days2
Click Below For More Images:
  • brighter-days2
  • brighter-days3

You Make My Days Brighter

Calling all coffee lovers!

We have a treat for you today. Amy Tsuruta (IG: @craftee1) is sharing a super fun card design featuring a favorite of many… coffee! Check out this delightful card where she has combined a few Papertrey Ink goodies to make this design shine!


Hey Foiled Fox Friends. It’s Amy Tsuruta and I’m sharing a caffeinated project today:

I combined a couple sets by Papertrey Ink:

  • Papertrey Ink – Just Notes | stamps + dies
  • Papertrey Ink – Love to Layer: Notebook | dies
  • Papertrey Ink – Thoughts of Spring Sentiments | stamps 
  • Papertrey Ink – Brew to Go | dies

The Concord & 9th cardstock and inks I used:

  • Sunflower
  • Avocado
  • Mushroom

The coffee cup is cut from Papertrey Ink – Classic Kraft.  I think the pen from the Just Notes set is so fun! The stacking heart dies on the coffee cup are from the Just Notes coordinating die set.


Thanks for stopping by!


more about Amy:


Goodies Used:


Share
$0.00
IG-ST-Nothing-But-The-Best1
Click Below For More Images:
  • Nothing-But-the-Best2
  • Nothing-but-the-best4

Nothing But The Best

Hi Creative Friends,

I love floral stamps, and a few companies do it up right. One of them is Pinkfresh Studio and the set I am using today is a real beauty. It is Nothing But The Best, and it is so lovely!


What a wonderful set this is. The flowers are beautiful and the coordinating stencil set is a dream to use! Another neat thing the stencils do is guide you along to the next section and create perfect coloring!

The ink colors I used were a few from Pinkfresh Studio and I used ink daubers (to get into the small spaces). So to start, I used Peach Fuzz on the outside parts of the flower, then intensified the color using Coral Reef. For the centers, I used Passion Fruit with a dash of Black Soot distress ink right in the centers.

The blue flowers were colored using Tidal Pool and Ocean Breeze, with a dash of Coral Reef.

Finally, the leaves were colors, again using daubers, with Fresh Pear and Olive. All the colors are in the supply list below.

Once all the coloring was done, I cut it out using the matching die. At the same time, I stamped the included sentiment with Versafine Black Onyx ink and cut it out using the coordinating die.

To provide a nice background for the flower spray, I used the smaller Ornate Rectangle Frame. Instead of cutting it out, I used my rubber mat with my die-cutting machine and embossed the pattern onto a small white cardstock panel.

To put it all together, I mounted an A2-sized Luxe Grey cardstock panel onto the front of an A2-sized white cardstock card base.

A foam backing was added to the back of the white embossed panel made earlier, then it was mounted on top of the card front.

The flowers and sentiment were mounted using white foam squares to complete the card.

It is always a pleasure for me to create a floral card and this spray of flowers from the Nothing But The Best set is perfect. I hope you give it a try! 


Goodies Used:


Share
$0.00
IG-ST-Tulip-Festival1
Click Below For More Images:
  • Tulip-festival2
  • tulip-festival3

Tulip Festival

Hi Creative Friends,

Spring is in the air… and tulips are popping up everywhere! These delightful flowers are wonderful and they are great for cheery projects. The new Concord & 9th Tulip Festival stamp and die set creates a spray of tulips!


These tulips are super easy to make. All you need is a few complementary colors of cardstock and glue to cut out and arrange together to make these lovely flowers. The assorted paper pack from Concord & 9th has all the colors you need right at your fingertips! When the tulips were all made, they were set aside.

For a decorative background, I embossed a white cardstock panel using the Honeycomb Quilt Top cover plate from Concord & 9th, then stamped a random display of gold dots using one of the stamps in the Tulip Festival stamp set and some Golden Glitz Delicata ink. Using a sponge dauber, I also lightly blended on some of the same gold ink on the left side of the panel.

An A2-sized panel of gold metallic paper (check out the supply list below for this gorgeous mica-coated paper- it is extra special!) was cut and the honeycomb embossed panel was trimmed and mounted on top of the gold.

Next, the flowers were arranged and permanently placed onto the honeycomb panel using foam squares and a little glue.

For the sentiment, I cut out 3 ‘Hello’s” from the ‘Sweet As Pie’ die set by Concord & 9th. They were then stacked and glued together.

A narrow variegated gold silk ribbon with a bow was added to the bottom of the flowers and the Hello mounted on top to complete the picture.

The card was now done – YAY! I think it will bring the recipient a smile! That makes it even more special!

If you are wondering about the supplies used, check out the list below… and I will see you next time! 

Goodies Used:


Share
$0.00
IG-At-You're-the-best1
Click Below For More Images:
  • sweet-birthday-wishes2
  • sweet-birthday-wishes3

Sweet Birthday Wishes

Hi Creative Friends,

It’s Wednesday, and that means we have the pleasure of treating you to another super cute card design by Amy Tsuruta (IG: @craftee1). She very cleverly combined a few of Papertrey Ink’s stamp and die sets to create this fun and cheery birthday card!


Hey Foiled Fox Friends. It’s Amy Tsuruta and I’m sharing a birthday project today:

I combined a couple sets by Papertrey Ink:

  • Papertrey Ink – Just Notes | stamp
  • Papertrey Ink – Love to Layer: Notebook | dies
  • Papertrey Ink – Birthday Pops | stamps + dies


The Concord & 9th inks I used:

  • Ballet Slipper
  • Sweet Pea
  • Oceanside

The Notebook die is so much fun!

The cardstocks I used:

  • Concord & 9th – Ballet Slipper
  • Papertrey Ink – Hibiscus Burst
  • Papertrey Ink – Kraft


Thanks for stopping by!


More about Amy:


Goodies Used:


Share
$0.00
IG-DK-Wonderful1
Click Below For More Images:
  • wonderful2
  • wonderful3
  • wonderful4

Down The Garden Path

Hi Creative Friends,

Everything is coming up blooms today with Dana Kirby’s (IG: @dkirbystamps) awesome two projects! She used the charming Garden Path stamp and stencil from Concord & 9th. It boasts of big, bold flowers that Dana has colored so magnificently!


Hi friends! It’s Dana here today and I am back with two cards that use the new Garden Path stencil and stamp set from Concord & 9th.

The Garden Path stencil set is a pack of five stencils that layer together to create a gorgeous card panel. For my first card, I used all five layers of the stencils and Concord & 9th ink. Colors used: Nectar (background), Sorbet (large florals), Sunflower and Stardust (small floral clusters and floral centers), Tidepool and Juniper (medium florals), Avocado and Artichoke (leaves).

Once my panel was finished I used the Garden Path stamp set for my sentiment. This set is designed to fit inside the opening of your stenciled panel. I love that it includes sentiments for lots of different occasions.

For my next card, I again used the Garden Path stencil pack (layers 2-5) and Concord & 9th ink. For this card, I chose to not use the first layer (background) and keep the background white. Colors used: Watermelon (large florals), Clementine and Spiced Cider (large floral centers), Sweet Pea and Dragonfruit (medium florals), Honeycomb and Stardust (small floral clusters), Lemongrass and Grasshopper (leaves). I then used the Garden Path stamp set for my sentiment. Lastly, I trimmed my panel down and attached it to a Sweet Pea card mat.

Thanks for joining me today and I hope you enjoyed my cards. I just love this set and I love that it creates a flat card that is perfect for mailing!! There are so many color options and I know it is a set I will be using often.

Enjoy your day,

Dana


More about Dana:


Goodies Used:


Share
$0.00
IG-AT-Get-Well1
Click Below For More Images:
  • 1
  • 2

Just A Note To Say…

Hi Creative Friends,

Once again, Amy Tsuruta (IG: @craftee1) has done it again. She has created a super adorable card using the new Love’s Embrace stamp set from Penny Black. This time she has combined it with the new and very popular Note Edger and Note Builder stamp set.


Hey Foiled Fox Friends. It’s Amy Tsuruta and I’m sharing a spring project today:

This card started with that sweet Penny Black image.

My project combines:

  • Penny Black – Love’s Embrace | stamp
  • Penny Black – Note Builder | stamp
  • Penny Black – Note Edger | die
  • Penny Black – Frame It | die

After coloring it I decided on my Distress Oxide blended background:

  • Scattered Straw
  • Dried Marigold
  • Abandoned Coral

I love that Note Edger die.  It’s such a great size!

The smaller sentiments have been stamped in Distress Oxide – Black Soot.

Thanks for stopping by!


More about Amy:


Goodies Used:


Share
$0.00
IG-ST-Idyllic1
Click Below For More Images:
  • Idyllic2
  • idyllic3

Idyllic Flowers

Hi Creative Friends,

Penny Black always has the prettiest flower stamps and dies and this last release was filled with some real beauties! I picked one to share with you today. It is the Idyllic rubber cling stamp which is a beautiful cluster of tiny flowers.


I used a 5×7″ hot-pressed watercolor panel, Idyllic stamp, and a few distress inks (I love to use the mini ink cubes so I can get into small spaces). The panel was mounted into my stamp positioner in the upper left corner so that I could move the stamp around as I stamped.

I began by inking up the stamp with combinations of Tumbled Glass, Broken China, Faded Jeans, and Seedless Preserves on the flowers, lightly spritzing with water, and then stamping. For the leaves, I used Crushed Olive and Peeled Paint. I stamped one cluster of flowers at a time, then spread the ink more evenly with a small damp brush. I continued to stamp bits of color as needed, then spread the ink with my brush until I was completely satisfied with the cluster before moving the stamp to another position and repeating the process.

Hint: If you haven’t seen this technique before, check out this video or this one.

I stamped three clusters using the above process to fill out the panel, leaving room for the sentiment.

After the three main clusters were painted, I stamped faint impressions of the stamp with Tumbled Glass. To get the faint impressions, it helps to ink the stamp, then stamp on a sheet of copy paper that I placed over the watercolor panel. Then, removed the paper and stamped it onto the panel. This second-generation stamping is really helpful in creating faint impressions. For several of the second-generation stampings, I only inked and stamped the upper part of the stamp.

Once the flowers were stamped and painted, I stamped a sentiment from the Penny Black Thinking of You stamp set (see supply list below). I used my favorite Versafine Clair inks for a crisp impression. For this card design, I used the color Monarch.

To finish, the panel was mounted on an Alabaster cream cardstock 5×7″ (when folded) card base. 


Goodies Used:


Share
$0.00
IG-ST-lets-celebrate1
Click Below For More Images:
  • lets-celebrate-p-2
  • lets-celebrate3
  • its-ur-bday1
  • its-ur-bday2

Birthday Celebrations!

Hi crafty friends,

I am totally in love with the Bunch of Balloons set by Concord & ith! You can create a fabulous birthday or celebration card using this stamp/die/stencil set in just minutes! I am sharing just two versions with you today but the sky is the limit!


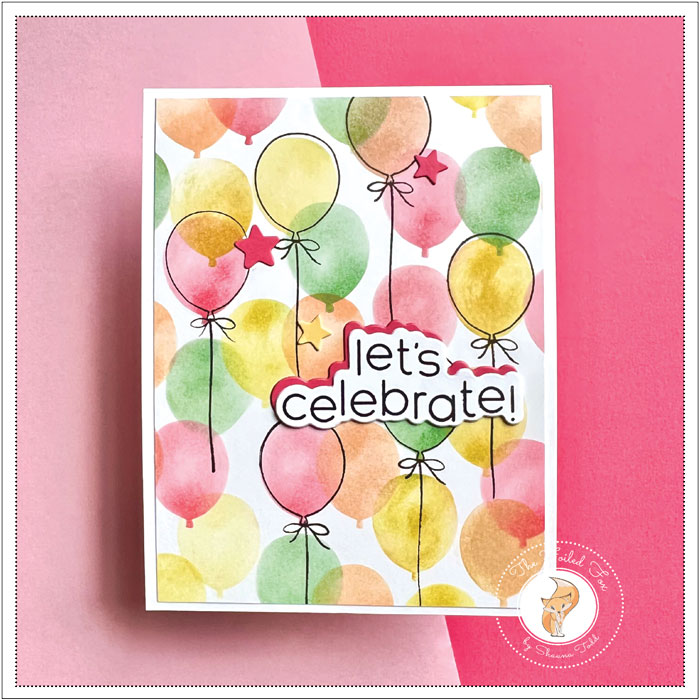
Let’s start out making a full panel of balloons using the Bunch of Balloons stencil set, a few Concord & 9th inks, Bristol paper for easy blending, and ink daubers (to help get in the tight spaces).

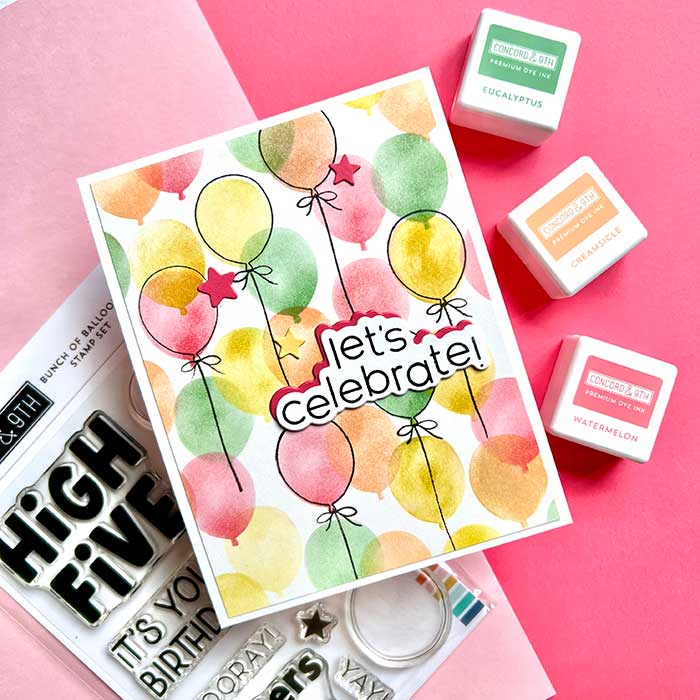
There are a bunch of stencils in this set but I only used the two that create a full panel of overlapping balloons. I used Concord & 9th ink colors: Watermelon, Creamsicle, Honeycomb, and Eucalyptus for the balloons. First, blending on balloon, then used the second stencil to overlap and blend on more balloons using the same colors.

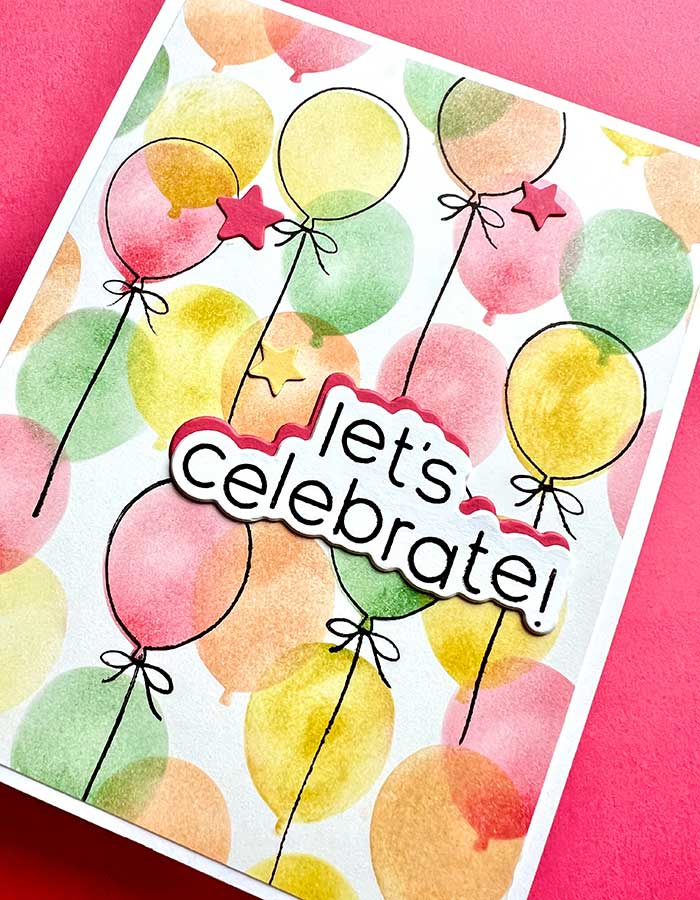
After all the ink blending was done, I outlined a few balloons with Versafine Black Onyx ink using the stamp in the set, plus added strings and bows. The panel was then trimmed and mounted onto a white cardstock card base.

Included in the stamp set are a bunch of awesome sentiments. For this one, using Versafine Black Onyx ink again, I stamped the ‘let’s celebrate’ on white cardstock. Then cut it out using the matching die (I just love it when there is a matching die!). I also cut out another one from dark pink cardstock from Concord & 9th’s assorted cardstock card stack (see supply list).

To finish, the sentiment and the pink cardstock cut-out were stacked and glued offset from one another, then mounted onto the card. A few stars cut from Concord & 9th cardstock were added to add to the festivities!

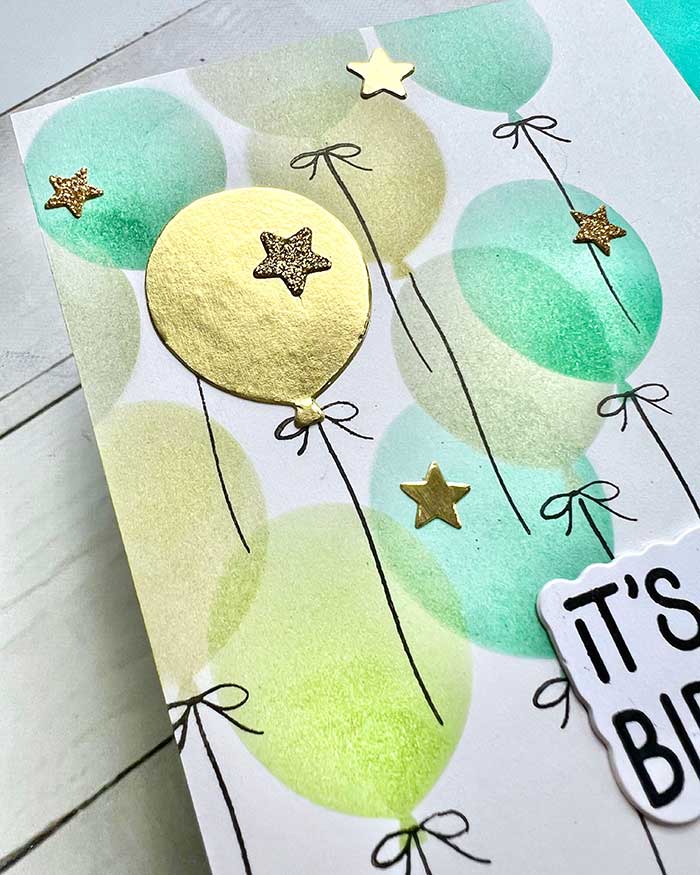
For my next card, I followed the same basic steps, only this time I only ink blended balloons onto one part of the panel. I ink colors I used for this one were Tidepool, Sprout, and Aqua Sky. Black strings and bows were, just like before.

To add festivities to this card, I stamped the ‘It’s Your Birthday” onto white cardstock and cut it out with the matching die. A gold foil balloon with gold foil and gold glitter stars was added.

YAY! Two cards were done with a snap of the fingers!

Thanks for joining me today, I hope to see you next time! 


Goodies Used:


Share
$0.00
IG-AT-Springtime-Hello1
Click Below For More Images:
  • Springtime-hello2
  • Springtime-hello3
  • FF-march-sale1
  • FF-March-sale2

Springtime Hello

Hi Crafty Friends,

With Springtime in the air and Easter just a few days away, Amy Tsuruta (IG: @craftee1) is sharing a super cute card design perfect for the season! It is complete with pastel colors and an adorable bunny!


Hey Foiled Fox Friends. It’s Amy Tsuruta and I’m sharing a spring project today:

I love this stamp set because it is filled with seasonal details!

My project combines:

  • Papertrey Ink – Occasional Cupcake | stamps + dies  
  • Papertrey Ink –  Thought of Spring Sentiments | stamps 

I love how the Hero Arts – Infinity Postage die set adds a fun detail to the project. 

Concord & 9th Cardstock:

  • Sweet Pea
  • Sprout
  • Wheat

I used several Concord & 9th inks:

  • Pink Lemonade | Sweet Pea
  • Nectar | Grapefruit
  • Sprout | Parsley
  • Wheat

I finished off the project with ribbon from my stash

Thanks for stopping by!


Quick reminder, you can save today and tomorrow – see details below!


More about Amy Tsuruta:


Goodies Used:


Share
$0.00
IG-ST-Easter-buddies1
Click Below For More Images:
  • easter-buddies2
  • easter-buddies3

Happy Easter!

Hi Creative Friends,

I am popping in to share a cute card design just in time for Easter. I used the adorable Easter Buddies stamp and die set by Papertrey Ink to make this fun and festive card.


I began by cutting a 7.25×4″ white card stock panel, then partially cutting the Radiant motif into the center of the panel. A piece of white card stock was then ink blended using Bright Buttercup and Wild Honey and mounted behind the Radiant cut to create a graduted yellow sun effect behind the design.

Hint: Use the mini cutting plates to only cut the upper portion of the Radiant die.

The panel was mounted onto a 7.5×4.25 white cardstock card base.

For the Easter buddies, I stamped three using three different colors: Lovely Lady, Hawwian Shores, and Lavendar Moon, then inked blended the bodies and stamped their faces.

The basket was stamped using Cocoa Bean brown ink, then ink blended. Several eggs were colored using my blending brushes.

I stamped the green bits using New Leaf and Pine Forest green inks.

With all the pieces done, I arranged, then mounted them in place using small foam squares.

A small flag-like tag was stamped with ‘Hoppy Easter” from Pretty Pink Posh’s Easter Signs stamp set and then mounted to complete the card.

Whew! the card is done. I hope it sparked a tiny bit of inspiration for you! 


Goodies Used:


Share
$0.00
The Foiled Fox

The Foiled Fox

MENUMENU