
Hi Crafty Friends,
It is nice to start out the week with a delicious-looking cupcake, don’t you think (yum)? This is one is created using a brand new die and stamp from Ink To Paper: Sweet Celebration. You can make your own luscious cupcake with adorable flowers and a strawberry on top!
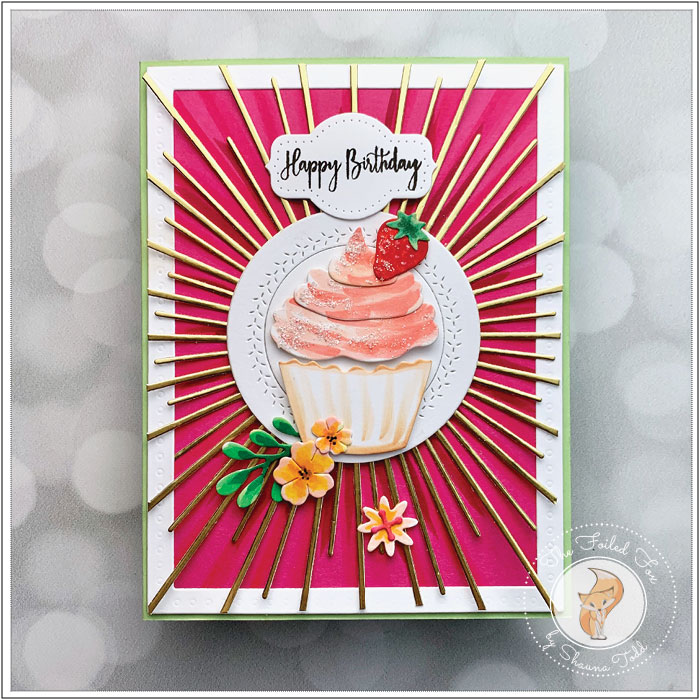
I just love Ink To Paper’s beautiful new release. I used a few of the new things in this release, namely the fabulous Sweet Celebration die and stamp set. Plus, there is an awesome Sunburst background die to really make things pop! So let’s get started on how this all goes together.
As usual, I started with making the cupcake and accouterments. I never know how a card design is going to quite come together until I have created the main focal point. In this design, of course, it is the cupcake. So, I cut out the cupcake and all the other items in the die from Neenah 110lb. white card stock since I was not sure what I would use yet.
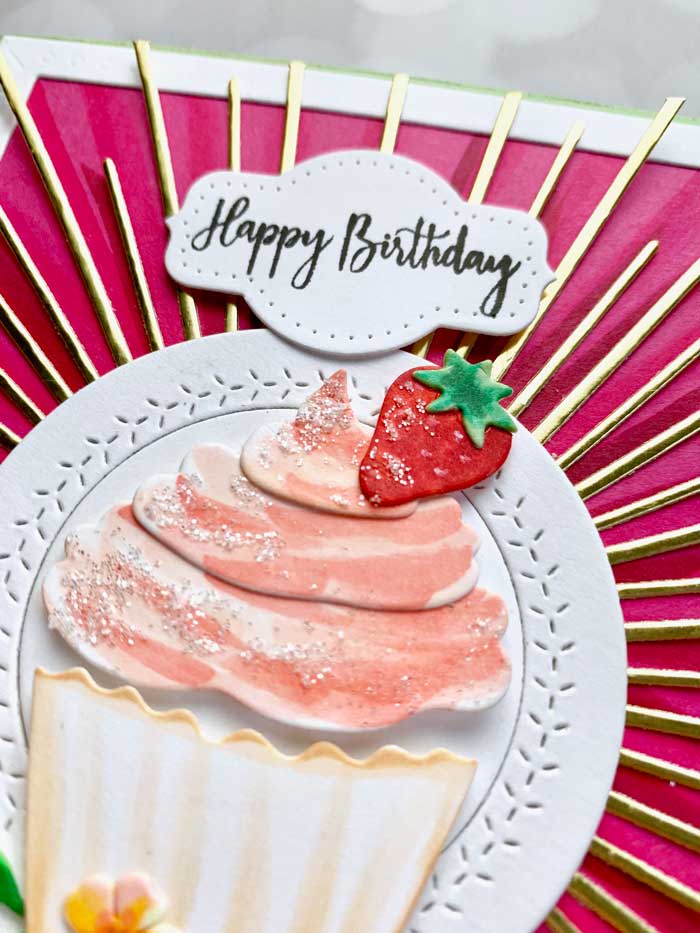
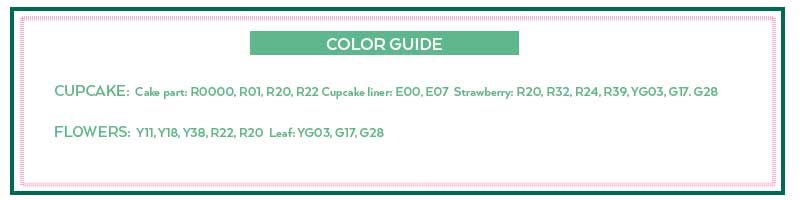
The die set cuts each of the flowers, leaves, strawberry and cupcake parts, plus a ‘label’ that I used for the sentiment. Since the coordinating stamp set is filled with sentiments and not stamps for coloring the flowers or cupcake, you are free to totally express yourself with whatever color medium you prefer. I colored them with a few Copic markers and then added a smidge of sugary texture with Gina K’s glitter gel to the strawberry and cupcake top. Here is a guide to the colors I used:
With the cupcake and flowers colored. I went on to create the rest of the card. I was dying to use the new Sunburst die so I cut one from gold foil paper, then cut a circle background by using a die from the Penny Black Stitched Circles decorative circles set and a circle die for the outer edge. Next, I cut a thin white card stock border using the new Skinny Dotted frame die by Ink To Paper.
The final piece I needed was a card base. I chose the Juicy Pear green card stock for that and then prepared a Fuchsia panel that was the same outer dimension as the white skinny frame.
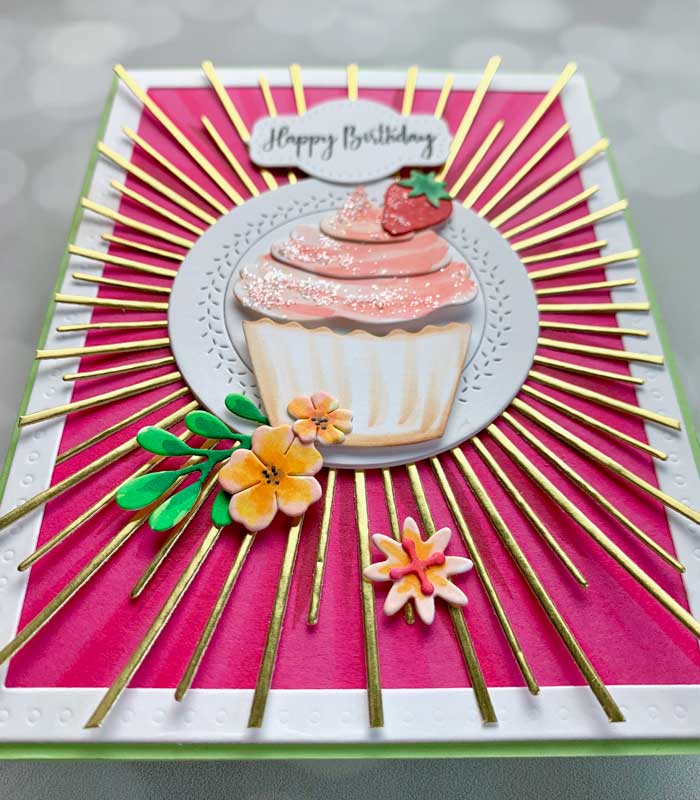
For a test run of the finished card, I arranged all the pieces in its place to see how it looked. I thought the fuchsia panel looked a little flat so I added ‘rays’ with two colors of Copic markers that could be seen in between the gold ones. It is a subtle addition and it only took a few moments. I think it added another layer of dimension!
With the panel complete with its new ‘rays’, I continued on to assembling the card. To do this, I adhered the fuchsia panel to the card base, added the white frame on top, then glued on the stunning gold foil sunburst. The decorative white circles were added and the cupcake was affixed onto with some foam tape, along with a few flowers and a strawberry on top.
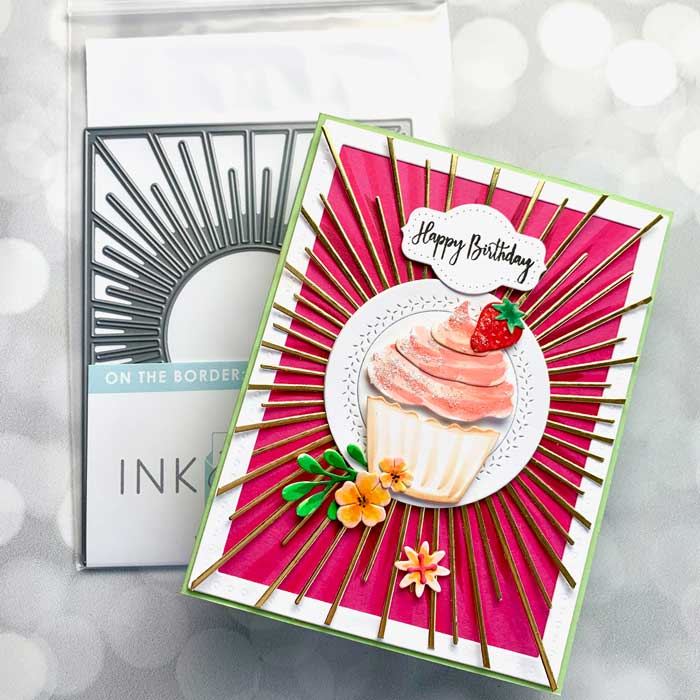
The last step was to stamp the sentiment onto the label and add that to the card. Then the card was complete!
I hope you enjoyed this card design as much as I did making it for my sweet daughter’s upcoming birthday! ♥
Goodies Used:

OH YUM!!!! :). LOVE THE STARBURST DIE, THERE ARE SO MANY WAY IT CAN BE USED.
it could become a foundational die with many seasonal and many occasion use. THANKS!