Hi Creative Friends,
As we go along in the Autumn and Winter season, I will share a mix of Fall, Winter, and Holiday cards. This one is a perfect winter or holiday one. It features the charming Feathered stamp and Nature’s Garland by Penny Black. The Feathered stamp has three adorable and festive birds but I am only using one for this project, though I am eager to use it again with the three!
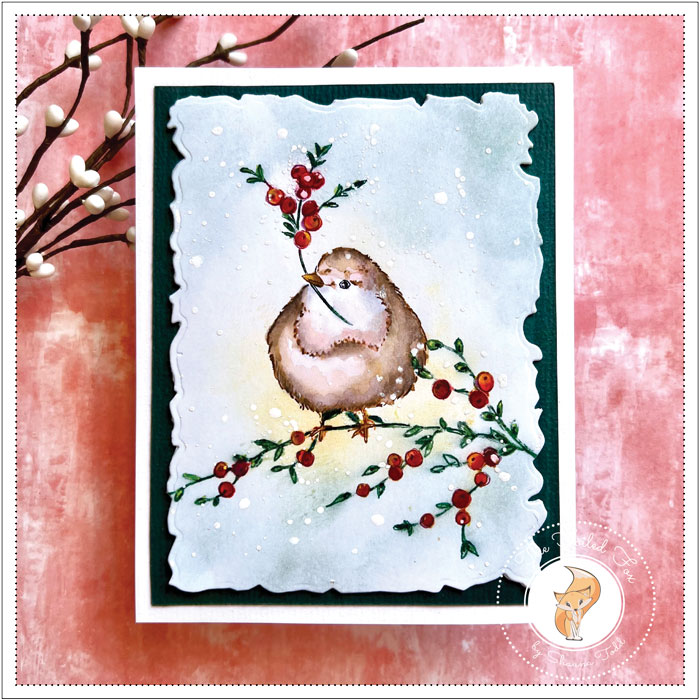
This project starts with a watercolor panel. I used hot-pressed paper but if you want a more textured finish cold-pressed watercolor paper can work too.
With the watercolor panel in my stamp positioner, I positioned the bird where I thought it should be on my panel. With the stamp mounted in the right place, I inked up the bird with Gathered Twigs distress ink, being careful to avoid the berry branch (I’ll save that for later), and stamped. I inked again in a few places and stamped again just to get good coverage. Then, without moving either the stamp or the panel, I colored the eye on the stamp with a black Tombow pen and stamped again, repeating until I had a good impression.
Hint: Tombow pens are wonderful for spot color and getting color into those tight spaces like these in this scene!
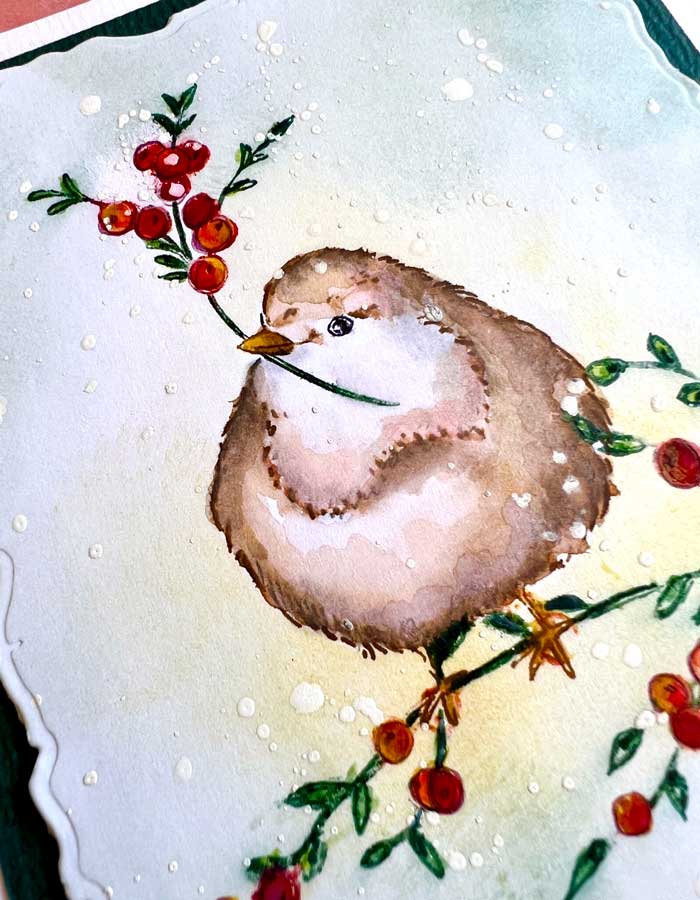
Placing a piece of masking paper over the panel, I stamped the bird, without the branch, onto the masking paper, then cut it out with a pair of detail scissors. When the mask was all cut out, I placed it over the stamped bird and started to blend a glow of Antique Linen distress ink around the bird. The rest of the background was colored by blending on some Speckled Egg distress ink.
Once I was happy with the background, I uncovered the bird and continued to color the branch on the stamp with a green Tombow pen, spritzed it lightly with water, and stamped. The same procedure was used for the berries except they were colored with a red Tombow pen.
Before moving the stamp, I colored the bird and branch completely. I used more Gathered Twigs distress ink that I had smooched onto my glass mat and loosed with water for the body of the bird, along with a little Worn Lipstick distress ink. I used a yellow Tombow pen for the beak and his feet. The berries were colored with a few more Tombow pens. I used orange and yellow, plus some red pens. I did not move the stamp until I was completely satisfied with the painting in case I needed to do a little more spot stamping for a crisp impression.
The larger branch under the bird’s feet was from Nature’s Garland stamp set (it matches!). I used one part of this stamp to complete my scene. I positioned the stamp so that it was right under the feet of the bird. To get good positioning, I first covered the panel with a piece of clear acetate, then tested it to make sure it was in the right place by coloring a section of branch with the Tombow pens, then stamped it onto the acetate. If I needed to make adjustments, I could do that before the actual stamping onto the watercolor panel.
When the branch was in the right place, I only colored the part of the branch and the berries on the stamp I wanted, spritzed, then stamped onto the panel. I used the same pens as before. When I got to the part under his feet, I didn’t stamp there. Instead, I sketched in the line.
To finish the panel, I added splatters of Dr. Ph. Martin Bleedproof white ink to create a snowy scene.
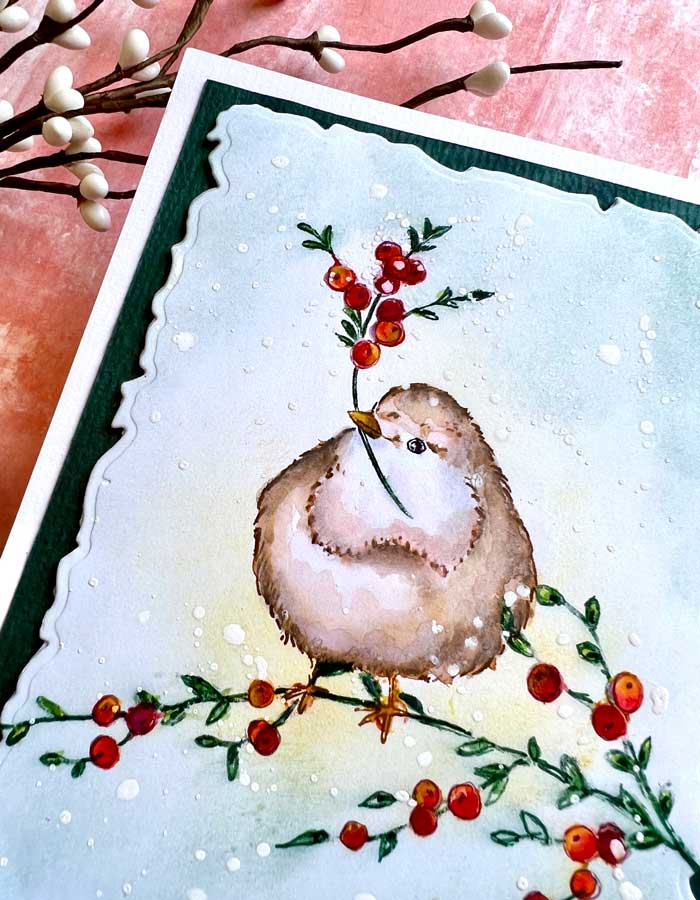
When the white ink was dry, I mounted a piece of foam to the back, then trimmed the whole panel by using a frame die from the Antique Frames die set by Penny Black.
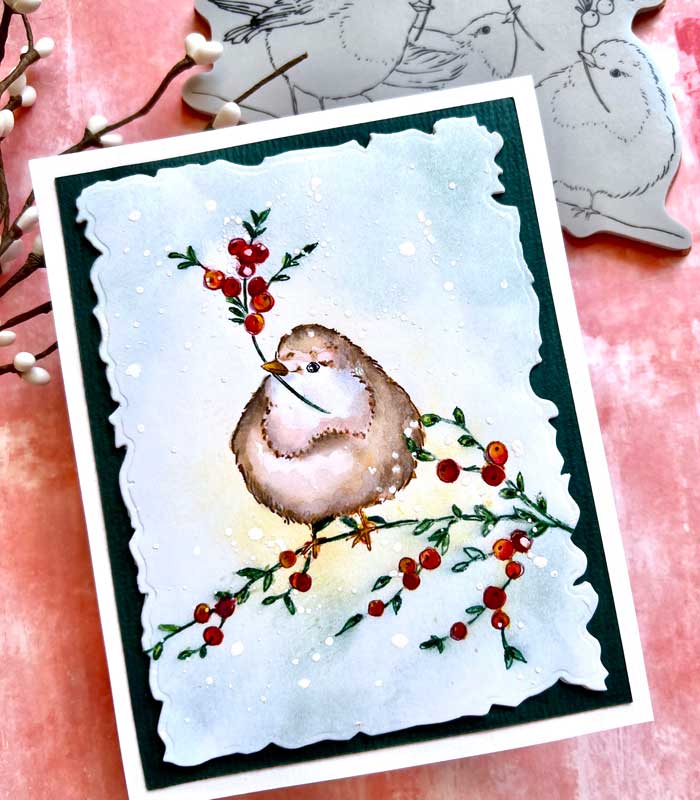
The birdie panel was mounted to a darker green panel, then onto a slightly larger cream card base.
I toyed with stamping a sentiment from the Jolly Snippets stamp set (see supply list below) but in the end, decided to let the little birdie do the talking! ♥
Goodies Used: