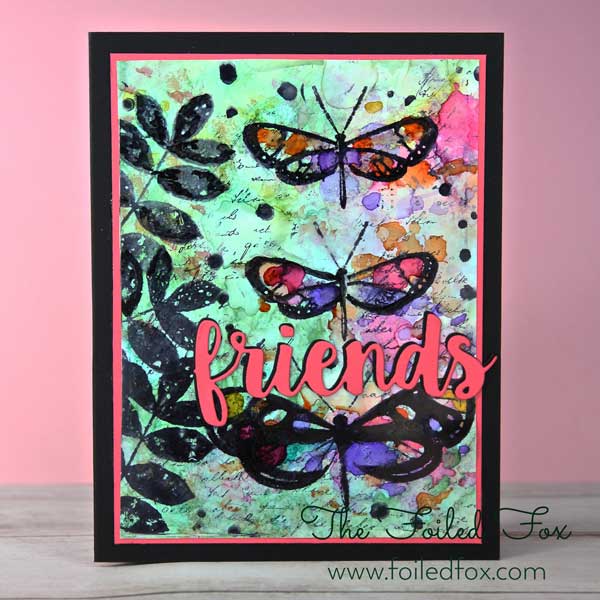
Vibrant Butterfly Trio
Hello Everyone,
So nice to say hello again! Today’s project explores the Tim Holtz Alcohol Inks. They are so much fun and oh, so vibrant! I just love the rich jewel tone colors that you get with these inks. The stamp sets I am using today are the Butterfly Trio by Penny Black and Paper Artsy’s Eclectica3 by Sara Neumann.
This card is all about the beautiful alcohol inks, the stampings on top and the paper. To get the alcohol inks to blend and spread, it is important you use a glossy or plastic paper. There are a few papers out there I would recommend like: Adirondack Alcohol Ink Cardstock by Tim Holtz, Tim Holtz Alcohol Ink Transculent Paper, or Yupo Paper. For this project, I used the Yupo Paper. All of the papers just mentioned have that slick, plastic-like finish so the inks don’t absorb into the paper. This is really important. The beauty of these inks and paper is that the inks can move, spread and mingle with other colors. If you use any other type of paper, the inks absorb into the paper on contact, making it impossible to have any spreading or blending.
This is a 5″ x 7″ card so I began with a 10″ x 7″, scored and folded, piece of Neenah Black cardstock for the card base. Setting that aside, I placed a piece of Yupo paper on my work surface. Usually, I work directly on my Ranger Non-Stick Craft Sheet but I was afraid the inks would not clean up too well so I placed a plastic sheet from a zip-loc bag on my work surface. It worked great and was a snap to clean-up too.
With the paper in place, I started making droplets of ink around the paper. First starting with the 3 in the Beach Deco collection, then adding bits from the Summit View grouping until I achieve the desired look. It is amazing how these colors blend into one another.
There are a few things to keep in mind though. Watch what colors you blend together – you could end up with them all brown if there is too much blending. The other tip is to only use alcohol inks. I tried the Adirondack reinkers, thinking that they would work because they are alcohol based too. But they just stayed in the mound of color I set on the paper, it took forever to dry and it was very gooey.
I wanted more green on the left and the pinks and purples on the butterfly side. This is easy to control – just drop the ink where you want it.
To create a little more blending and some interesting effects, I sprinkled Blending Solution onto the card. Everywhere you splatter blending solution or rubbing alcohol, it moves the ink away, creating little openings of color, much like using masking fluid. The technique I used to splatter the solution was very sciencific – haha! I just put a little in my hand and sort of ‘tossed’ it at the paper. I loved the random look it created. If you don’t have any blending solution, you can use rubbing alcohol. It seems to work just as well.
When I thought I had the alcohol ink background the way I wanted it, I let it air dry. This is really important!! You must let the inks dry thoroughly before going to the next step. I would not recommend drying with a heat tool, believe me I know. Remember, this is plastic paper. The heat does dry the ink but warps the paper very easily!
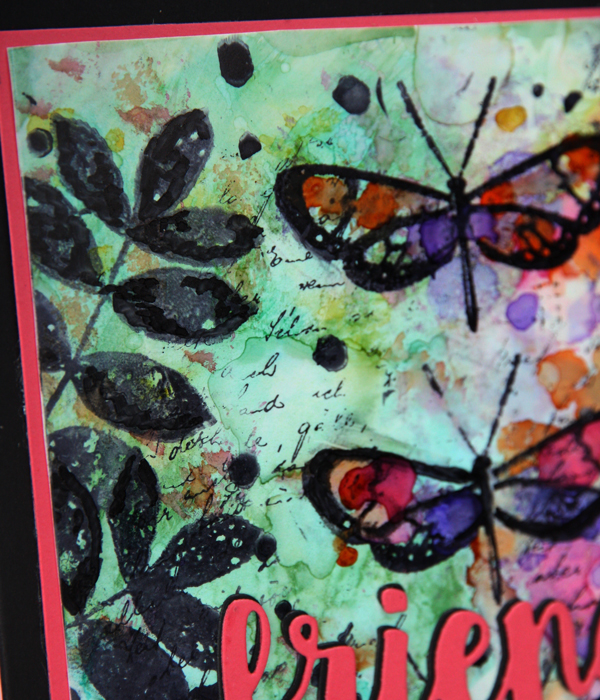
Now that the background is dry, it is ready for stamping. It is really important you use a permanent alcohol based ink, like the Archival inks or Staz-On. Using the Jet Black Archival Ink, I first stamped a scripty text, Letter Background from Penny Black. I didn’t want the text to be too bold so after inking up the stamp, I stamped off once onto a piece of scratch paper, then stamped the text randomly onto the background. I used the Letter Background for the script but you can use whatever scripty text stamp you have around. A few suggestions are Romantic Script background , French Text stamp or Script Background cling stamp by Penny Black.
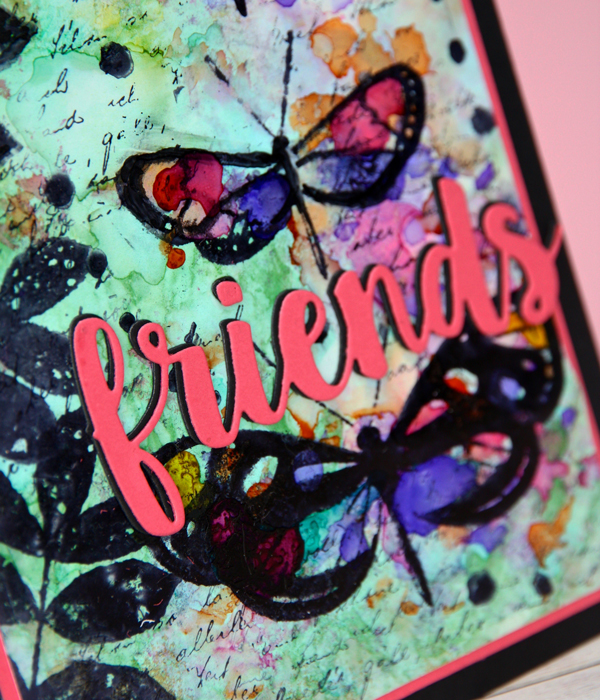
Then, I stamped the leaf stamp from the Eclectica 3 stamp set a few times on the left and stamped the beautiful butterflies from the Butterfly Trio on the right. I had spotted in the PaperArtsy set an interesting grouping of irregular-shaped dots. I stamped a few of these around for fun and interest.
After a few minutes, all the black ink was dry and ready to mount. I trimmed the paper to 4 1/2″ x 6 1/2″, mounted it onto a piece of 4 5/8″ x 6 5/8″ Candy Hearts (deep pink) cardstock using my trusty ATG tape gun.
The final step was to mount the card front to the black card base and mount the ‘friends’ sentiment that I had cut out in the Candy Hearts Pink and Neenah Black cardstock. You can see in the image above that the pink cardstock ‘friends’ was mounted over the black cardstock ‘friends’ with a slight offset so you could just barely see the black peeking through. There you go, all finished.

Supply List:
 Butterfly |
 Eclectica3 |
 Penny |
 Friends |
 Yupo |
 Neenha |
 Candy |
 Adirondack |
 Adirondack |
 Archival |
 ATG |
 Multi |
 Alcohol |
