A Happy Heart
Hi Creative Friends,
I have THREE new projects to share with you today that are using an awesome stamp and die set from Concord & 9th called Happy Heart. This combination is fabulous for Valentine’s Day but don’t let that stop you from using it throughout the year. Who doesn’t need a little treat box or a happy heart card to cheer them up?
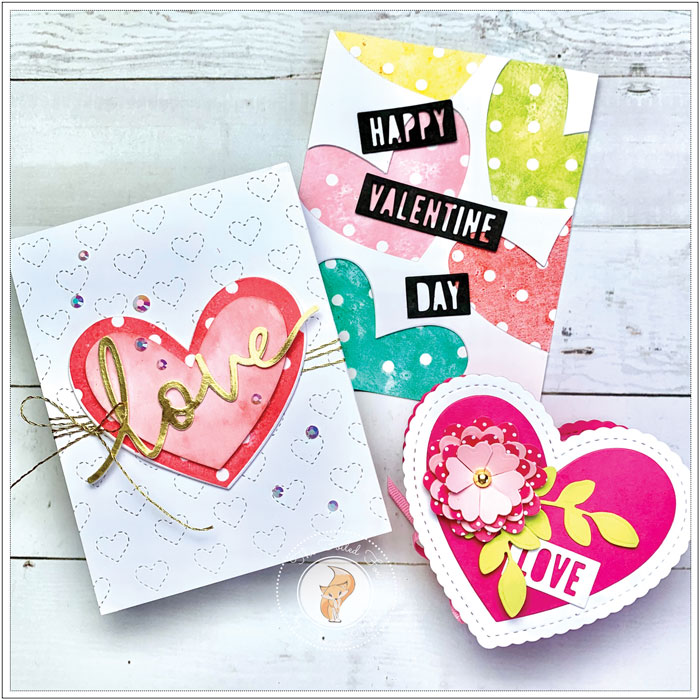
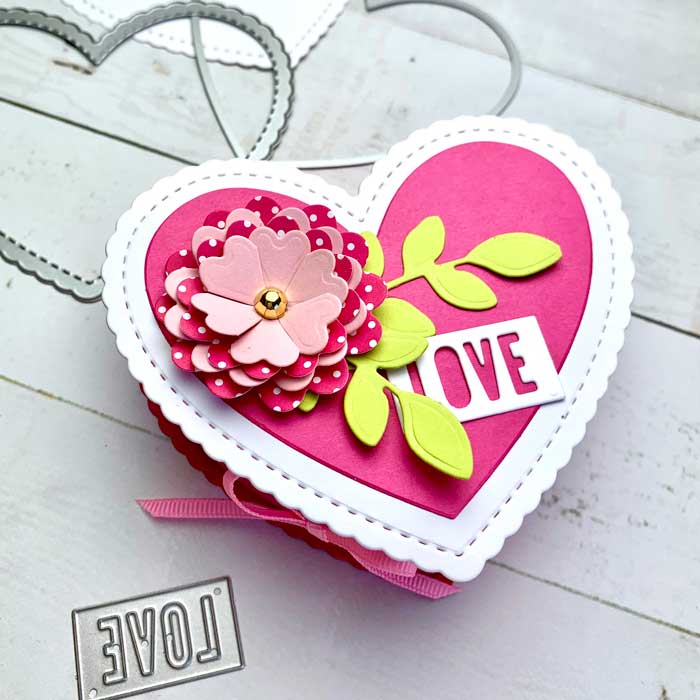
Let’s start with a charming ‘love’ card. This one begins with a white A2 card base and a white A2-sized panel that I embossed using the Concord & 9th Stitched Hearts card front die. This die imprints rows of stitched hearts and makes a delightful background. I set the card base and front panel aside for now
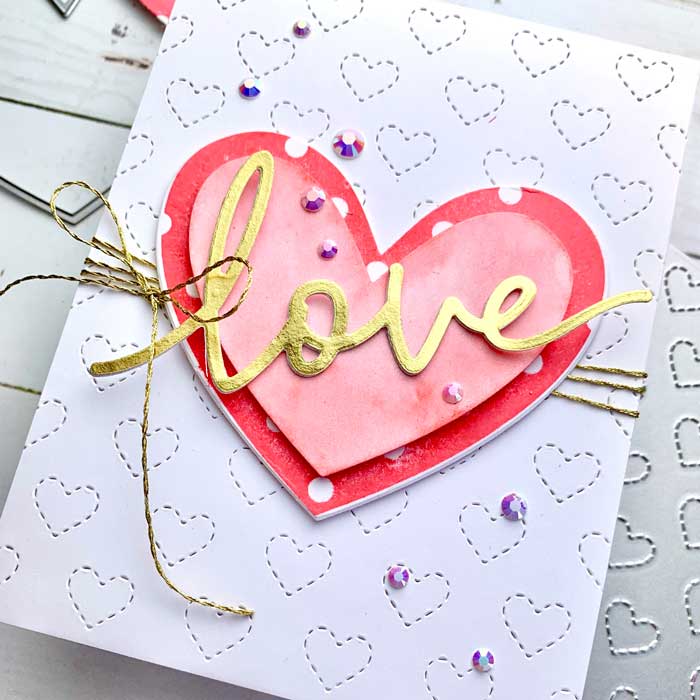
The stamp set has a cute polka dot heart stamp. I used it to stamp a large heart onto white cardstock using Papertrey Ink’s Berry Sorbet ink, then cut it out with the coordinating die. Next, I cut out a smaller heart (die included in the set) from watercolor paper, moistened it well with water, then colored it with Picked Raspberry distress ink.
While the hearts were drying, I wrapped a gold metallic cord around the stitched heart panel and tied a bow. Next, I added foam tape to the back of each heart, then applied the large polka dot heart on the front panel, and stacked the smaller one on top.
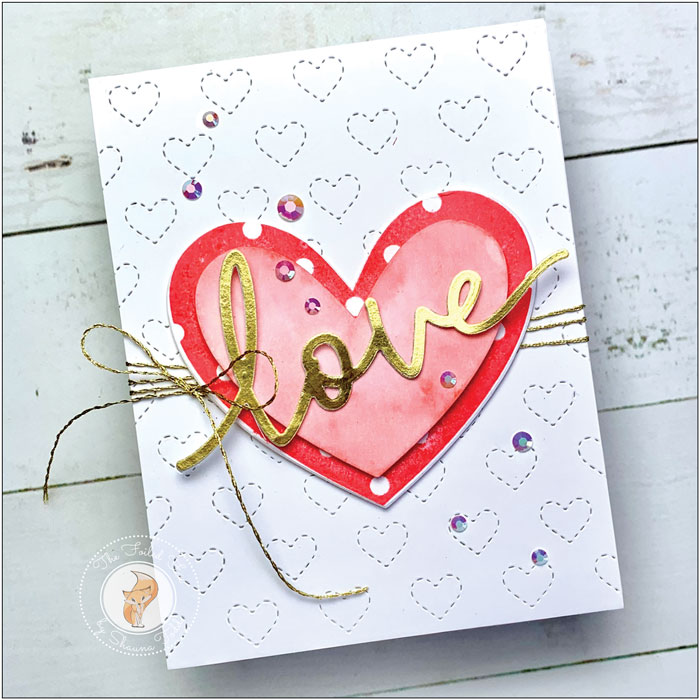
To complete this card, I cut out the word ‘love’ from white card stock and another from gold foil paper. I stacked and glued them together for more heft, then mounted on top of the hearts, added a few white jewels, and was done!
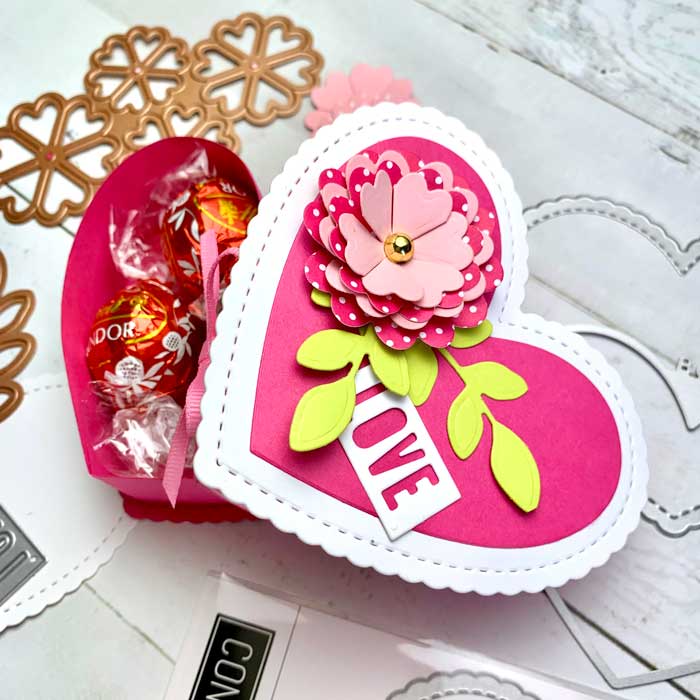
Next, I went on to make an adorable heart box. The dies for this are also included in the Happy Heart die set – another reason why this is a fantastic set. I used Raspberry Fizz and white cardstock to make the box. Check out this video to show you how- it’s a cinch to make!
Once the box was made, I went with a traditional decoration (but there are sooo many ways to go) by cutting out the pieces for a dimensional flower using the Spellbinders Cinch & Go die set, Raspberry Fizz Bitty Big paper, and Rose Quartz card stock. The flower layers were stacked, glued, and a gold jewel for the center. The leaves were cut from Green Parakeet. For my sentiment, I cut a ‘LOVE’ mini tag from white cardstock. The final touch was to glue a strip of narrow grosgrain ribbon around the box and apply a bow.
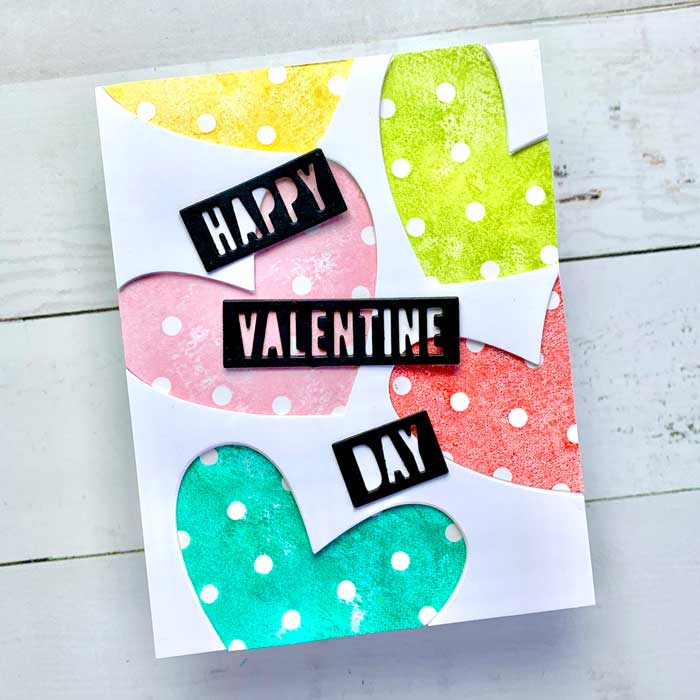
For my last card, I stamped five different polka dot hearts onto Bristol paper using five different colors of ink. The colors I used were Spun Sugar and Salvaged Patina distress ink, Berry Sorbet, Bright Buttercup, and Green Parakeet (see supply list below). I spritzed the stamp each time I stamped to blend the ink and give a more watercolor-y look.
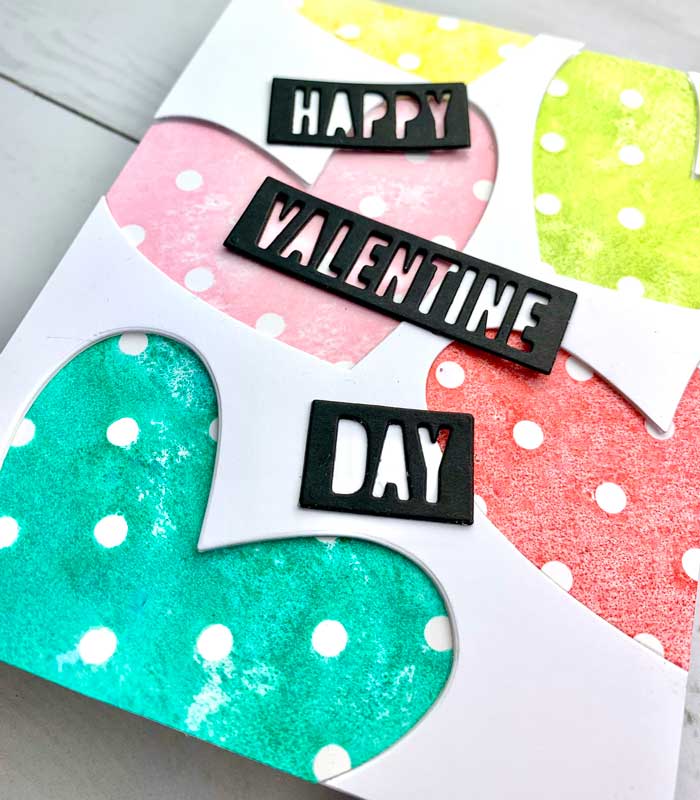
While the hearts were drying, I cut out the background by using the solid heart die in the set and a white A2 cardstock panel. I carefully cut out sections of five hearts. This makes a very ‘holey’ background when you are finished so be careful not to bend any parts. I carefully added foam tape to the back of the cutout background and mounted it onto an A2 white card base.
The polka dot hearts were now dry so I cut each one out using the same solid heart die, then glued them in the spaced on the background. For the sentiment, I cut out two sets of ‘Happy Valentine Day” from black cardstock and mounted them on top.
And there we have it… three projects with one stamp and die set and there are oodles more ideas for more! ♥
Goodies Used: