An Autumn Harvest Pumpkin
Hi there,
Autumn is in full swing and Fall is never complete without a great, big pumpkin. I just love the one in Concord & 9th’s Autumn Harvest stamp and die set.
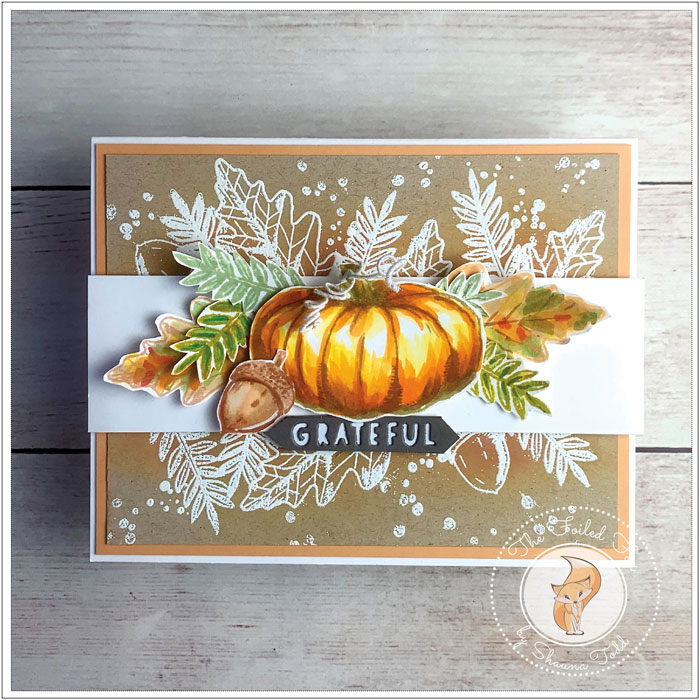
This awesome pumpkin is the centerpiece of this card. But, before we get to that, let’s dive into making the background.
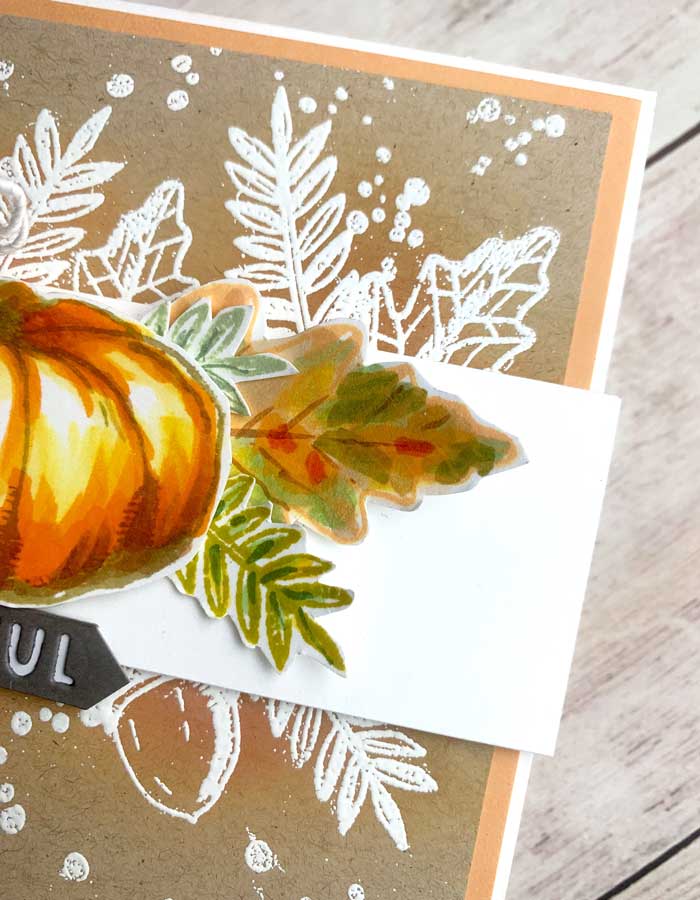
I wanted to have a white section in the center of the card so I started by cutting a piece of Neenah 110lb. white cardstock into a strip. This gave me some guidance where I wanted to stamp a spray of leaves and acorns both top and bottom of the strip.
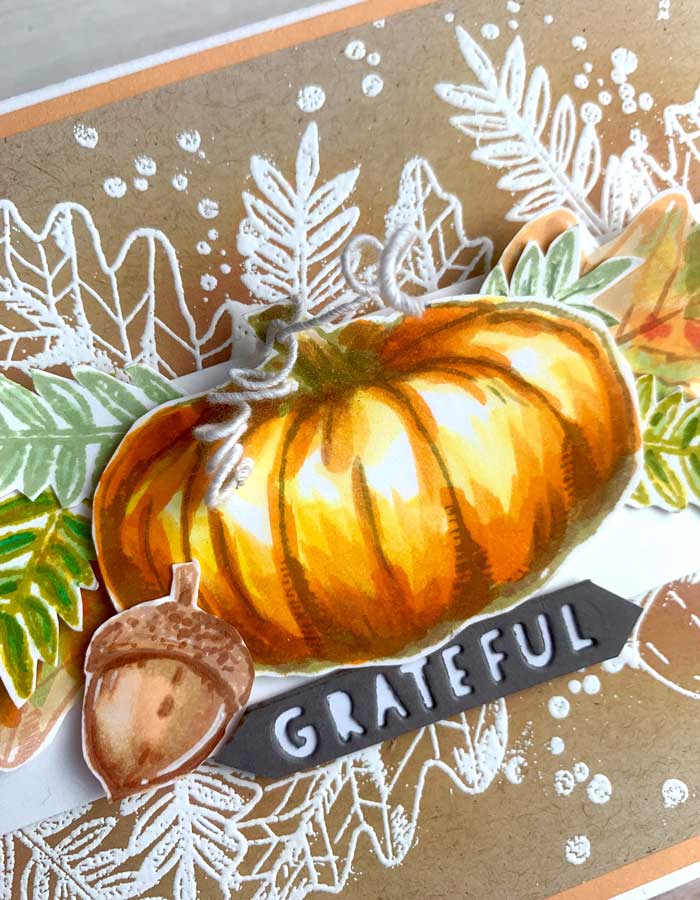
To make the first spray, I started with a Desert Storm card panel, then using Versamark ink, I stamped the large leaf from the stamp set. I stamped it a few times, then heat embossed it with white embossing powder. Next, I filled in the area with the smaller leaf stamp and finally a couple of acorns. In a few areas, the leaves were going to overlap. So to avoid a confusing mess, I covered the large leaf with a mask I had created by stamping the large leaf onto a full-adhesive post-it note (masking paper is great to use here too!), cutting it out, then laying it over the leaf and stamping the smaller leaves around it. Once the top spray was done, I followed this same procedure with a bottom spray of leaves and acorns. Finally, I added some splatters. One of my favorite ways to do this is to stamp and heat emboss some ‘intentional splatters’ by using one of the spray of dots stamps from the Concord & 9th Brushed Blossoms stamp set. This gives you more control over your splatters!
Then, to add a little depth and accent to the background, I blended Rusty Hinge distress oxide ink over some areas of the spray.
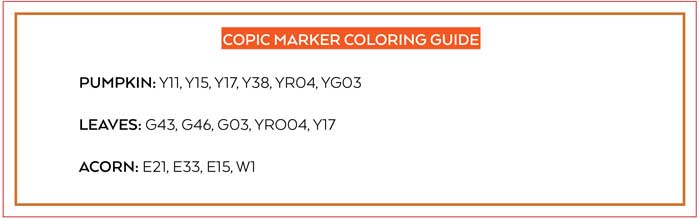
Next, I turned my attention to the glorious pumpkin. On a piece of Neenah white card stock, using Shappy Shutters distress ink, I stamped a few individual leaves. I also stamped the pumpkin with Gathered Twigs distress ink and an acorn. All these were colored with Copic markers. Here is a guide of the colors I used:
Once all the individual pieces where colored, they were cut out using the matching dies set.
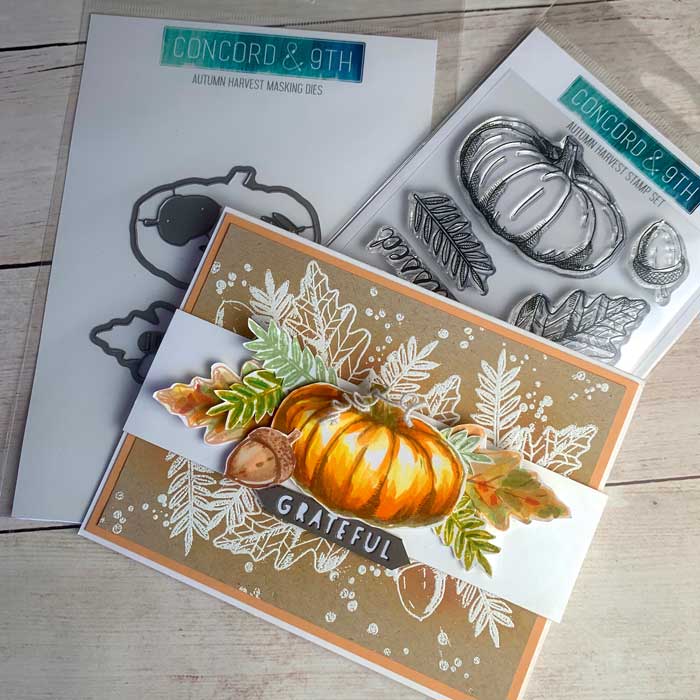
Now, all the pieces were done and I was ready to assemble. Starting with a white card stock card base, I adhered a slightly smaller panel of light orange card stock, then the background created earlier on top. The white center strip created earlier was popped up with some foam tape. Next, all the leaves, acorn and pumpkin were arranged and adhered with a bit of foam tape. For the final touches, I used a small length of white florist wire, wound it around a pencil, then wrapped it around the stem of the pumpkin. The final, final touch was to add “Grateful” for the sentiment by cutting out the word out of a scrap of Slate gray cardstock.
And there you have! Happy Autumn! 🍂
Goodies Used:
Sorry, the comment form is closed at this time.

October 8, 2019
Lagene
WOWZERS! Wnderful card! This is the most natural pumpkin stamps I have ever seen!
October 8, 2019
Shauna Todd
Thank you for your very kind words! … much appreciated!
October 8, 2019
June DeHart
This is one of the most exquisite cards I’ve seen.
October 8, 2019
Shauna Todd
Thanks so much!