Elegant Orchids
Hi Creative Friends,
Today I am sharing a very simple but elegant card design using the beautiful Purity stamp by Penny Black. I love the graceful bending spray of orchids and its utter simplicity!

For this card design, less is definitely more! The single stem of orchids is all it needs… and the less you stamp the better!
So, with that in mind, I mounted a cold-pressed piece of watercolor and the stamp in my stamp positioner. Then, using my distress inks (I like to use the mini ink cubes for small areas like in this stamp), I inked the pink version first with Saltwater Taffy, spritzed it with water, then stamped it. Next, I inked most of the flowers with Worn Lipstick distress ink, leaving the tips without any additional ink, lightly spritzed, and stamped. Finally, I used a little Seedless Preserves in the center of the flower, spritzed again, and stamped.
The leaves were stamped the same way, using first Crushed Olive, then some Rustic Wilderness on most of the leaves, leaving the tips still with only the Crushed Olive. Finally, a bit of Forest Moss at the base of the leaves, making sure to lightly spritz each time.
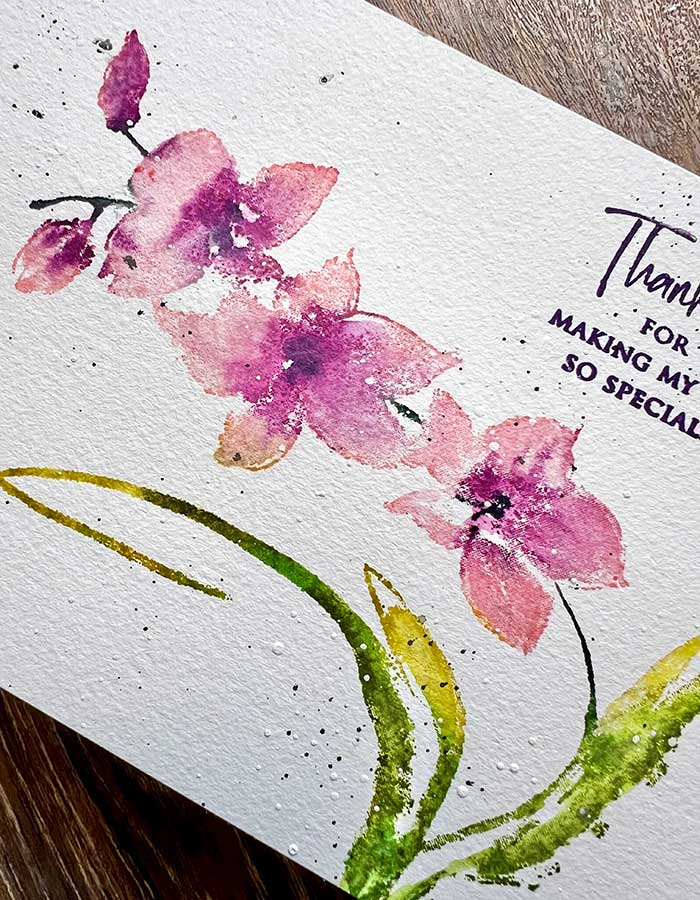
I didn’t want to overwork the design so I stopped stamping and only used a damp brush to spread and blend the ink.
To complete the card front, I splattered tiny droplets of black ink, then followed up with white ink droplets. I use a small brush and black Sumi ink for the black and Dr. Ph. Martin’s Bleedproof white ink for the white splatters.
When dry, I stamped the sentiment (from the Brighten The World stamp set – see supply list) with Monarch Versafine Clair ink.
To finish, the card front was mounted onto a cream cardstock card base.
The yellow version was made exactly the same, only using Scattered Straw, Wild Honey, and Crackling Campfire for the center of the flowers.
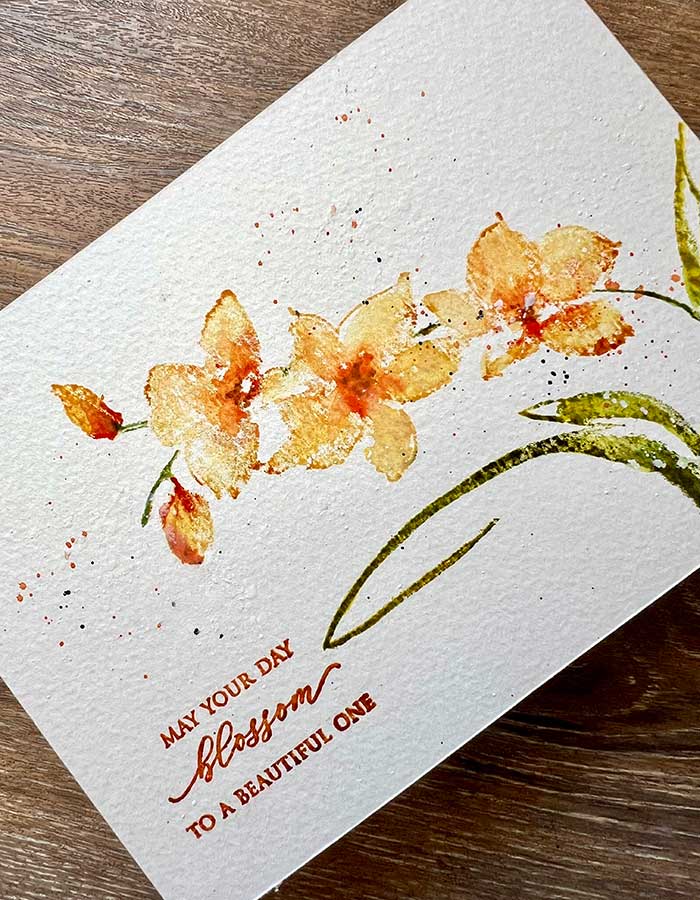
The leaves were inked with first Crushed Olive (just like before), then stamped. Peeled Paint and Forest Moss were used to darken and shade the leaves.
The sentiment for this one was from the same Brighten The World stamp set by Penny Black. I used Papertrey Ink Terra Cotta ink.
I splattered tiny droplets on this card panel too. I used Crackling Campfire, a tiny bit of Sumi ink, and Dr. Ph. Martin Bleedproof white ink.
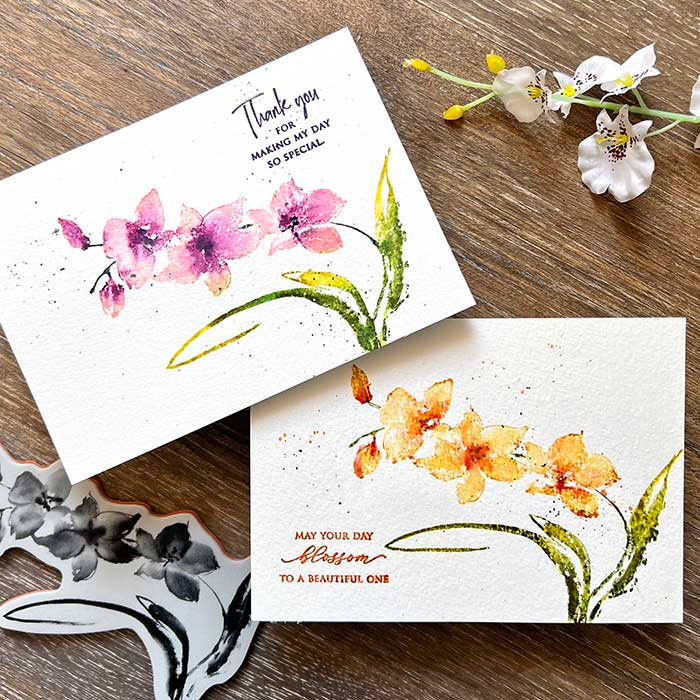
That completes my two cards today. I want to thank you for joining me… I hope you gleaned a tiny bit of inspiration from this project! ♥
Goodies Used: