Beautiful Flowers & YOU by Rosali
Hi Crafty Friends,
We are always so happy to have Rosali of I Love Stamping visiting us! She never fails to create the most delicious cards for us! Take a look at her fantastic coloring and combination of beautiful stamps and dies.
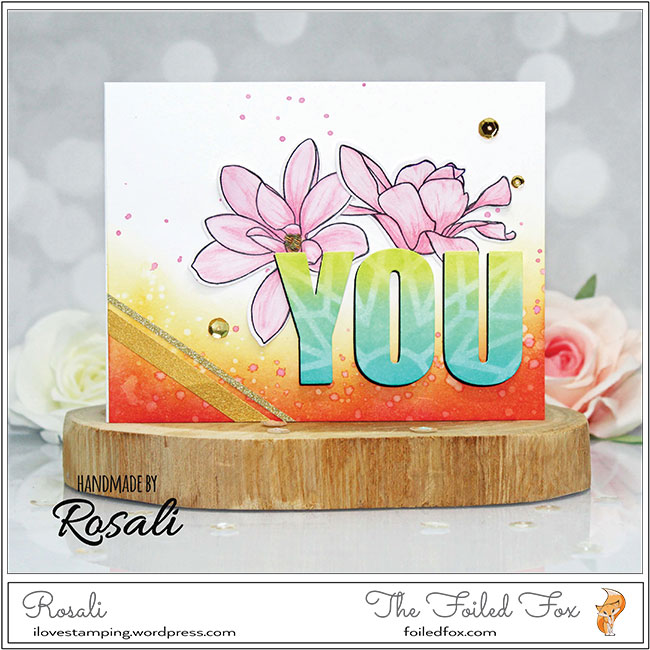
Hello everyone, it’s Rosali from ilovestamping again! I’m excited I got invited to The Foiled Fox’s blog again and brought you a colorful card with alphabet dies, stenciling AND flowers! Let’s dive right into how I designed it, shall we?
My whole card idea evolved around the “Caps Bold Alphabet Dies” from Altenew. The letters are so nice and big that they easily fill up a card front if you’re going for a quick & simple design! And the possibilities to create sentiments with these dies are of course almost endless: names, pet names, words in other languages or just part of a sentiment stamp that you have. In fact, there were so many possibilities in my head that I was maybe slightly overwhelmed lol. And since I didn’t want to make a personalized card for this particular blog post I went with a simple “YOU”. That way I can stamp something inside the card to finish up the sentiment, e.g. “… are amazing” or “… can do this”, before sending it out.
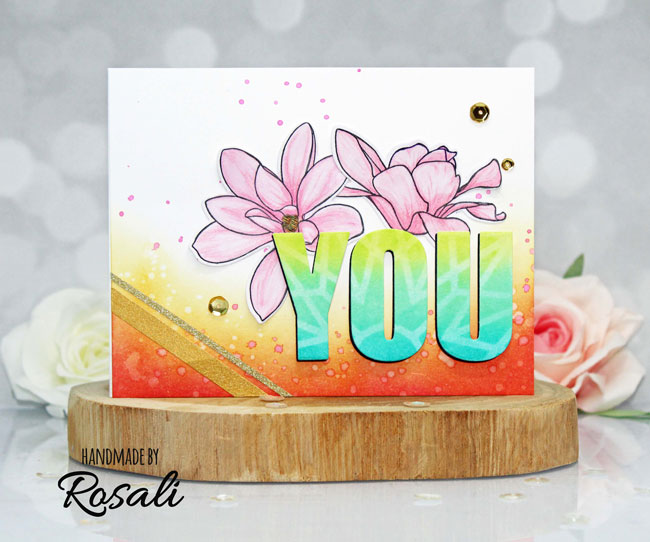
Once my decision for the sentiment was made these were the steps to make my card:
- I took a piece of Neenah Solar White 80 lb. cardstock and did some ink blending with Wild Honey and Picked Raspberry Distress Inks. First I applied Wild Honey over the whole one side of my panel and then Picked Raspberry on top of that. That’s why it turned out orange instead of pink where the two colors overlap! I didn’t plan for that to happen but I just went with it! 😀 I also added small splatters with water and both colors of Distress Inks.
- To die cut the three letters (YOU) I picked Ranger Watercolor Cardstock as well as black cardstock. I chose watercolor cardstock because it makes ink blending as easy as possible, especially when using a stencil. My chosen Distress Ink Colors were Twisted Citron, Cracked Pistachio, and Peacock Feathers. I applied a very light first layer of ink right onto the watercolor cardstock. Then I laid Altenew’s “Layered Kaleidoscope Stencil A” on top and tapped on a second, heavier layer of ink
- I really liked the look of the stenciled alphabet dies on top of my background panel but decided I wanted to add another element to my card – flowers! After all, it’s finally spring, right? So the “Magnolias For Her” stamps from Altenew seemed perfect to me. I colored them with a wash of Daniel Smith watercolor and minimal shading. After the paint was dry I took my colored pencils and added all those details that make the magnolias look more realistic. Love how the coloring turned out! ☺
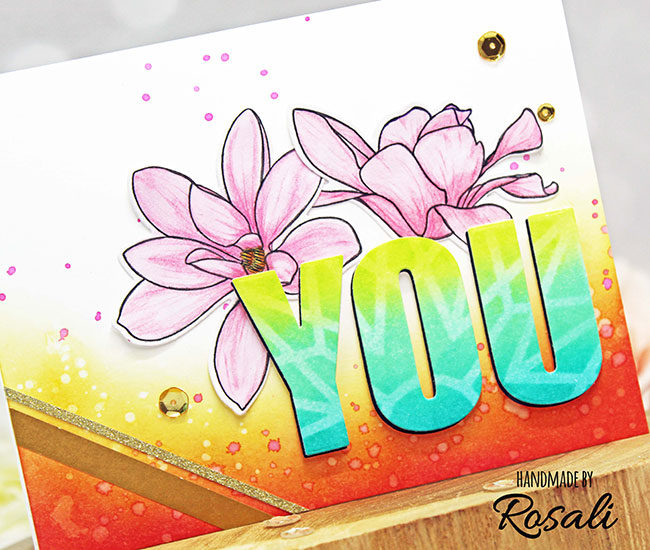
4. To put the card together I first adhered my background panel to a card base. Then I glued the stenciled letters on top of the black letter die-cuts – slightly offset so that they would appear like a shadow. Then I foam mounted them onto the card. I used my bone folder to bend the outside of the flower petals a bit and put tiny pieces of foam tape behind them. For the center of the flowers, I used regular adhesive. Here’s a picture that shows you the foam tape underneath the petals and the dimension it creates:
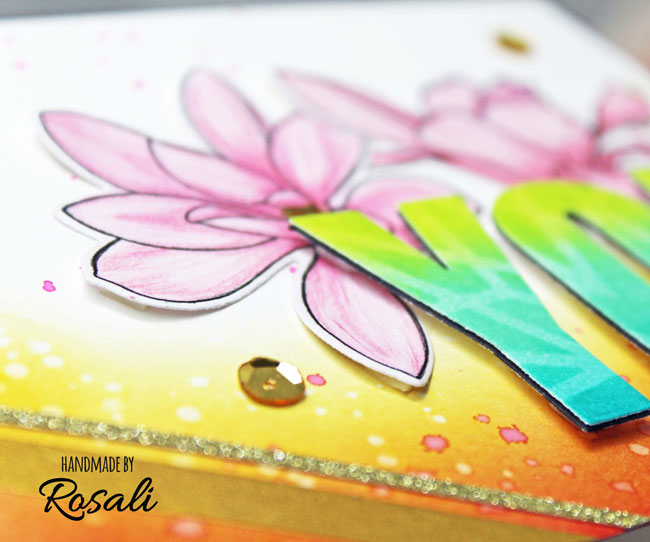
5. Lastly, I added two thin strips of shiny and glitter gold cardstock across one edge of my card and three gold sequins as additional embellishments.
I hope you like the finished card! Have an amazing day!! ♥
Rosali
![]()
Supplies:


