Dad’s Garage
Hi Creative Friends,
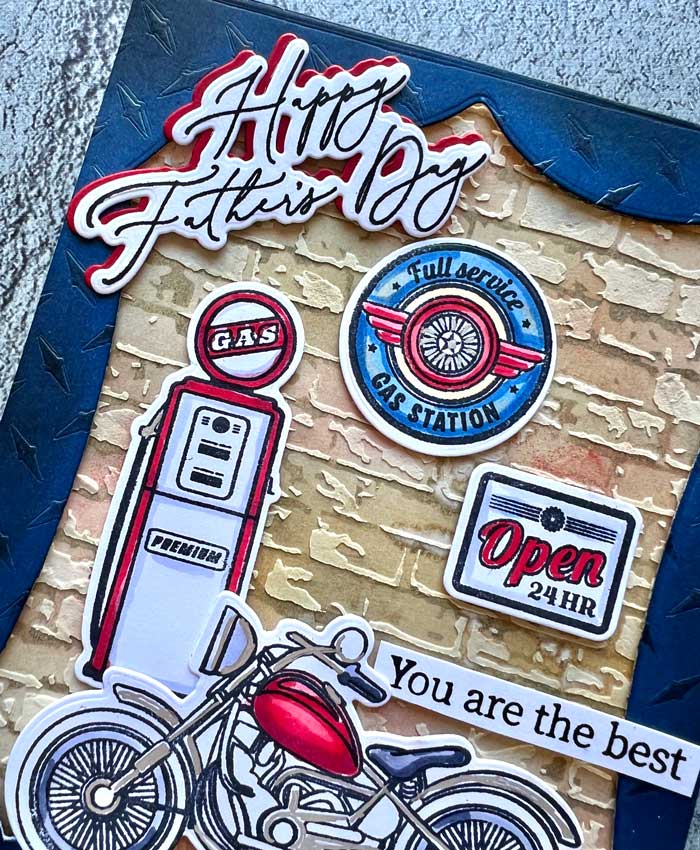
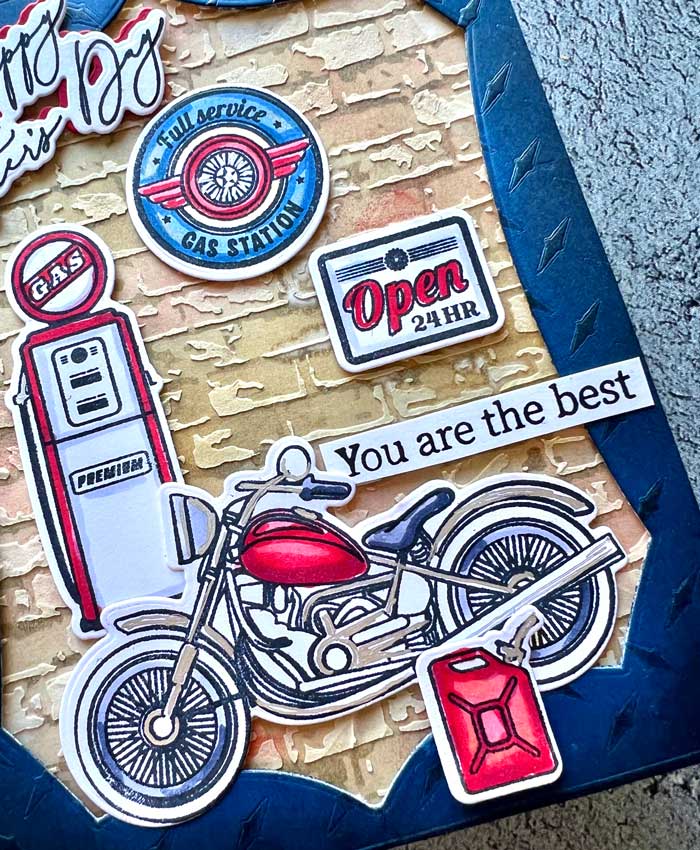
Whew! It has been a busy week, but I wanted to squeeze in a project or two before it ends. With Father’s Day right around the corner, today’s card design is devoted to those guys in our life who love hanging out in their garages. The Dad’s Garage stamp and die set by Honey Bee Stamps has all the fun stuff to create a garage-centric themed card. Then, if your guy loves motorcycles as mine does, then this stamp set has an extra bonus by including a vintage motorcycle.
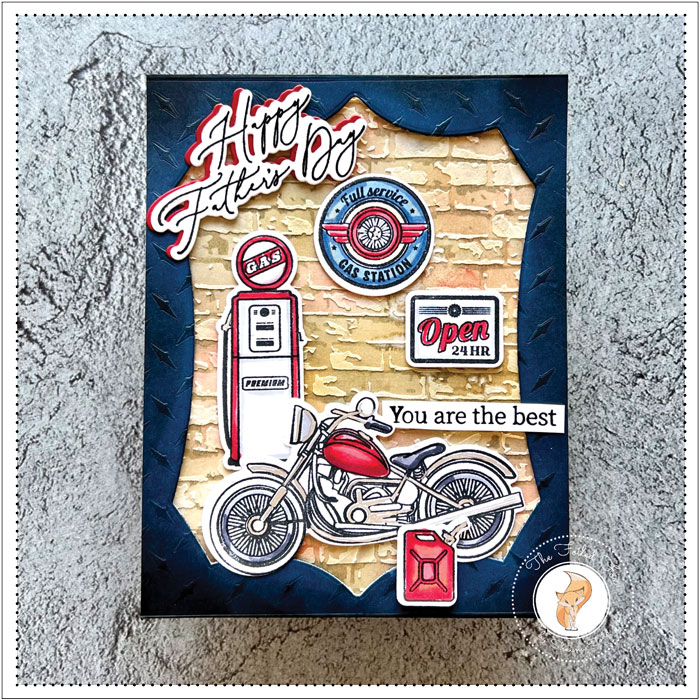
I started by creating the brick background. I used a piece of Bristol paper and randomly blended on a few distress inks like Pumice Stone, Black Soot, Vintage Photo, and Fired Brick. The patches of color looked rather hodge-podge but won’t matter once I used the Brick stencil by Papertrey Ink.
This is a two-part stencil. I used the first stencil to define the grout lines. I used Pumice Stone for this. When that was done, the second stencil was placed on top of the paper, and an opaque texture paste was applied. This helps give the brick background some personality and character. It was set aside to dry.
Next, I stamped most of the pieces in the Dad’s Garage stamp set onto a piece of Spectrum Noir card stock using Memento Tuxedo Black ink. This card stock and ink are really ideal for alcohol marker coloring.
The Copic markers I used were:
Motorcycle: R22, R27, R56, C2, C7, and silver uni-ball pen
Signs: B41, B93, B97, R22, R27, R56, YR31G, and silver uni-ball pen
Gas Pump and can: R22, R27, R56, C2, and silver uni-ball pen
After all the coloring was done, the pieces were cut out using the coordinating dies.
The next element to create was the frame. I used a Dark Indigo panel and mounted another piece behind it to make it thicker. Then, I cut out the center using the largest die in the new Honey Bee Stamps Shield Layering Dies.
To add some dimension, I placed the Diamond Plate stencil over top the panel and ran it through my die-cutting machine using the rubber embossing mat instead of the hard cutting surface. I also used several pieces of cardstock as shims to add more pressure so I would get a nice embossed pattern from the stencil.
Without removing the stencil, I blended on Black Soot to accentuate the pattern. When done, I added a little more Black Soot around the edges.
I was now ready to assemble. I mounted the brick background onto my card base, then added my newly created shield frame on top using foam squares to pop it up. All the garage pieces (ie: pump, signs, motorcycle, and gas can) were mounted too.
For the sentiment, I stamped Happy Father’s Day and You are the Best from the One of the Guys stamp set onto white card stock using Verdafine Black Onyx ink and cut them out using the coordinating dies. I also cut out a red cardstock one.
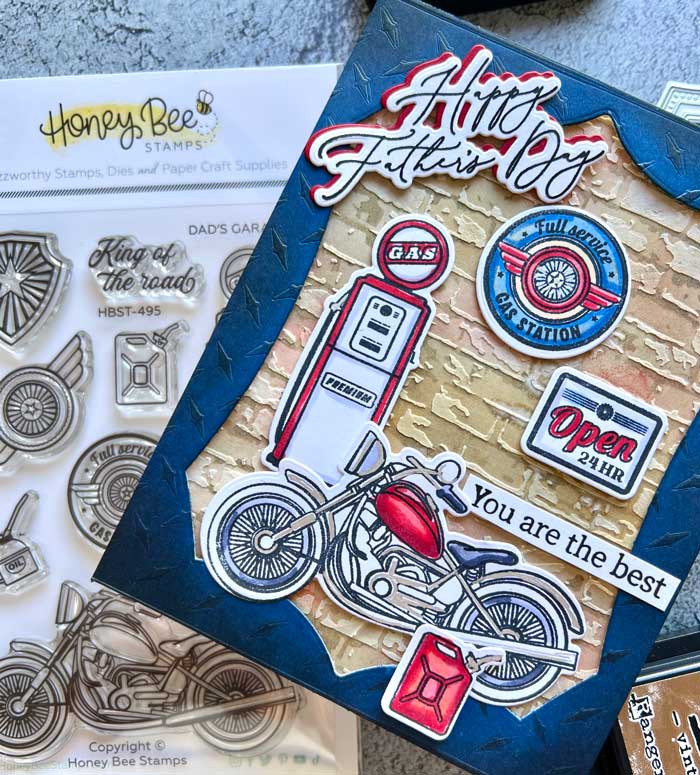
The red cut-out was added to the back of the Happy Father’s Day and mounted in the corner with foam squares and the You are the Best was tucked near the motorcycle.
The card was done and I think he is going to love it! ♥
Goodies Used: