Dreams of Love Blossom in Watercolor – VIDEO
Hi Crafty Friends,
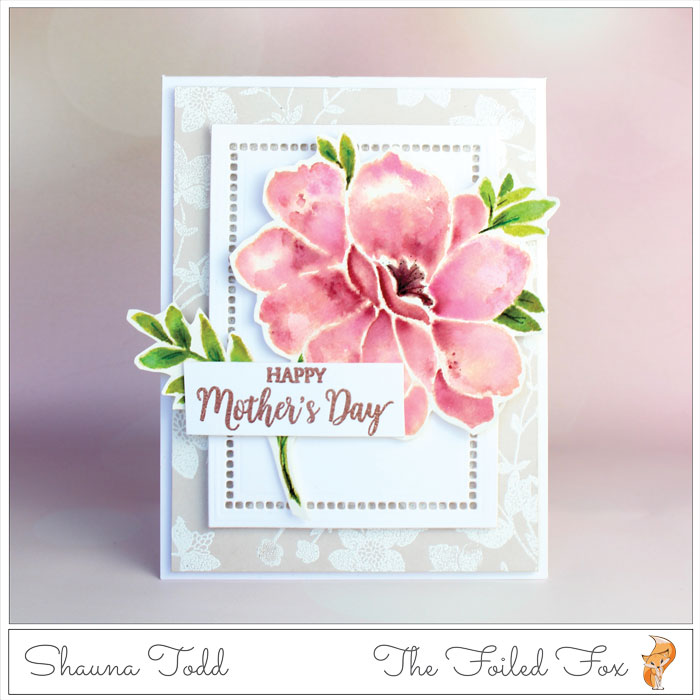
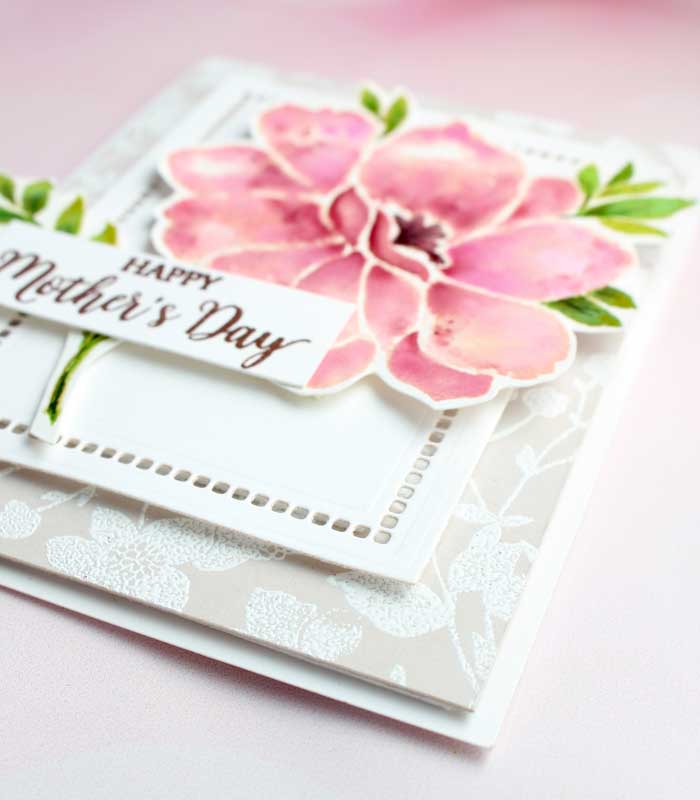
I am back with a new floral stamp, Dreams of Love by Penny Black. It is a big beautiful blossom that you can use in so many ways. Since Mother’s Day is right around the corner, I thought that would be a perfect way to display its beauty!
As I started writing up the steps for this card, I realized it would be better to show each step in a video. So… here we go, a video with all the tips and steps to create this design.
I hope you had a chance to view the video. There you will see all the steps of no-line coloring, using distress stains but really any watercolor will do. Sometimes it is hard to see all the small details in videos so here are some close-ups to help you with that.
I will briefly outline the step here but really if you have the time, zip through the video. There are tons more info there. But for now, here are the basic steps:
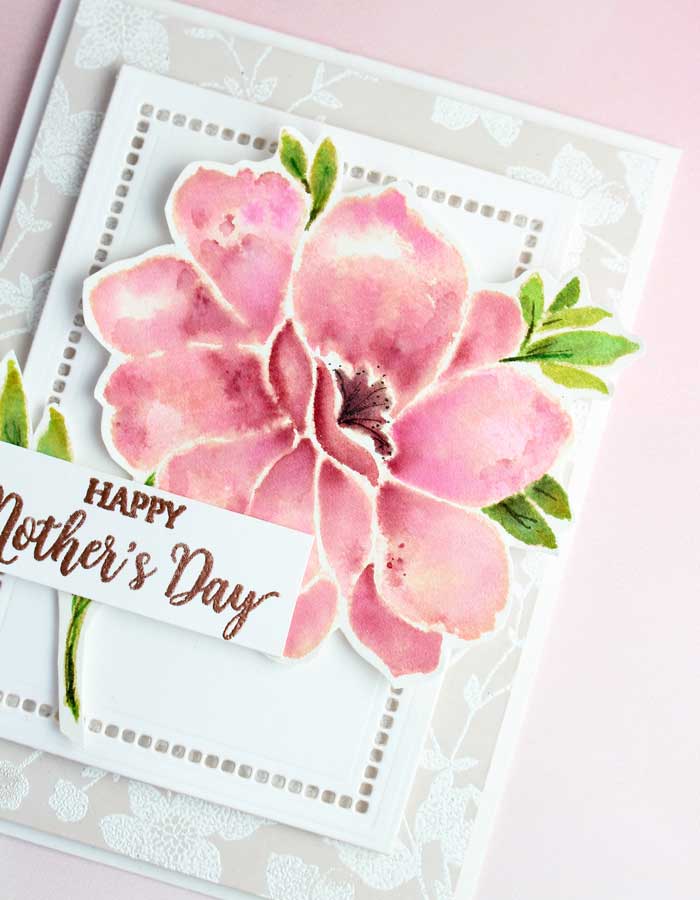
The flower was stamped by placing the flower stamp in a stamp positioner (like a MISTI). I stamped it onto hot pressed watercolor paper using Tattered Rose distress ink and a light green distress marker. The Tattered Rose ink gives a light but distinct impression, especially if you stamp it twice (thus, the need for a stamp positioner). From there, using Worn Lipstick, Picked Raspberry and Aged Mahogany distress stains as my watercolors, I painted the flower one petal at a time. Check out the technique for keeping the detail and individuality of each petal in the video.
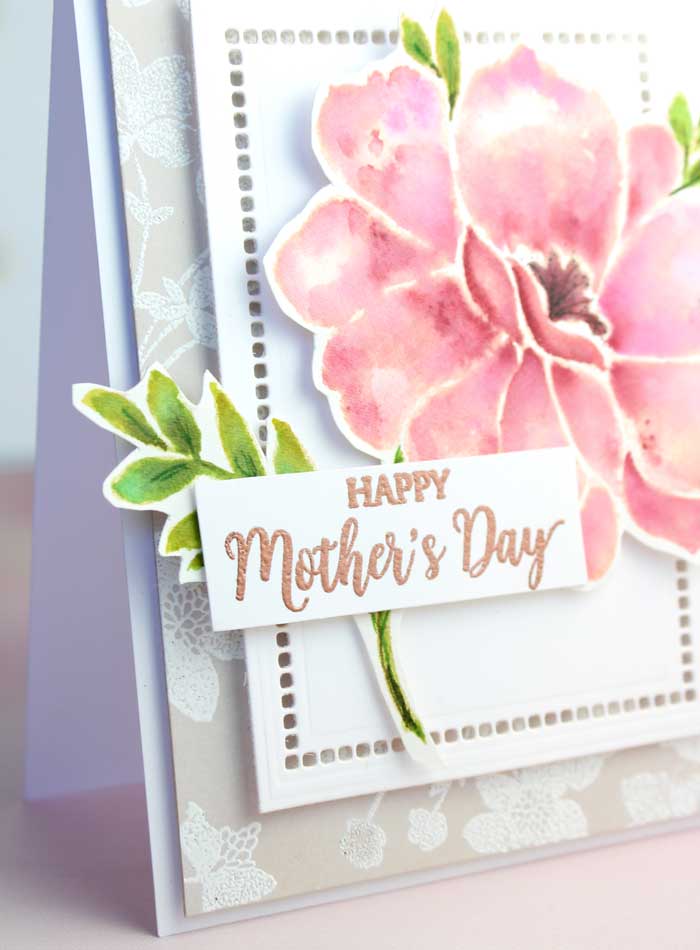
The leaves were painted the same way. I used Peeled Paint, Forest Moss, Crushed Olive and Weathered Wood distress stain for them. To color and maintain the thin stem lines, I used the fine point end of Peeled Paint and Forest Moss distress markers for this detailed work.
While the flower was drying, I chose another one of Penny Black’s newest stamps called Youthful to create the background. It has a beautiful open spray of flowers and leaves so it will be a nice background to the big blossom I just colored.
For the background, I started with a Chocolate Malt card stock panel, treated it with anti-static powder and then stamped section of the stamp onto the panel, using Versamark ink, until the panel was mostly covered. I then sprinkled white embossing powder and heat embossed it. I really liked the panel when it was done but it was a little strong for the card design so I added a layer of Lawn Fawn Yeti white ink to the top to mute and soften the color.
The next step was to create a smaller white panel using the Spellbinders Venice Lace Hemstitched Frames. It cuts an elegant hemstitched panel around the edges. With that done, the only thing left to do was to stamp the sentiment and assemble. The sentiments “Happy Mother’s Day” is from the new stamp set, Best Mom by Penny Black. It was stamped onto white card stock, then heat embossed with Altenew Copper embossing powder.
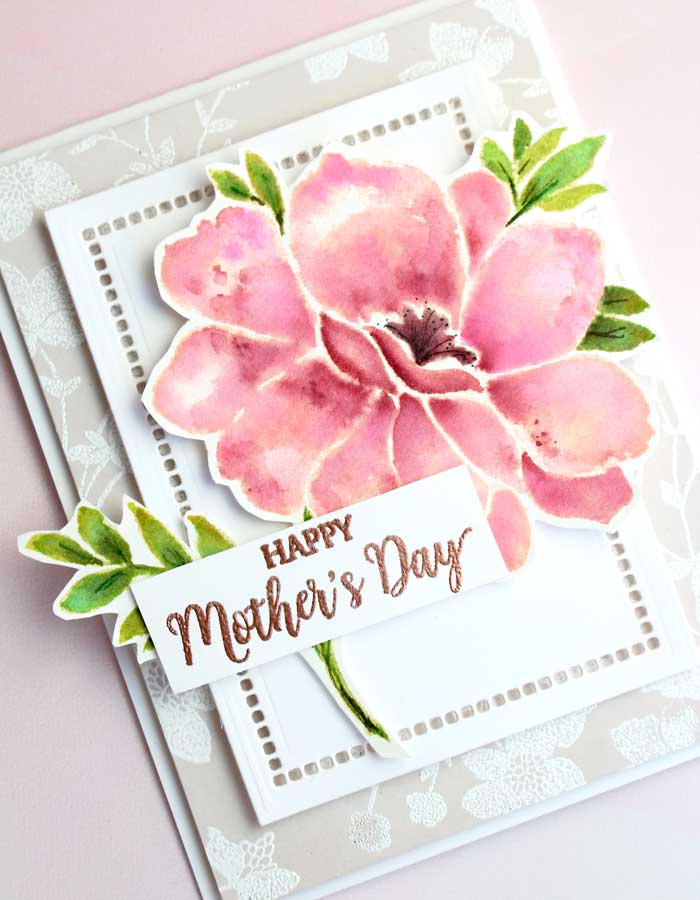
To assemble, the floral background was popped up with foam and added to the top of the white card base, then foam was added to the smaller white hemstitched panel and adhered to the top of the floral background. The flower was then pressed on with foam tape and the sentiment was added. And there we have it… a Mother’s Day card ready to send.♥
Goodies Used: