Fluttering Butterflies
Hi Creative Friends,
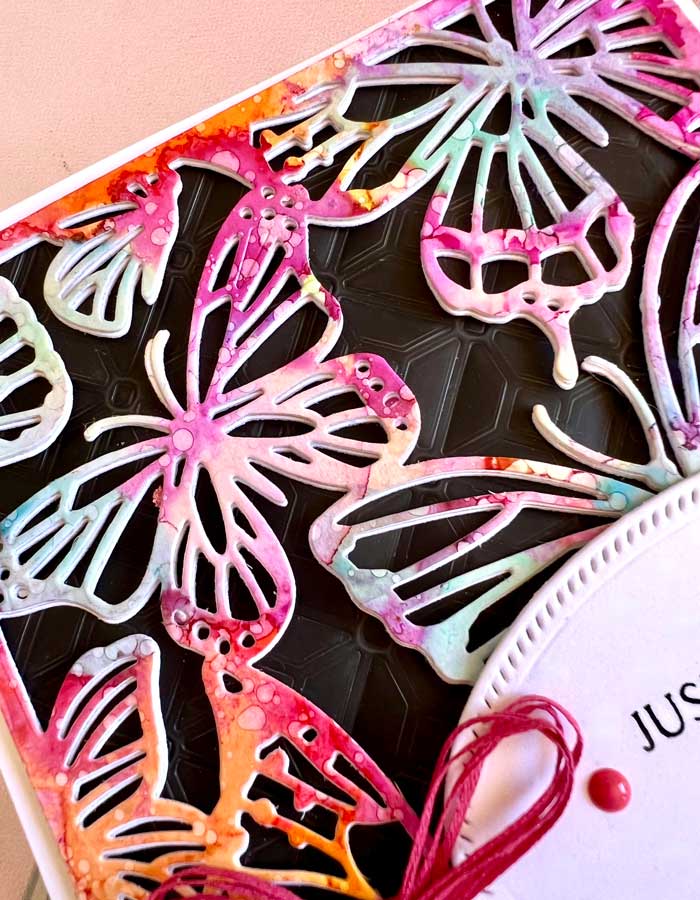
Fluttering butterflies is the theme for this card design. The new Flutter cover plate by Papertrey Ink, along with vibrant alcohol inks create a beautiful display for the front of your card.

I haven’t played with my alcohol inks for some time. I love the vivid colors you can achieve with these inks. You can mix whatever colors you like but I chose a few of my favorites together, namely pink, purple, blues, and yellow.
I began with a Yupo paper panel but Tim Holtz’s Alcohol Ink Cardstock works well too (remember you must use a synthetic paper for alcohol inks otherwise the ink will soak into the paper instantly, making it impossible to move the ink around). I have listed both in the supply list below so you have a choice. I like to start by squeezing blending solution or 99% alcohol onto my panel first before I apply ink. This way, when I add ink droplets, it can quickly spread on their own. Often I use a blower or a brush dedicated to alcohol inks to move the ink around but for this panel I just added drops of inks, letting them flow where they may. Occasionally I would add tiny droplets of blending solution to spread the ink but other than that it was the inks that did all the work.
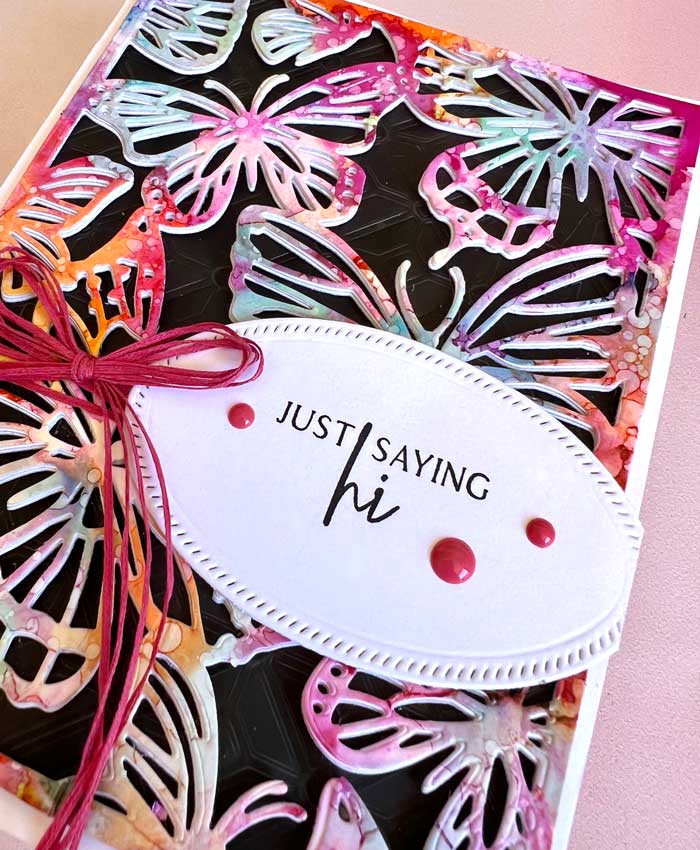
While the panel was drying, I cut an oval from the new Love to Layer: Ovals die set using a piece of white cardstock. I then stamped my greeting using a sentiment from the Happy Hello stamp set (see supply list). Just like always, I used Versafine Black Onyx ink for this.
Next, I cut a black panel the same size as the Flutter cover plate. Using the Trellis cover plate and my rubber mat to my die-cutting machine, I ran the plate and paper through my machine. By using the rubber mat with the plate, instead of cutting the panel, it embossed the pattern onto the paper. You could easily skip this step but I like the added small detail to the card. It is hard to see in the pics but the texture really does shows through in real life.
It was time to cut the alcohol ink panel using the Flutter cover plate. At the same time, I cut a second one from white cardstock, then stacked and glued them together, along with adding the black embossed panel to the back.
I wrapped some thin cord around the panel, then applied this whole assembly to a slightly larger white card stock card base. The sentiment oval and a cord bow were applied to the front and a few enamel dots were added to finish.
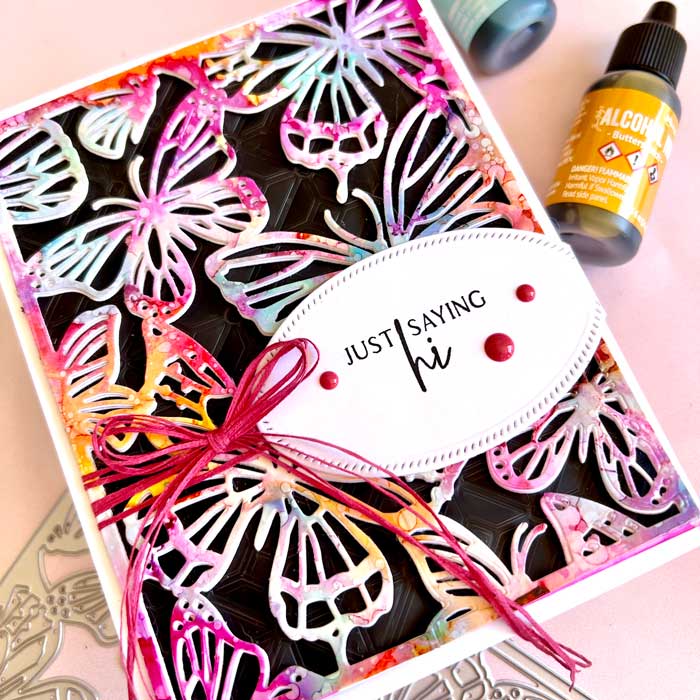
YAY! the card was done. I just love all the bright colors… it seems fitting for these charming butterflies! ♥
Goodies Used:
Sorry, the comment form is closed at this time.

August 11, 2022
Lagene
Gorgeous creation!
August 11, 2022
Shauna Todd
Thank you so much!