A Friendly Flamingo In Paradise
Hi Crafty Friends,
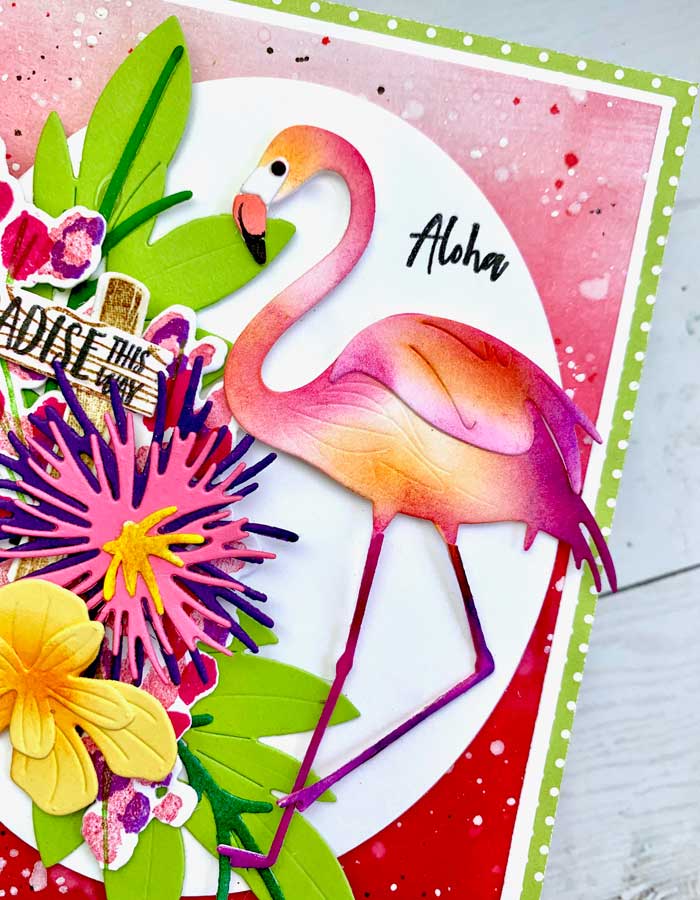
As promised, we are back with another project (and video – YAY!) using stamps and dies from the new release from Papertrey Ink. We chose the Feathered Friends 12 – the Flamingo – to be our focal point and of course, he is in his natural habitat surrounded by flowers.

The video explains all the steps, so check it out below.
Below we have also included a few pics to give you a closer look and a very quick run-down on how it came together – then don’t forget the complete supply list at the end!
First, the splattered color-fade background was created on a piece of bristol paper, using a few distress inks. We started with Spun Sugar, then Worn Lipstick, Picked Raspberry, Festive Berries, and a hint of Seedless Preserves just to darken the bottom. The panel was then splattered with Festive Berries, Black Sumi ink, and a real fav, Bleedproof White ink.
Stamping the Blooming Thoughts flowers was next. The flowers were cut out using the matching dies, then stamped with New Leaf, Hibiscus Burst, Raspberry Fizz, and finally Amethyst Allure. When done, they were set aside.
The Flamingo was the next step. All the pieces were cut out of bristol paper for easy ink blending. Then, the pieces were colored with Bright Buttercup, Summer Sunrise, Pale Peony, Hibiscus Burst, Raspberry Fizz, Amethyst Allure, and Royal Velvet. It was an easy assembly. Only his peak, legs, and wing need to be glued on.
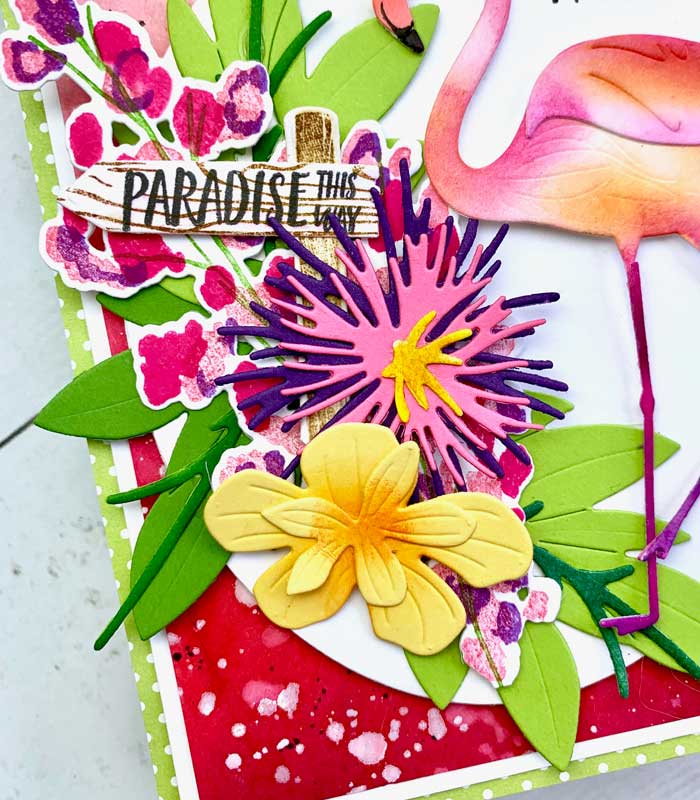
With the flamingo done, he was set aside while the flowers were cut from colored cardstock and using the Into The Blooms II die set. The colors used were Bright Buttercup, Green Parakeet, Easter Grass, Pinefeather, Hibiscus Burst, and Royal Velvet cardstock. A few of the flowers had multiple layers. They only needed a spot of glue to put them together.
So, it was time to assemble. With a white card stock card base, a piece of Green Parakeet Bitty Big paper was placed on top. It covered the whole front of the card base. Next, the splattered background previously made was added. The oval was the next layer. It was popped up with a foam backing.
Finally, the flowers and flamingo were arranged and adhered with a bit of foam tape and/or glue.

The sentiment was last. So, a signpost was created by cutting the post and sign from white card stock and stamping “Paradise This Way” using the Paradise This Way stamp and die set. The sign was then tucked in amongst the flowers and Aloha was stamped with True Black ink on the white oval layer.
And there we have it, a summer’s hello! ♥
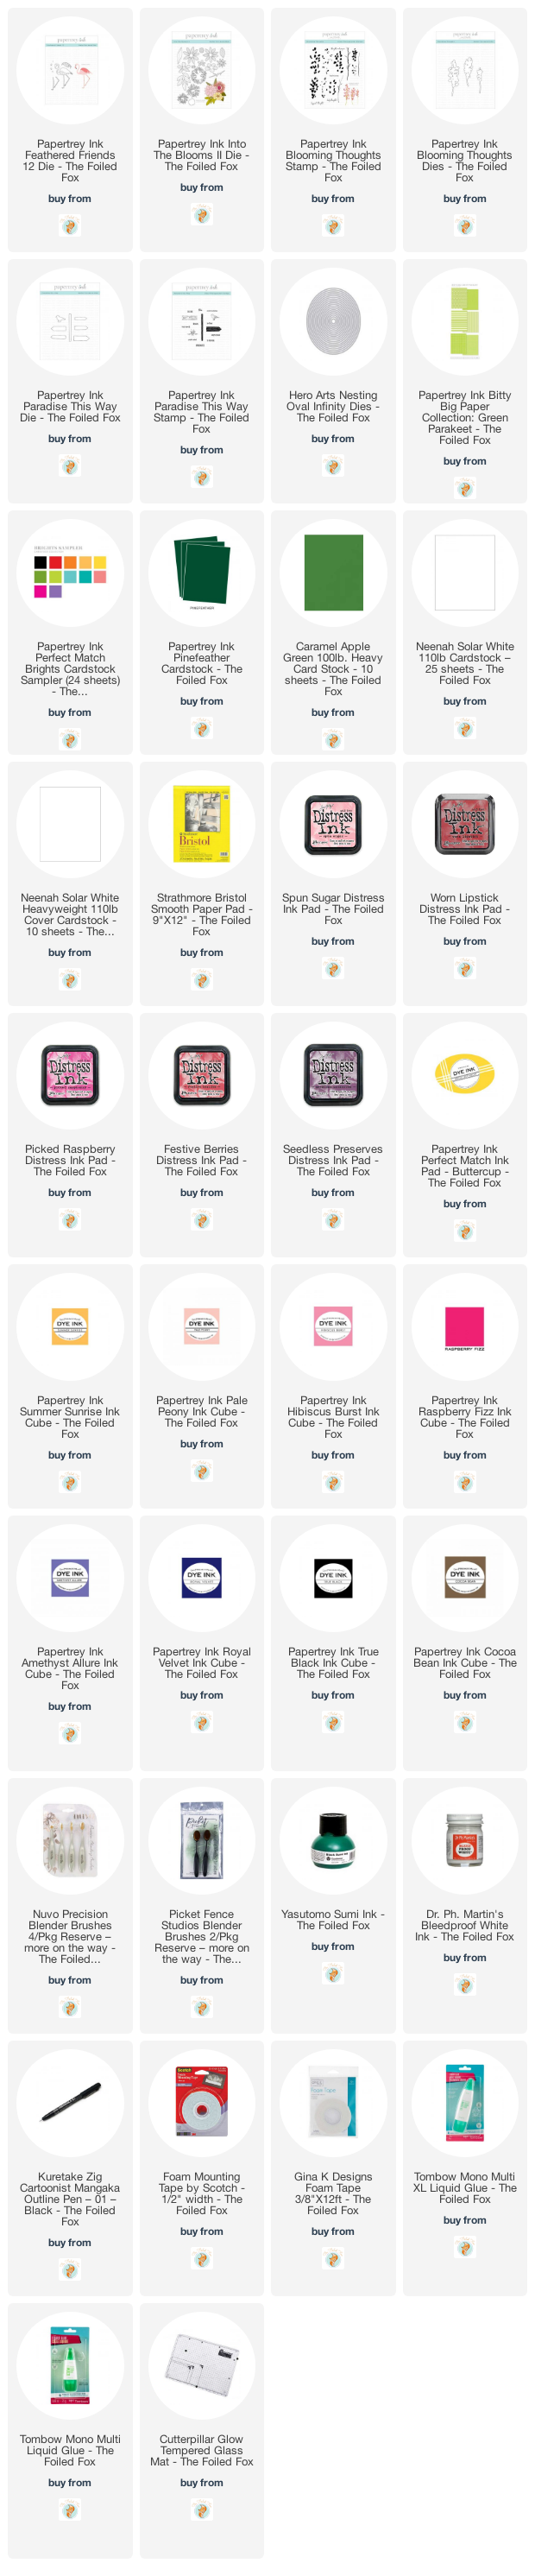
Goodies Used:
Sorry, the comment form is closed at this time.

June 22, 2021
Anita
This turned out great!
June 23, 2021
Shauna Todd
Thanks!