Hear The Bells
Hi, my creative friends,
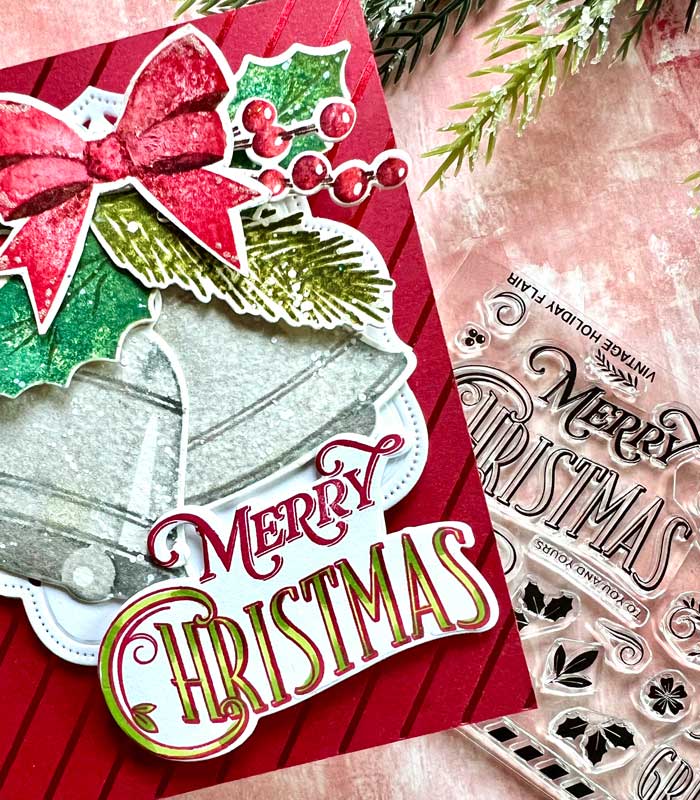
As always, Papertrey Ink has released new and beautiful stamp and die sets for the holidays. One of them is the “Hear The Bells‘ set.
Christmas bells are so iconic of the season and give a nostalgic nod to the past. I just love them!
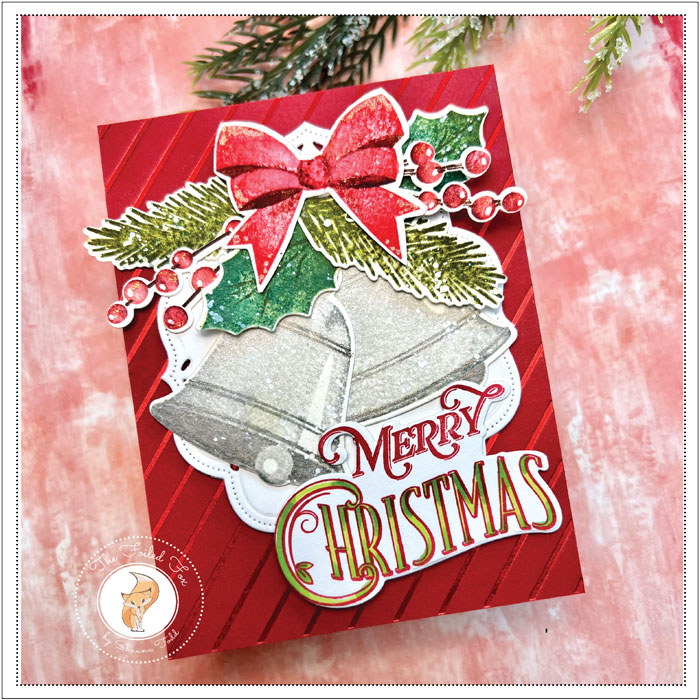
The minute I saw the Hear The Bells set, I knew I had to make a vintage-y Christmas card. I love to slip back into yesteryear and take in all the beautiful cards that were made for the holidays back then. Borrowing from that vibe, I began my project.
I started with an A2 white cardstock card base. Next, I made the background by foiling a Peppermint red cardstock panel using the Diagonal Stripes hot foil plate by Papertrey Ink, red Glimmer foil, and Spellbinders Glimmer system. When done, using double stick tape, I mounted it onto the front of the card base.
Now, I was ready to jump into making all the goodies! I started with the bells. They were stamped with Delicata Silver Shimmer ink and accented with Weathervane. I know you can’t see the shimmer in the photos, but a subtle sparkle is there, trust me!

Next up was the foliage… holly and pine. I used Peeled Paint and Forest Moss distress ink to stamp the pine sprigs and Pine Needles and Peeled Paint for the holly. When finished, I splatter tiny dots of Dr. PH. Martin Bleedproof ink.
The berries and bow used similar inks. For the berries, I used Worn Lipstick, Aged Mahogany, then Vintage Photo for the stems (by the way, I borrowed the berries from Papertrey Ink’s Christmas Bouquet but you can just use the berries included in the Hear the Bells set if you would like).
The bow was stamped with Worn Lipstick and Candied Apple for the main bow parts and Aged Mahogany for the shading. Then, of course, all the pieces were cut out using the matching die sets.
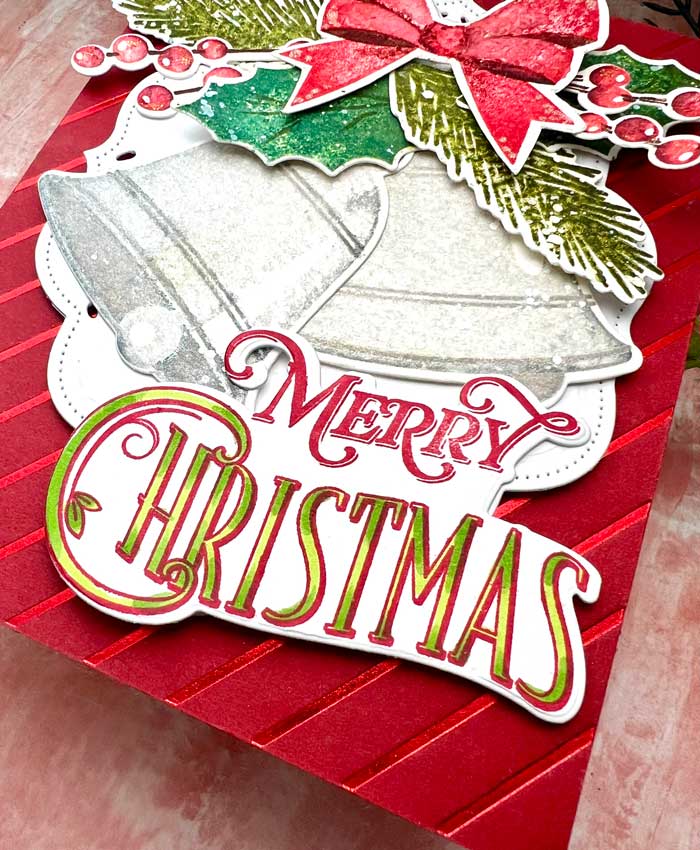
For the sentiment, I stamped the fanciful Merry Christmas from the Vintage Holiday Flair with Concord & 9th Poppy red ink, then colored the inside of the word ‘Christmas’ with a couple of green alcohol markers.
With all the pieces stamped and cut out, I started to assemble. I needed a base for all the details to mount onto so I cut a decorative panel using the Love to Layer: Decorative Bracket from white cardstock, then mounted it to the front of the card base with foam squares.
Next, I arranged and attached all the elements using foam squares. The sentiment was mounted last and a few sparkles were added to the bow and berries with Stardust Stickles.
That completed my project. I hope you like it! ♥
P.S. I listed everything used in the Goodies List below. As always, I included the mini and full-sized ink pads where available so you can have a choice.
Goodies Used:
Sorry, the comment form is closed at this time.

December 7, 2023
Amy Tsuruta
Beautiful!