Hedgehog Love
Hi, all our creative friends,
Penny Black has a bundle of awesome new stamps and dies especially for celebrating love. So that means they are great for Valentine’s Day, anniversaries, or any time you want to spread a little love. I enlisted the help of one of these super cute mini stamp set, Adorable, to help me with my Valentine’s Day card.
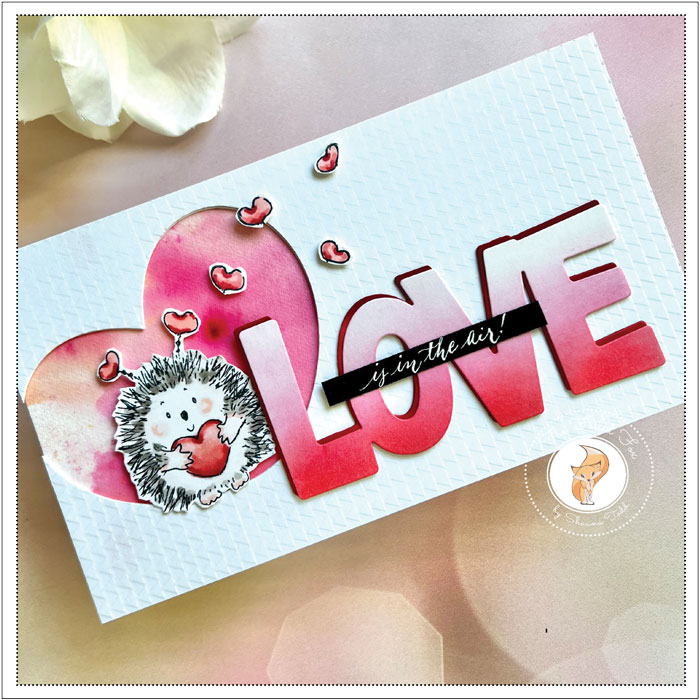
To begin, I started by using a square of cold-pressed watercolor paper, spritzed it with water, then sprinkled a little Brusho Alizarin Crimson and Sunburst Lemon dry watercolor crystals. I added a light spritz of water and let the crystals do their best work, then set it aside to dry. I used this same technique in my last post, I just love using these magical little crystals!
Meanwhile, I cut a piece of white cardstock to 4.25 x 7.5″ and also made a coordinating white card base to match.
Next, I cut out a large heart from the left side of the white cardstock panel using the new Papertrey Ink Love to Layer: Rounded Hearts2 die set. Then, using the Triangle embossing folder from Penny Black, I slipped my cutout panel into the folder, then ran it through my die-cutting machine. (Hint: it works best to cut out any shapes from the panel, then emboss last… this ensures a crisp embossed pattern!)
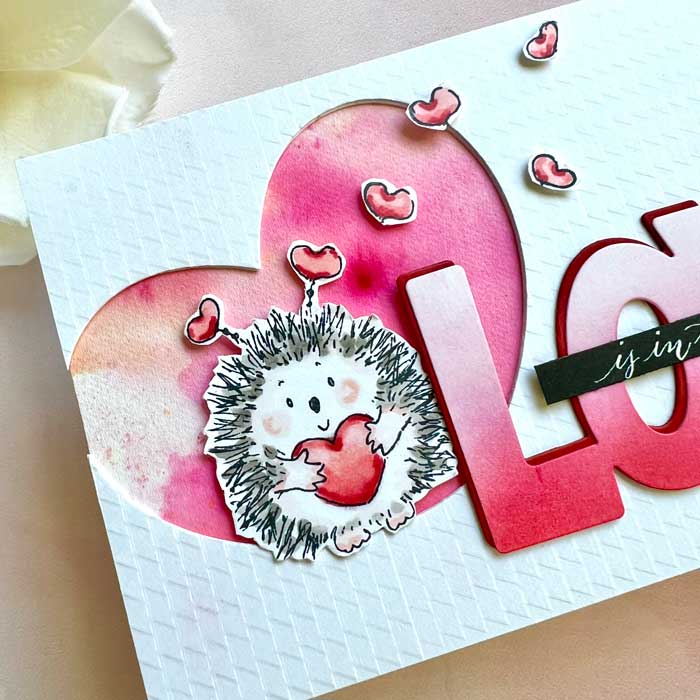
To make the hedgehog, I stamped him (and a few more hearts) onto a piece of white cardstock with alcohol marker-friendly ink like Memento Tuxedo Black (see supply list), then colored him with a few markers. Here is the list:
Hedgehog: W3, W5, R01. R32
Heart: R01, R20, R32, R56
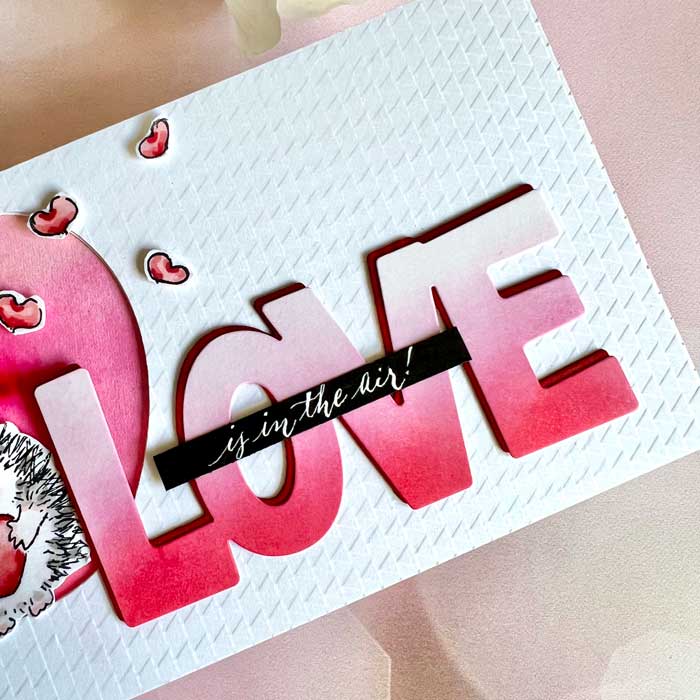
The hedgehog was fussy cut with a pair of detail scissors (the new Spellbinders detail scissors are awesome – see supply list). And, I cut out two white ‘LOVE’ words from white cardstock and one from Peppermint red cardstock.
One of the white Love’s was ink blending in an ombre fashion using Worn Lipstick first, then Candied Apple for the bottom half.
My pieces were ready to assemble. The watercolored panel was mounted on the white card base, then the white embossed panel was added on top, using foam tape to pop it up. The hedgehog was added next with a few foam squares
The LOVE’s were stacked and glued together. The Peppermint red one was slightly off-set so you could see it just peeking through. It was then mounted on the card front.

To add the final touches, I hand-lettered ‘is in the air’ on a strip of black cardstock. I used an oblique pen holder, nib, and Dr. Ph. Martin Bleedproof ink. When dry, it was mounted on top of the LOVE sentiment and a few more hearts were stamped, colored, cut out, and mounted to show the hedgehog’s extreme love!
I hope you enjoyed today’s project and will give it! ♥
Goodies Used:

