HIbiscus and Leafy Branches
Hi Crafty Friends,
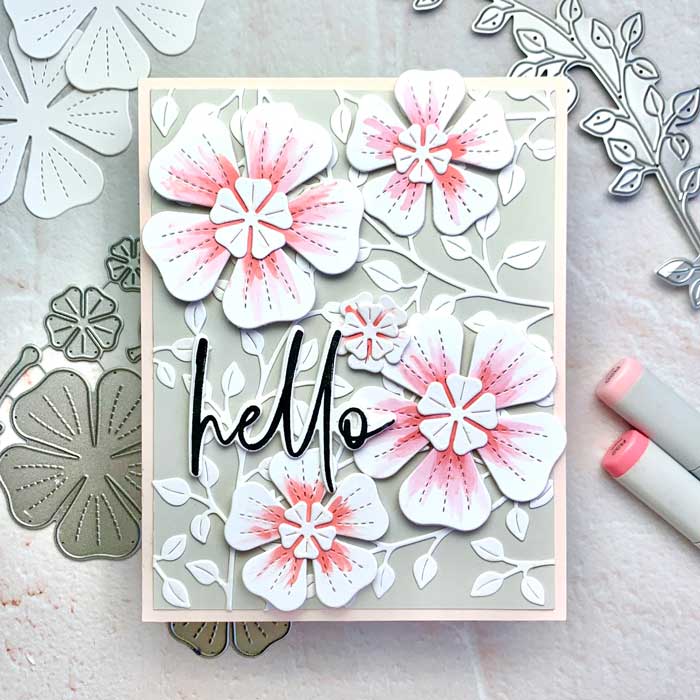
I am sharing a sweet card design that features white and pink hibiscus with a leafy branch background. This card is super easy to make and could be used for lots of different occasions!
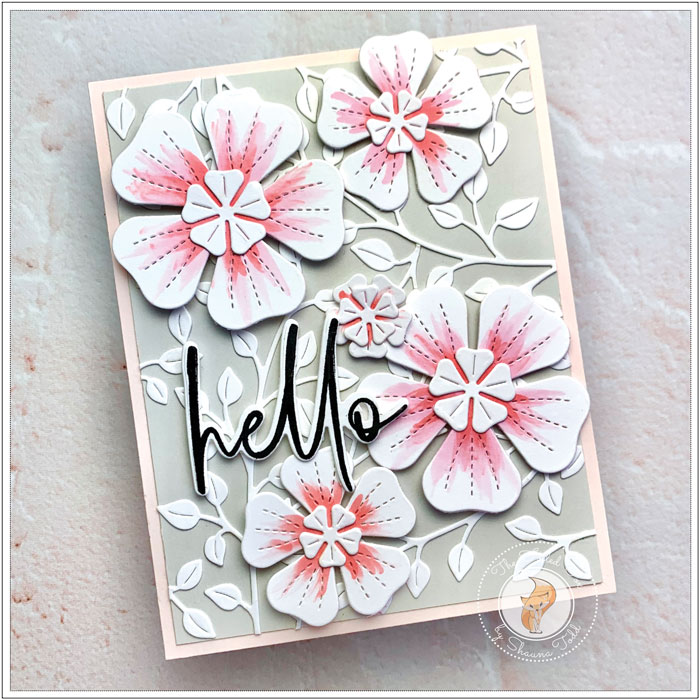
To begin, I made an A2-sized Pale Rose card base and cut a slightly smaller Antique Gray card stock panel, and set them aside.
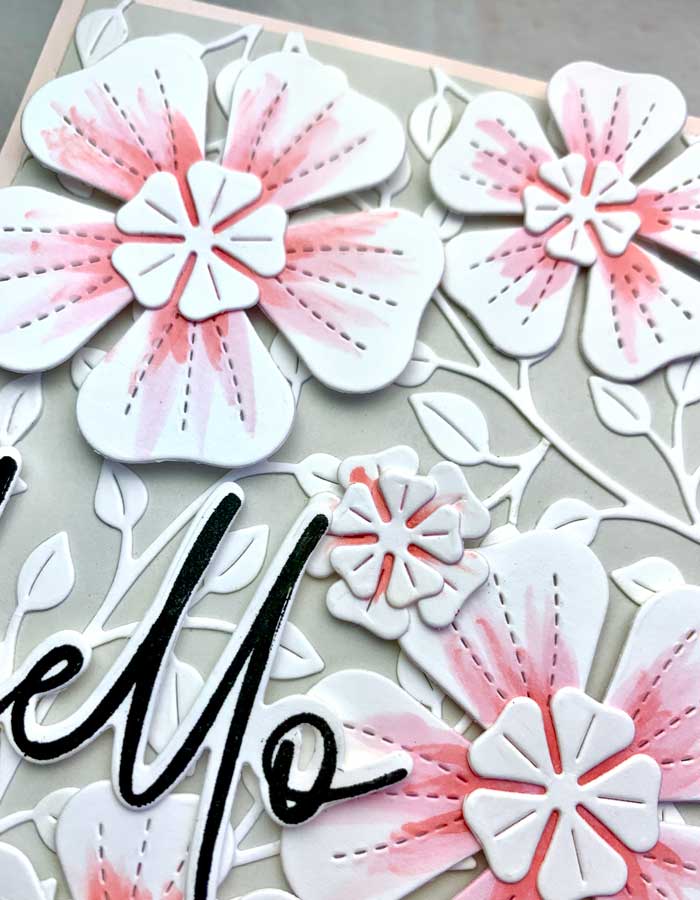
Next, I cut out several flowers in different sizes using Neenah white card stock and the Happy Hibiscus die from Lawn Fawn. At the same time, using the same paper, I cut out a bunch of leafy branches, using the Leafy Branch die by Pinkfresh Studio. and the word ‘Hello’ from the Perfect Pairs: Essentials die set by Papertrey Ink.
With all the pieces cut, I was ready to create! I started by arranging the leafy branches on the Antique gray panel. To fill the panel, I used the complete branch in some areas and filled in with some bits and pieces of the branches. Once it was arranged the way I liked it, I glued them all down and trimmed any excess hanging off the edges. The completed leafy branch panel was then adhered to the Pale Rose card base.
The flowers were next, starting at the center of the large and medium-sized flowers, I added some color using only two Copic alcohol markers, R20 and R32. When done, I stacked a smaller white flower on top and glued them together.
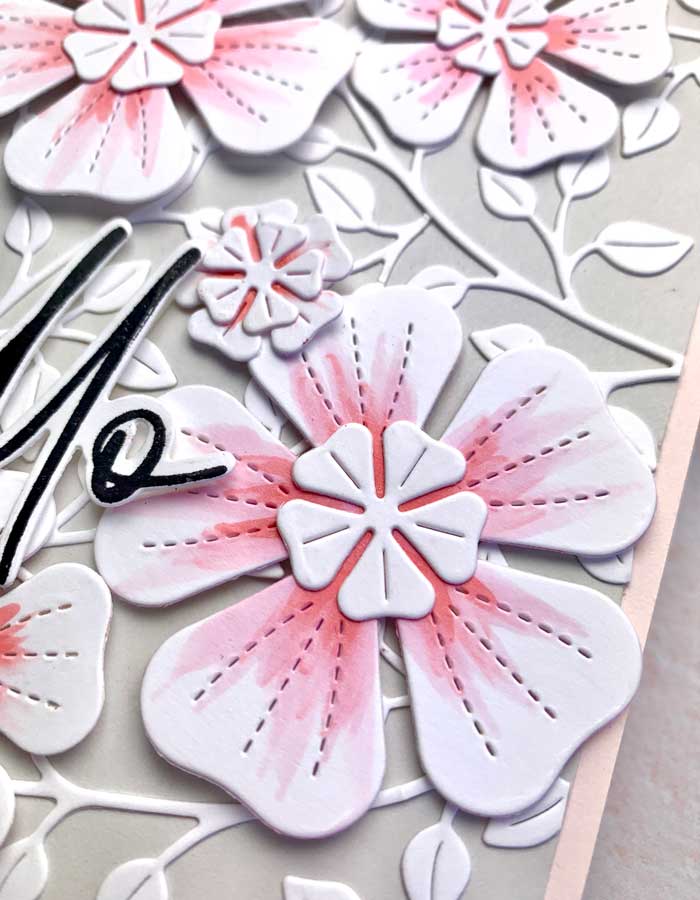
Next, the flowers were arranged and applied to the front of the card with a bit of foam tape.
The sentiment was the last element to add but first I had to stamp my die-cut ‘Hello’. As I often do, I placed the negative and positive of the cut-out in my stamp positioner, placed the hello stamp over the word cut-out, and closed the door of the positioner. With the stamp in place, I inked it up with my favorite ink for sentiments, Versafine Black Onyx, and stamped the sentiment.
Once done, I added some foam tape to the back of the word and pressed it in place. YAY! the card is done! ♥