Lovely Love Wreath
Hi Crafty Friends,
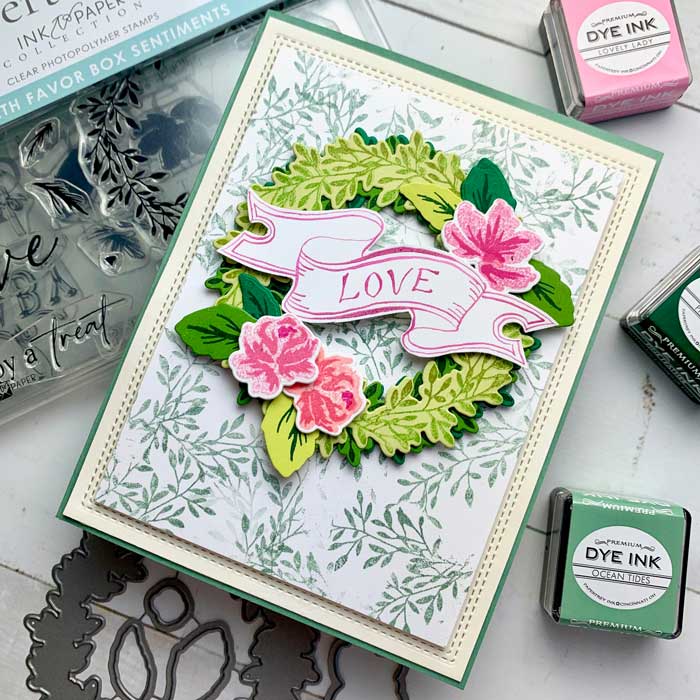
Thanks for joining me today! I am featuring a lovely love wreath that can be found in the Papertrey Ink-Ink To Paper Wreath Favor stamp and die set. I fell in love with this set the minute I saw it. It has so many wonderful things in it, from great sentiments to the flowers, leaves, and a wreath.
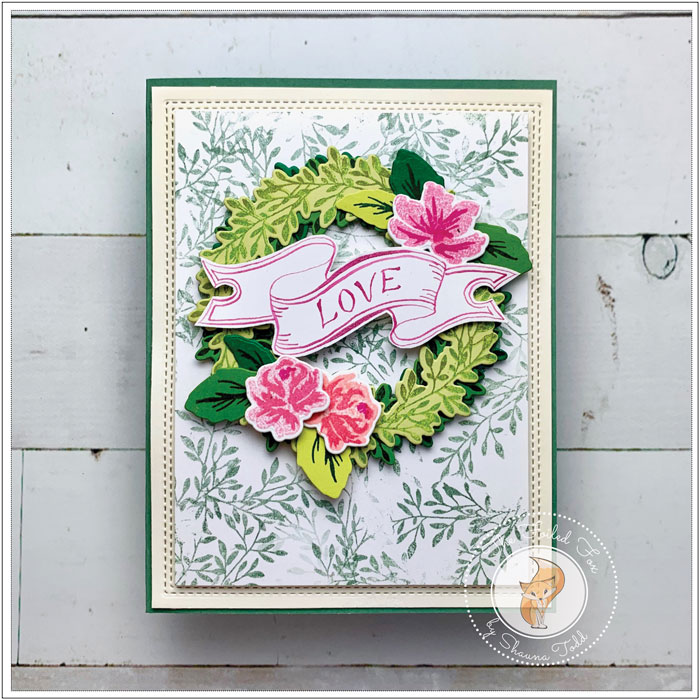
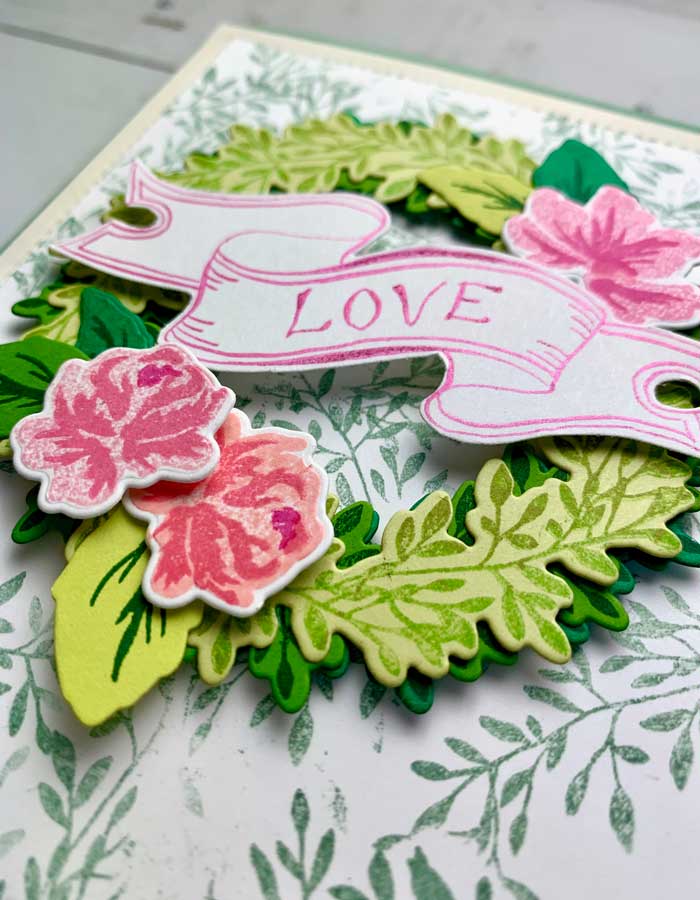
This card design is all about the wreath and the accent flowers. So, naturally, I started with the wreath. As you may know, when I can, I like to cut out my pieces first. So, I cut one from each of these colored card stocks, Spring Moss, New Leaf, and Pinefeather. I then stamped the Spring Moss wreath with New Leaf ink and the other two with Pinefeather ink. Once done, I layered the three wreaths, staggering them a bit, and adhered them together with glue.
Next, I cut out the flowers and leaves. The flowers were cut out of white cardstock and stamped with more Papertrey Ink ink cubes like Pale Peony and Hibiscus Burst. Then, using the layering stamps, the flowers were accented with either Raspberry Fizz or Autumn Rose.
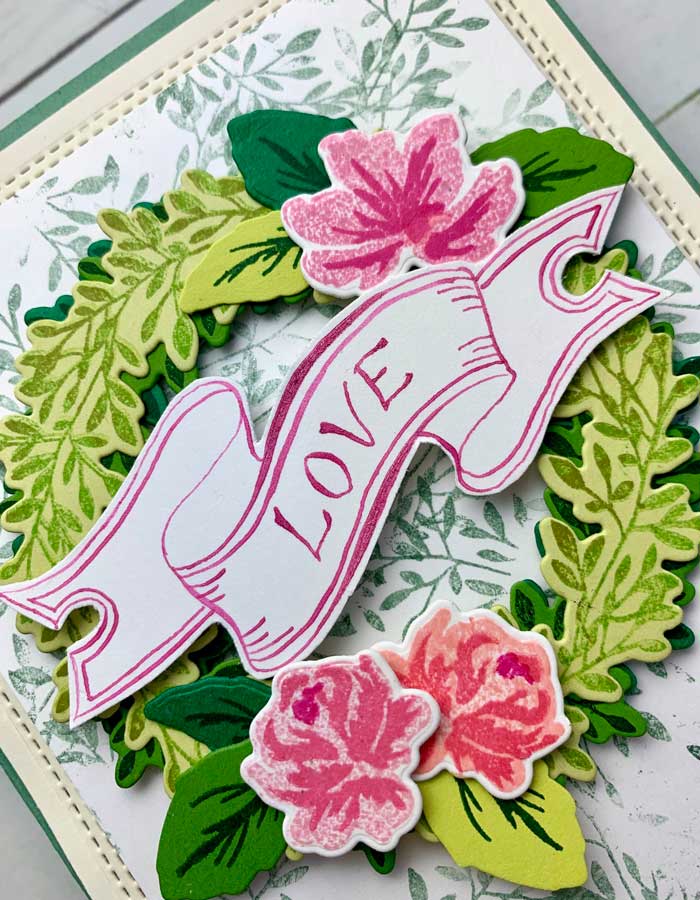
The leaves were cut out using the same three green cardstocks in the wreaths, then stamped with Pinefeather.
With the main pieces done, I worked on the backgrounds. The first background was the cream one. I used Vintage Cream cardstock and cut a panel using the Lawn Fawn Double Stitched frames. This panel was then adhered to an Ocean Tides card stock card base.
Next was the leafy background. This one was created by first inking the wreath stamp with Ocean Tides ink, then pressing small sections of a white cardstock panel onto the wreath stamp using my finger. Then, rotating the panel around the leafy wreath and reinking when necessary until all was covered.
With the leafy background done, I popped it up with a foam panel on the back, then pressing it on top of the cream stitched panel. The wreath was now added with a bit of foam tape, along with the flowers and leaves.
The final piece remaining was the banner. I love banners so I fashioned this one after one I saw on Instagram. I wish I had kept the artist’s name so I could share it with you but sadly I didn’t. 😔
Anyway, to make it, I first drew the banner on a piece of copy paper, traced over it with a black marker. Next, I placed a piece of Bristol paper on top (Bristol accepts ink nicely with no bleeding), turned on my light pad so I could see the image, then traced the banner using a drawing pen and nib (see supply list). For the ink, I used the beautiful Dr. Ph. Martin’s Rose Lame calligraphy ink. Once dry, I fussy cut it out, added some foam tape, and pressed it on top.
And there we have it! All done and ready to send! ♥
Goodies Used: