Lovely Peonies
Hi Creative Friends,
I am trying my hand at the new Into The Blooms: Peonies die set by Papertrey Ink today. This die set creates big, beautiful blossoms that you can color and arrange as you like. Here is my card design.
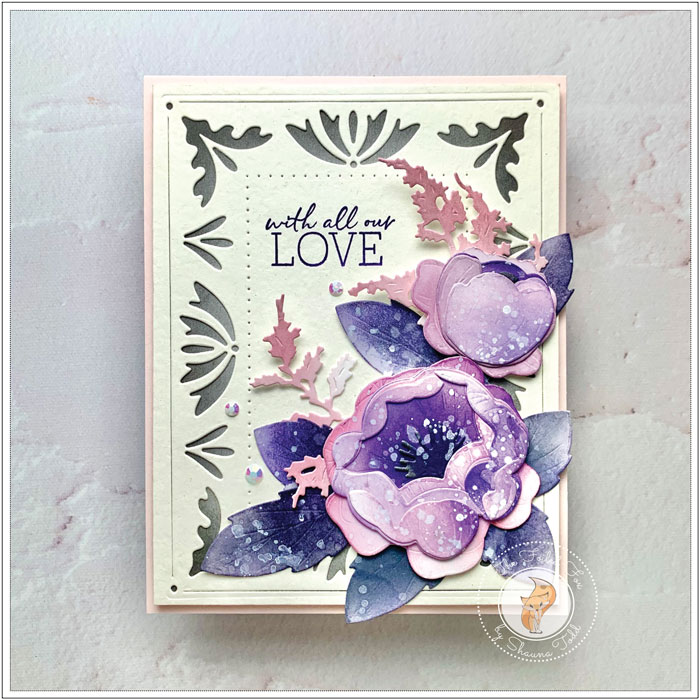
In real life, this card has a very vintage-y feel and the grey peeking out from the decorative background is soft and blends well. I hope it communicates the same to you… even though, sometimes the camera decides to see it a different way (ugh!).
With that said, let’s jump in with the steps to create this design…
I started out by cutting out all the pieces of the peonies and lots of leaves from white cardstock. There are many pieces to the flowers, especially the large peony so I recommend sorting out which pieces go with what flower first. The flower layers stack on top of one another to build depth and interest so I temporarily arranged and stacked them together just to see how they all go together.
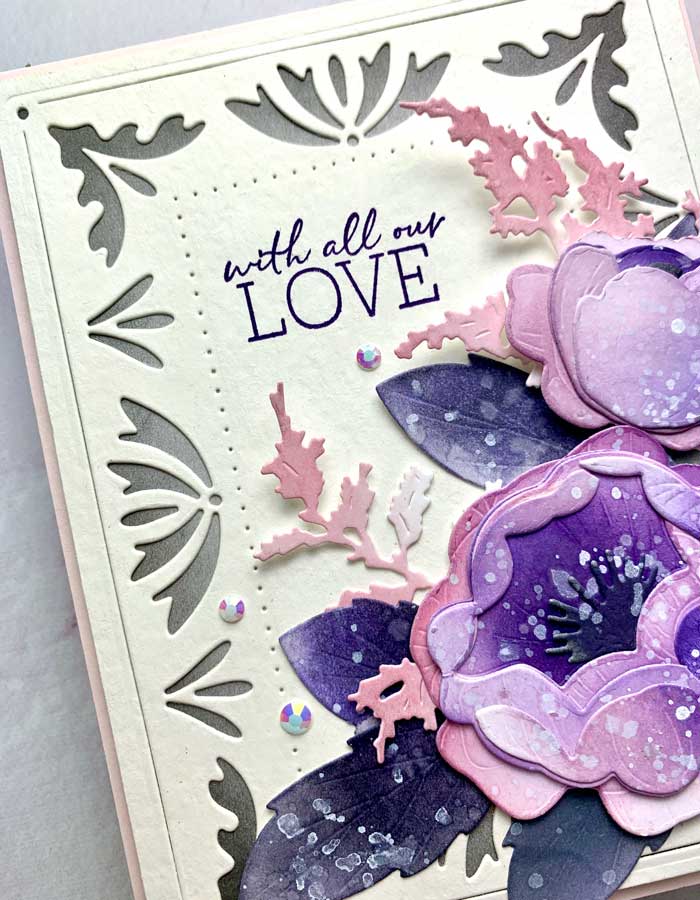
So, now that I had an idea of the construction of the flower and with a blending brush in hand, I began with the base layer of the large peony. I colored it with primarily Spun Sugar and a little Villainous Potion distress inks. For the next layer, I used mostly the Villainous Potion distress ink since this layer will be the inside center of the flower. For the remaining layers, I used these same colors plus some Shaded Lilac distress ink too. The very center stamen piece was colored with Black Soot distress ink.
The small flower was colored the same way but I used more of the Spun Sugar and Shaded Lilac. The leaves were colored, believe or not, with Black Soot and a touch of Villainous Potion.
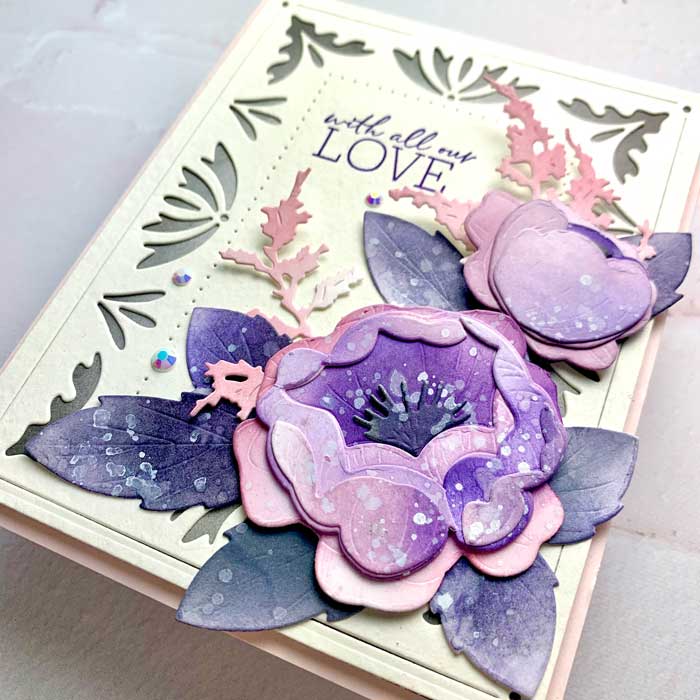
When the coloring was done, I stacked and glued all the pieces together, then laid the finished flowers and leaves on my work surface and lightly splattered them with a very loose and watery mixture of Dr. Ph. Martin Bleedproof white ink and water. I left them to dry while I made the rest of the pieces.
I started with a white card base and covered the whole front with a Pale Rose panel. Next, I cut a panel from Vintage Cream cardstock, then cut out the decorative frame using the Border Bling: Joy die. At the same time, I cut out a panel the same size as the decorative border from Antique Gray cardstock and colored the edges with Weathervane ink.
The decorative frame was stacked and glued to the gray panel and a piece of foam was added to the back before mounting it all to the card base.
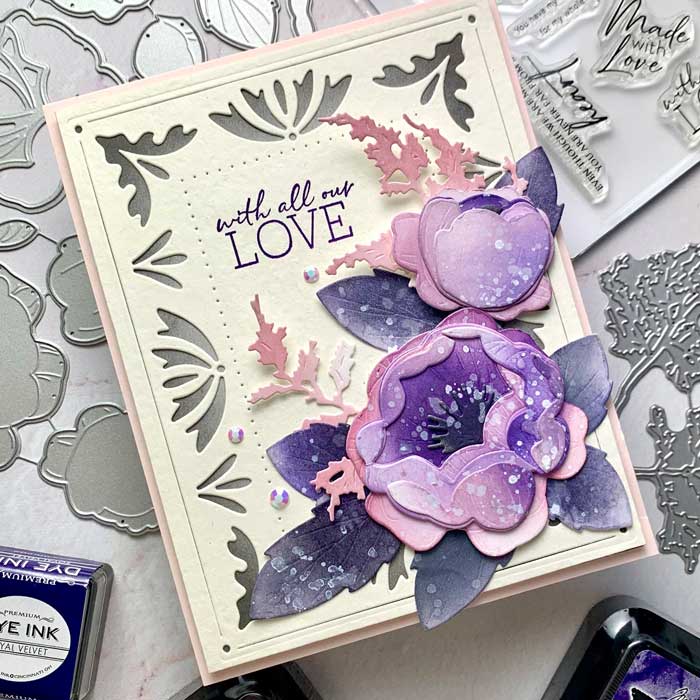
The flowers and leaves were arranged and glued in place (I used a square of foam tape for the flowers). To add a little lacy bit, I cut out the fronds from the Juniper die set by Penny Black, colored them with a little Spun Sugar distress ink, then tucked them in here and there.
Finally, I stamped a sentiment from the Just Sentiments: Love stamp set using Royal Velvet ink and added a few jewels to complete the card. ♥
Goodies Used: