Magical Butterflies by Alexander Renke
Hi Crafty Friends,
Butterflies are so beautiful and elegant and that is exactly how Alexandra Renke made these Magical Butterfly dies. These butterflies have expansive wings with delicate cutouts to create a lovely graceful look. This card design uses vellum and alcohol inks to capture this elegance.
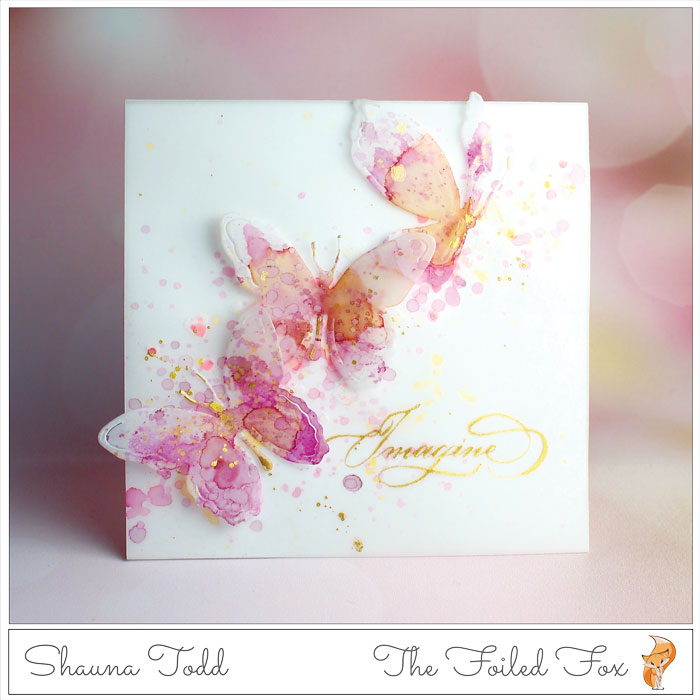
This card design is akin to a chiffon dress, light and airy with a beautiful overlay. With the use of our 40lb. vellum, which is stiffer than some, I have created a vellum overlay and cut out the butterflies for the same effect. Here are the step-by-step instructions.
I started with a square white cardstock card base, then cut a piece of vellum the same width and height of the square PLUS one inch. This one inch will be used to overlap to the back by scoring across the width one inch down from the top of the vellum and folding it. Now, the vellum should cover the front exactly with one inch of the vellum hanging over the top of the card base.

But before I secured the vellum, I had to decorate the front. To do this I first made a stencil from the Penny Black Hearts Galore die by cutting the heart spray out of clear plastic, then placed the clear plastic stencil over the top of the vellum and spread on Nuvo Moonstone glimmer paste. Once the front of the vellum front was stenciled, I let it dry. Meanwhile, I cut out the butterflies from the vellum paper.
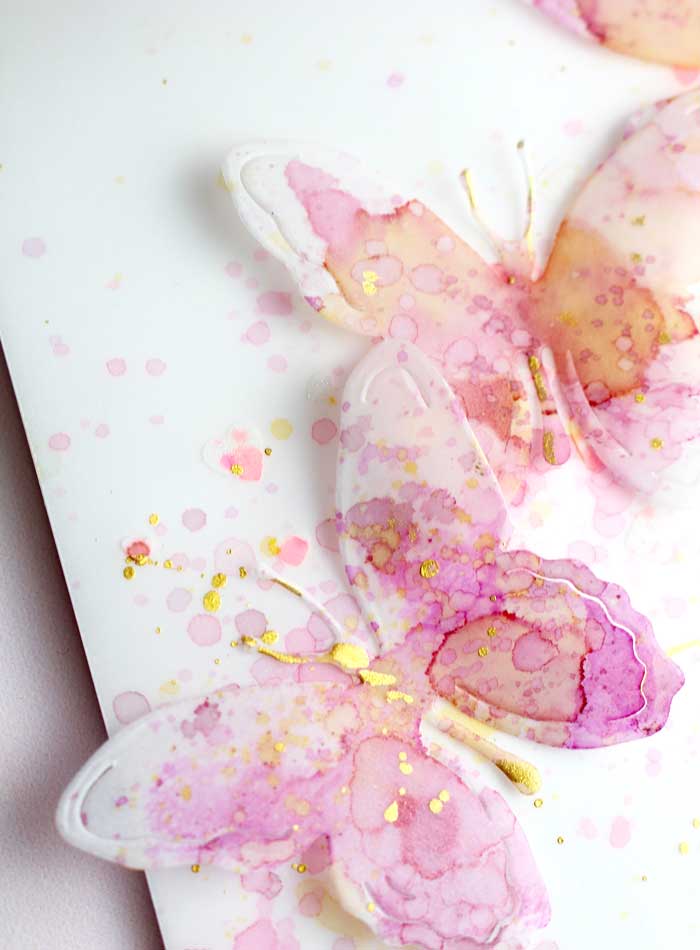
With the butterflies and the stenciled front on my tempered glass mat (one of my very favorite tools), I splattered a little alcohol blending solution over the butterflies and front. I then squeezed a small circle of each of my alcohol inks (Flamingo, Plum, and Butterscotch) onto my glass mat. Then, using the same brush, I splattered the inks onto the vellum front and the butterflies. I was very careful not to over splatter since I wanted a lot of white space on the card. To add an extra special element, I splattered gold ink from the Finetec Artist Mica watercolor colors.
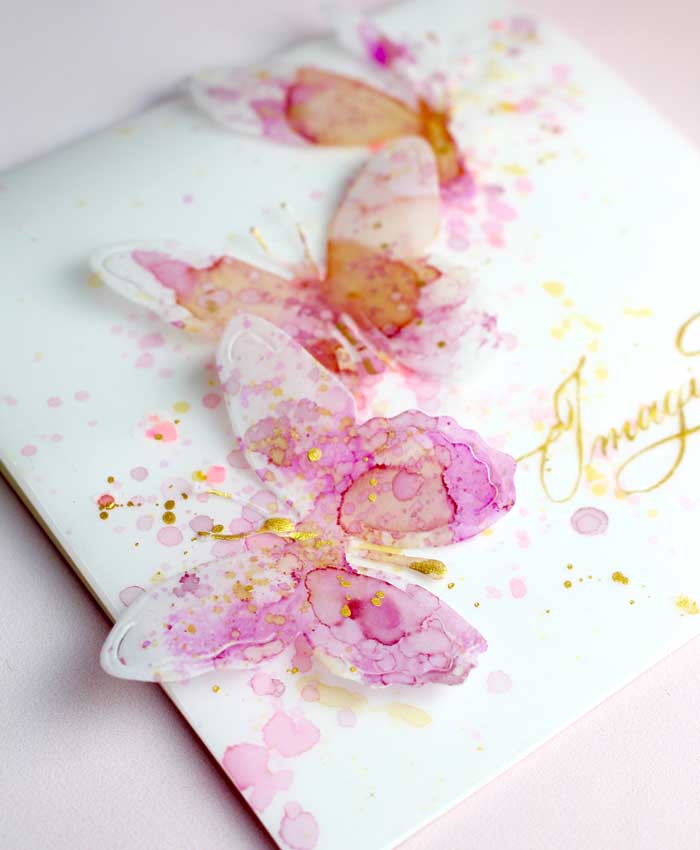
Now, it is time to assemble and add the sentiment. The overlay was attached to the back of the white card base with glue dots (this was a tidy way of adhering the vellum to the card base). Then, with micro glue dots, I added the butterflies. Finally, I lettered, with the Finetec gold ink used earlier, the sentiment. Of course, if you don’t want to hand letter, select your favorite sentiment and heat emboss it with gold embossing powder.
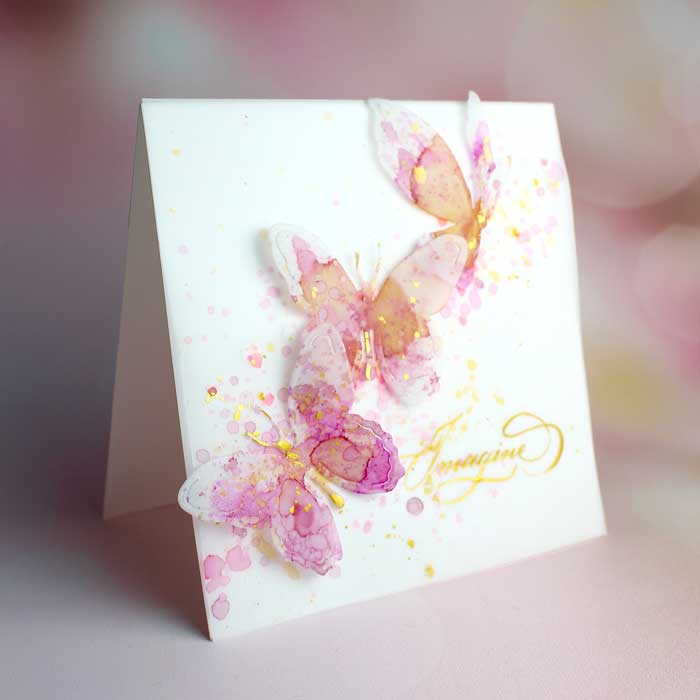
And, there we have it, a beautiful and elegant card suitable for any occasions but especially for a wedding or anniversary. ♥
Goodies Used:
Sorry, the comment form is closed at this time.

March 4, 2019
Jean Marmo
A stunning card!
March 5, 2019
Angela R
I LOVE this card. Thank you for your tutorial.. I have to get a few supplies to make it now…
March 15, 2019
Clelie
This card design and ‘work’ is beyond gorgeous! It is AMAZING!
May 12, 2019
Amy
This is so beautiful!
May 15, 2019
Tracy C
This is stunning! Did you have any trouble with your gold finetec paint drying on the vellum?
May 16, 2019
Shauna Todd
Thanks for your kind words. When I have usedFinetec paints, I have found they dry very quickly.
October 24, 2019
Sandra Carter
WOW! This card is absolutely stunning. I love the soft and delicate look of the butterflies. Actually, I love everything about this gorgeous card. I had never thought to die cut those butterflies vellum let alone add alcohol inks. . Whoever the lucky person is that gets this card will be thrilled! Thanks for the inspiration x
October 29, 2019
Shauna Todd
I am glad you liked it! Alcohol inks are fun to color vellum with.