Magnificent Bloom
Hi Creative Friends,
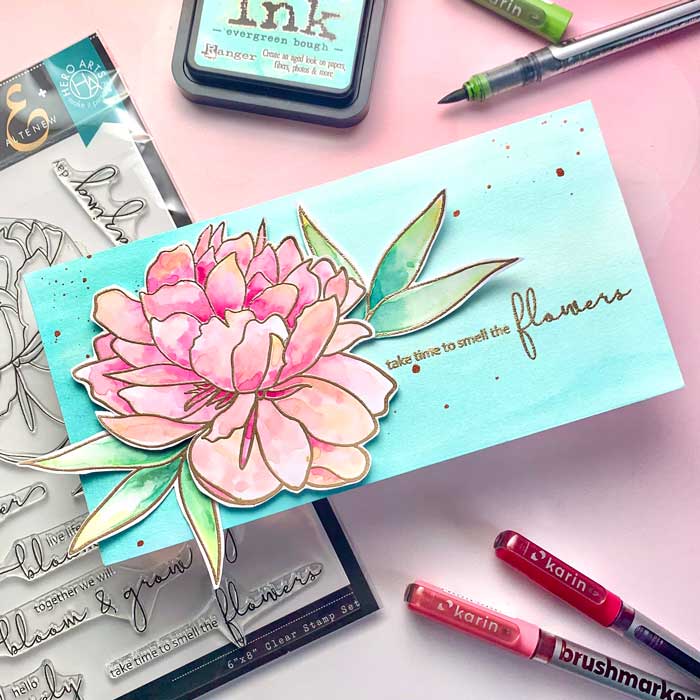
We are sharing a card design featuring an amazingly magnificent bloom from the Bloom & Grow stamp set by Hero Arts and Altenew, a collaborative effort. All you need is this stamp set to create a showstopper of a card.
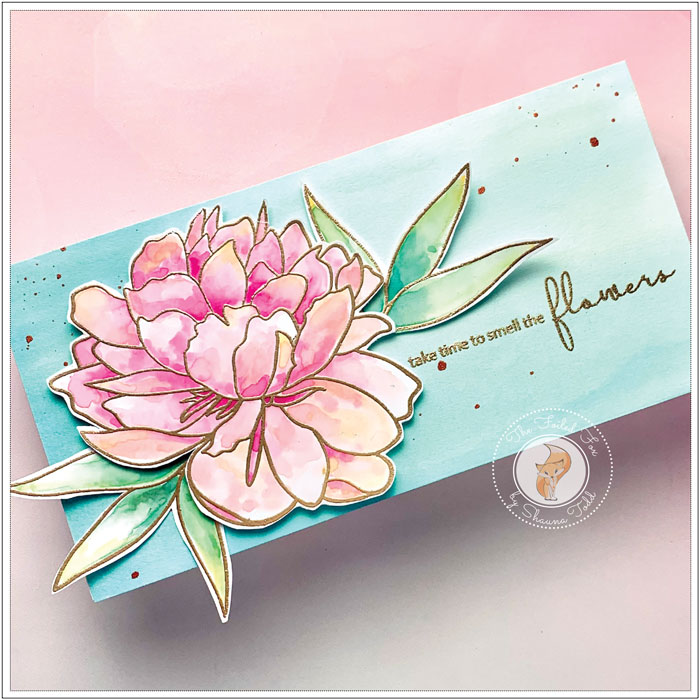
I started by creating the background. To do this, I used a slimline-sized piece of hot-pressed watercolor paper and brushed on a generous layer of water over the whole panel. Then, using a watery mixture of Evergreen Bough and a dash of Salvaged Patina here and there, I brushed on a light layer of color. I continued adding color until I was satisfied with the result, then left it to dry.
Next, I stamped the flower and a couple of sets of leaves onto slick photo paper. I have so much photo paper. It seems every time I order ink for my printer, they send me photo paper. So, since I had an overabundance of paper, I thought I would put it to good use. It is sturdy and stout paper, slick too, so it works great with my Karin watercolor markers (though, if you don’t have any photo paper, watercolor paper will work great too.)
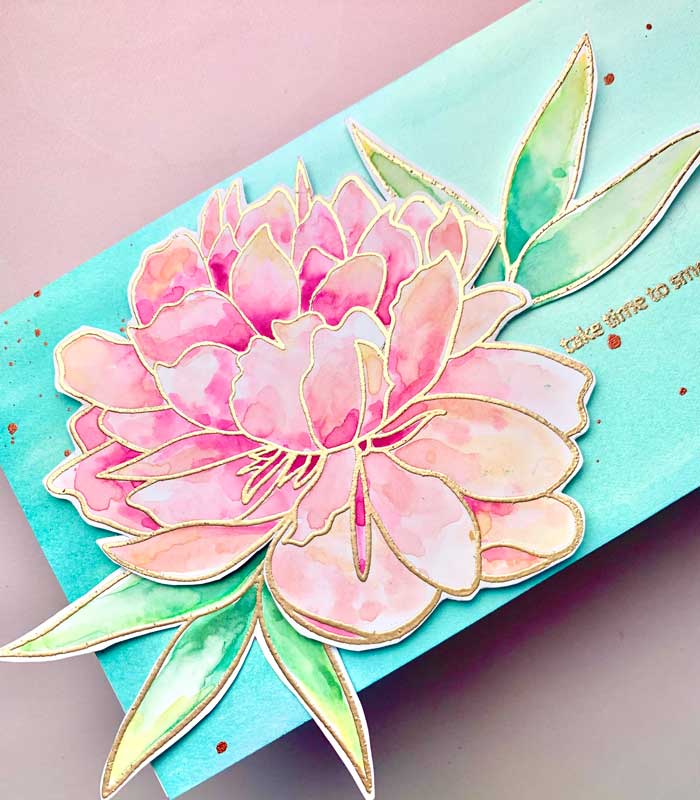
I stamped the flower and leaves with Versamark ink, then heat embossed it with gold embossing powder (be sure to always use anti-static powder so you don’t get embossing powder where you don’t want it).
With the flower and leaves stamped and embossed, it was time for coloring. I used one of my absolute favs, Karin watercolor markers. These watercolor markers are a marvel. Since they blend magnificently, you only need a few. I used a couple of pinks and the same with the greens.
Once the coloring was complete, I let it dry, then fussy cut out the flower and leaves.
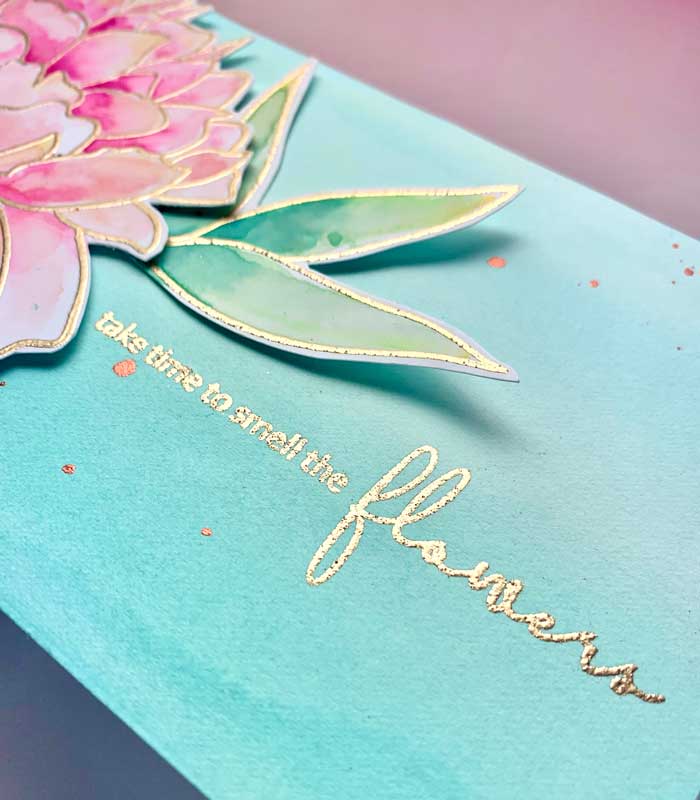
By this time, my background panel was dry. So, using one of the lovely sentiments in the stamp set, I prepped the area with anti-static powder, then gold heat embossed the sentiment. I also splattered dots of gold ink from my Finetec Gold & Silver watercolor set (see supply list below).
To finish, I made a white card base the same size as the background panel, then mounted it to the card base. Next, I popped up the flower with a bit of foam tape and tucked in the leaves. This completed this splendid card.
I hope you enjoyed this project. It is always fun to paint a huge blossom like this one and have it be the star of the show! ♥
Goodies Used: