Missing Your Smile
Hi Crafty Friends,
It is always such a pleasure to welcome Lisa Tilson of My Card Trip to our blog. She is fabulous! She is sharing a beautiful card using the magnificently designed, Miss Your Smile stamp and stencil set by Pinkfresh Studio.
After you are finished swooning over Lisa’s card design, be sure to pop over to ner blog!
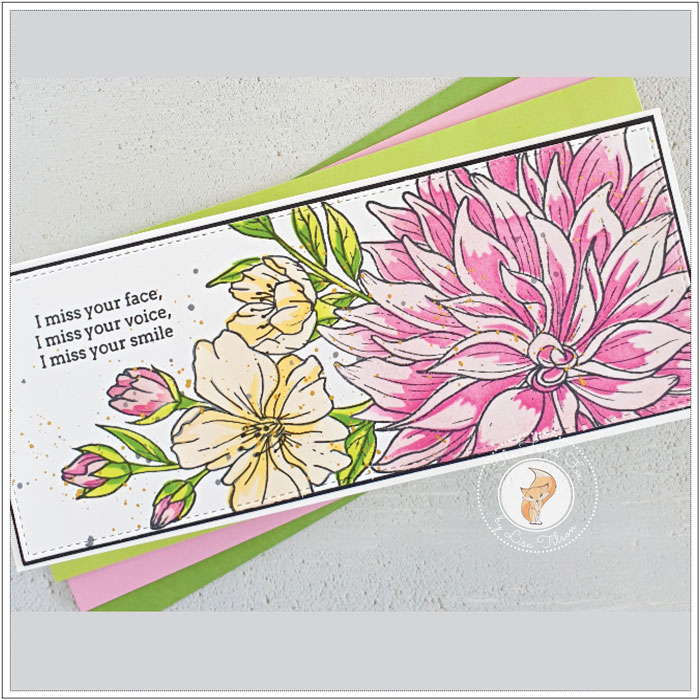
Hello everyone, Lisa here today to share another card with you using the gorgeous PinkFresh Studio Miss Your Smile set. A few weeks ago, I shared a card on here using the set with just it’s outline stamp which I had coloured with Copics. However, there are layering stencils that you can also use with this image, so that is what I am doing today.
I really love using layering stencils – they are super easy to line up and it is a quicker way of colouring your card. It’s not always possible to spend a few hours colouring with markers, pencils or paints, so these stencils will give you a beautiful panel in a lot less time!
To begin, I took a panel of 80lb Neenah Solar White cardstock and stamped the main floral image onto it using Memento Tuxedo Black Ink. I then taped the panel to my work surface and lined up the first stencil. They are easy to line up as they have little etchings in each corner. They are also numbered so you know which order to use them in.
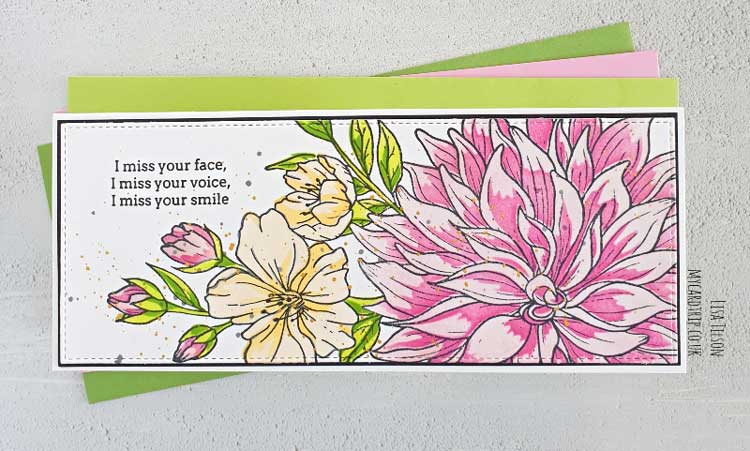
I took PTI Lovely Lady and PTI Vintage Cream inks and blended those through the first stencil using a mini ink blending tool. I removed the stencil and lined the second one up and applied PTI Raspberry Fizz and PTI Harvest Gold through that. Those two stencils take care of the two flowers.
The third stencil is for the first colour on the leaves and for this I used PTI Limeade Ice. I then lined up the fourth stencil and blended PTI New Leaf through that. It’s super easy to do. The hardest bit is just deciding which lovely ink colours you want to use! I sometimes use teals for my leaves, or grey, just for something a bit different.
I cleaned off all the stencils and then took the MFT Slimline Starter Die-namics set and used the stitched rectangle to die cut the panel. I then popped the panel into the MISTI and stamped a sentiment from the set using Versafine Onyx Black ink.
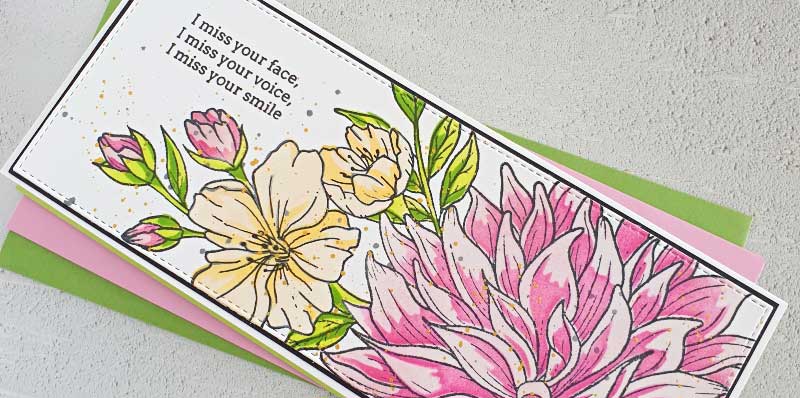
For extra interest, I smooshed some Black Soot Distress Ink down onto my work surface, spritzed it with a little water and then added some black splatters carefully over the panel. I thought it would be nice to add a little bit of gold in too. So, I grabbed my Gansai Tambi Starry Colours paints and splattered some gold over the panel before leaving it to dry.
The panel was simply matted onto some black cardstock and then onto a Neenah Solar White 110lb base card measuring 3.5” x 8.5”. And there you have it, a super easy and pretty card. You could definitely make a bunch of these quite easily, changing the sentiment each time and maybe ink colours if you were inclined. I hope that this gives you some more inspiration for this lovely set.
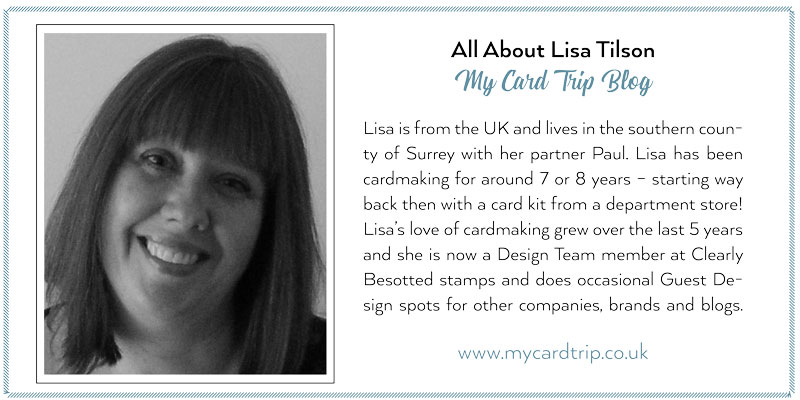
More about Lisa:
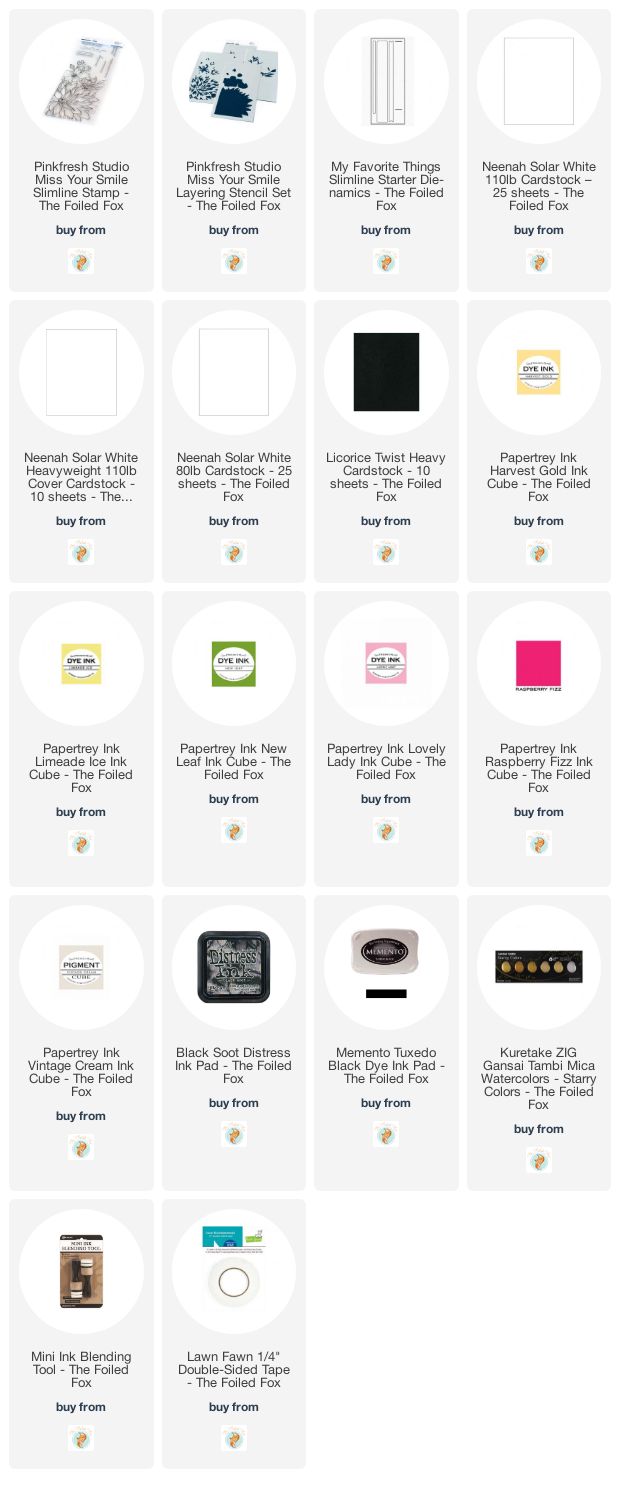
Goodies Used: