Movie Popcorn Card
Hello Friends,
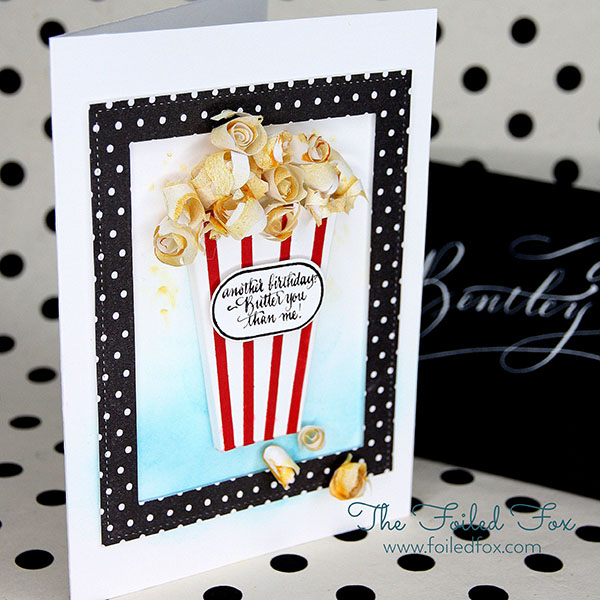
My son-in-law loves popcorn – you might say he is a popcorn aficionado. He doesn’t just love popcorn – he is a fantic and goes all out. He tests out every kind of popcorn and popcorn popping machine out there on the market. So, when his birthday was coming, I knew what I needed to do – make a Movie Popcorn Card, accompanied by a grand selection of carefully curated gourmet popcorn to go with it, of course!

To start, this is a 5″ x 7″ card. I wanted to make sure that I had the room to really do this card justice. Using Neenah 110lb. Solar White card stock as a base, I cut a black polka dotted rectangle frame from the My Favorite Things Dots & Stripes collection and Lawn Fawn’s large rectangle dies (use the biggest one), added foam tape to the back so it would ‘pop’ up-but for now, I just positioned the frame where I thought it needed to go without adhering it yet – that comes later. This gave a reference point where the blue ‘base’ of ink the popcorn bag should sit upon.
By the way, before I go any further…just so you know, you don’t have to try to remember the supplies used. A list of everything used is always given at the end.

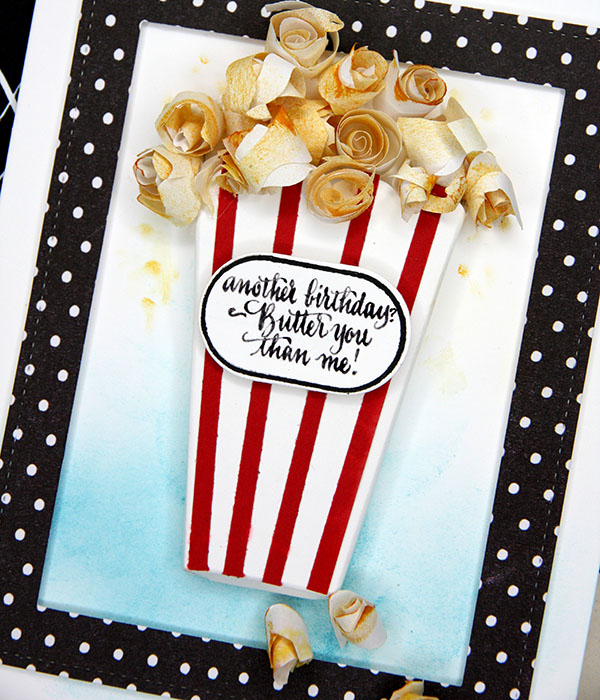
Now that I had a reference point, I rubbed on Tumbled Glass Distress ink with a blending tool, fading as I went up to midway where the box would sit. Then, I made the box.

I created the pattern for this silly box out of Neenah 110lb. white card stock. Since I went to all the trouble to make the box pattern, I am happy to share it with you…the PDF link is below in the supply list.
Cut the box out, then score and fold where the dashed lines are. That second fold on the sides acts as a tab to fold under and adhere to the card. Be sure you fold under the bottom of the box too, otherwise you will have a gap at the bottom since this box has a bit of dimension to it. Add the red stripes by cutting 1/8″ strips of red card stock, add your favorite adhesive for small areas to the strips and adhere to the box, trimming the ends to match the length of the box. Now add double stick tape to the tabs that you previously folded under, position and stick the box to the card.

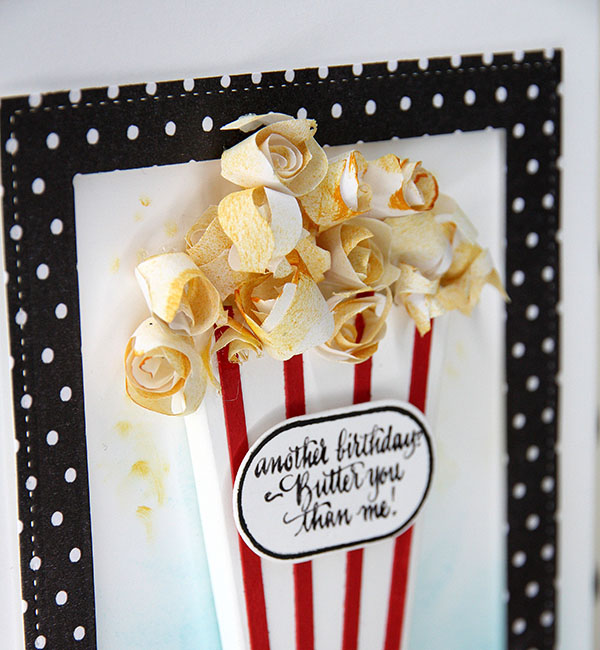
At this point, I pressed the polka dot frame in place. Now, the making of the popcorn…Making the popcorn is quite easy. First, with an ordinary piece of copy paper, I randomly colored both sides of the paper using a blending tool and Antique Linen and Wild Honey distress inks. Then, cut a bunch of strips similar to the pattern provided and rolled them up. For easy rolling, I used a Quilling needle but it is just as easy to roll around a small dowel or tweezer end… anything to get a fairly tight roll. To add a little contrast, after the curls of paper are rolled, I used sponge daubers (see in the supply list – these are so handy for applying little bits of ink or if you don’t have them on hand, you can use a Q-tip) and I randomly added tiny bits of darker highlights with Rusty Hinge distress ink.
With all the curls done, position the curls to resemble popcorn and adhere. I used The Ultimate Super Glue for its great sticking power and a toothpick and just added glue just enough to stick to where I wanted it. It doesn’t need much. The paper is very light weight.
The final step to the card was the sentiment. I stamped the label frame on 110lb. card stock – then, cut the tag using the Lawn Fawn Just for You Labels Lawn Cuts and hand lettered it. You can use whatever sentiment you like. My son-in-law and I are always kidding one another so this saying worked well!
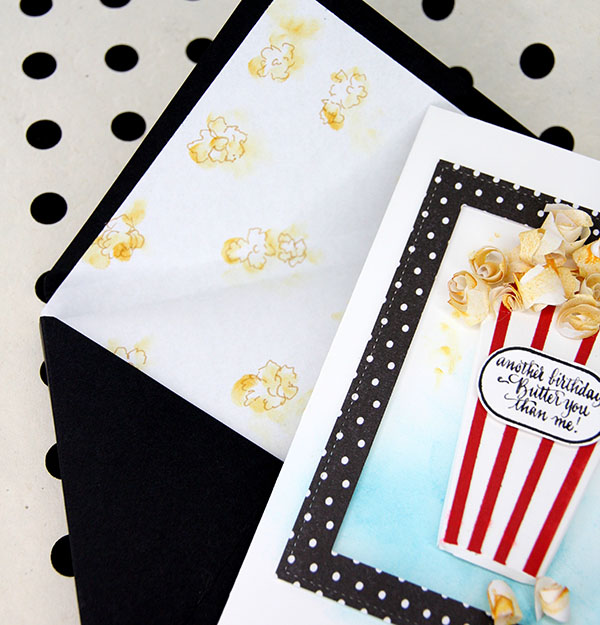
I nearly always make an envelope using the Envelope Punch Board. I like to use 65lb. paper so it is easy to score and fold. And because I am truly crazy, I made a liner for the envelope too. I like to use a very lightweight paper for the liner so it bends and creases easily. Copy paper is perfect for this. I just drew silly little shapes with a light brown distress marker that resembled popcorn (I thought anyway – I am no artist, believe me!), colored them with same distress ink as before. Then, adhered the liner to the envelope.
• A helpful hint if you have never added an envelope liner before, I find it works best if you use a stamp runner or a micro-dot adhesive runner and only add the tape to the flap of the liner, then position the liner in the envelope and press down where the tape is.
I hope you enjoyed this card. Thanks so much for visiting!!
And now,
Viola! it’s done.

Supply List:
| Popcorn Box pattern |
Calligraphy Supplies:
Sorry, the comment form is closed at this time.


July 7, 2016
Sue Malone
I can smell the popcorn….YUM! I love the sentiment too. Thanks so much for the box pattern. I can think of all kinds of ways to use it. With just a few tweaks it could be a vase with flowers coming out.