Posted With Love
Hi Creative Friends,
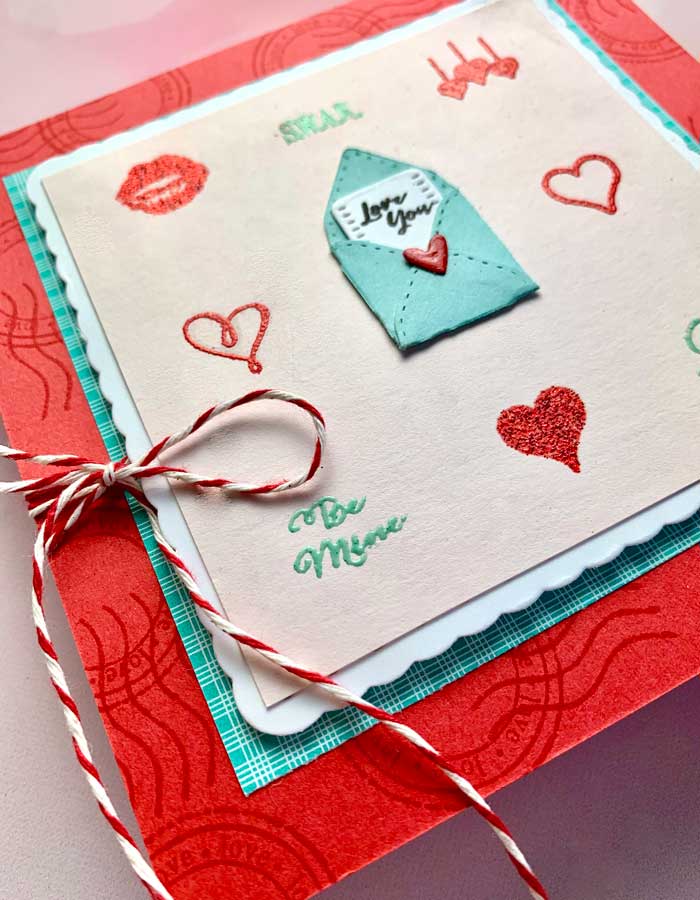
I am sharing a quick Valentine’s card filled with little Love icons and an adorable tiny love envelope. The Posted With Love stamp set by Penny Black is packed full of love mail stamps. When you combine it with Alexandra Renke’s Envelope Set of 4 die set it makes for a fun Valentine’s card design that is perfect for mass production if you like.
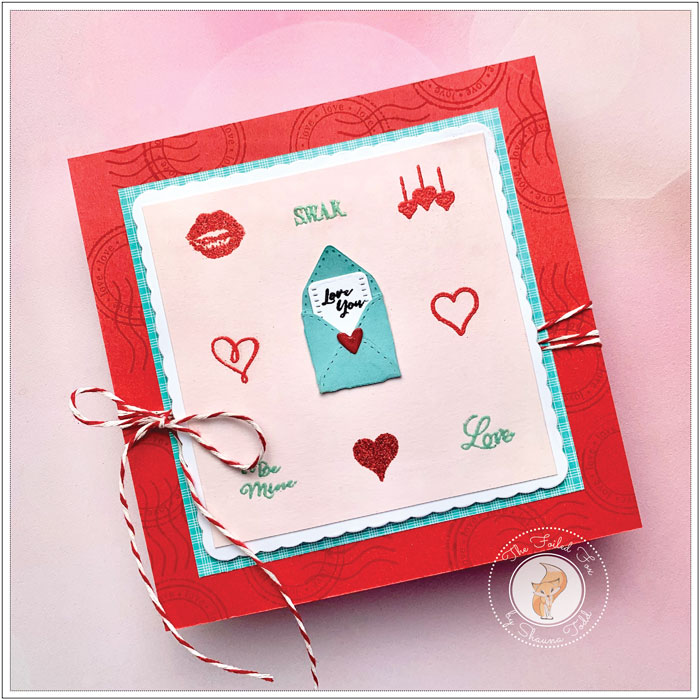
I started out with a 3.75″ square of Pale Rose cardstock, a few embossing powders, and the Posted With Love stamp set. I arranged the stamps in my stamp positioner so that they were equally spaced in three rows on the panel, leaving the center space blank.
The panel was first prepped generously with anti-static powder. Then I began by inking up the few groups of words with Versamark ink, sprinkling them with a blue-green embossing powder, tapped off the excess, and heat embossed them.
Next, using the same method, I heat embossed the open hearts with red embossing powder and finally heat embossed the solid heart and lips with a red embossing glitter (check out all the supplies used below).
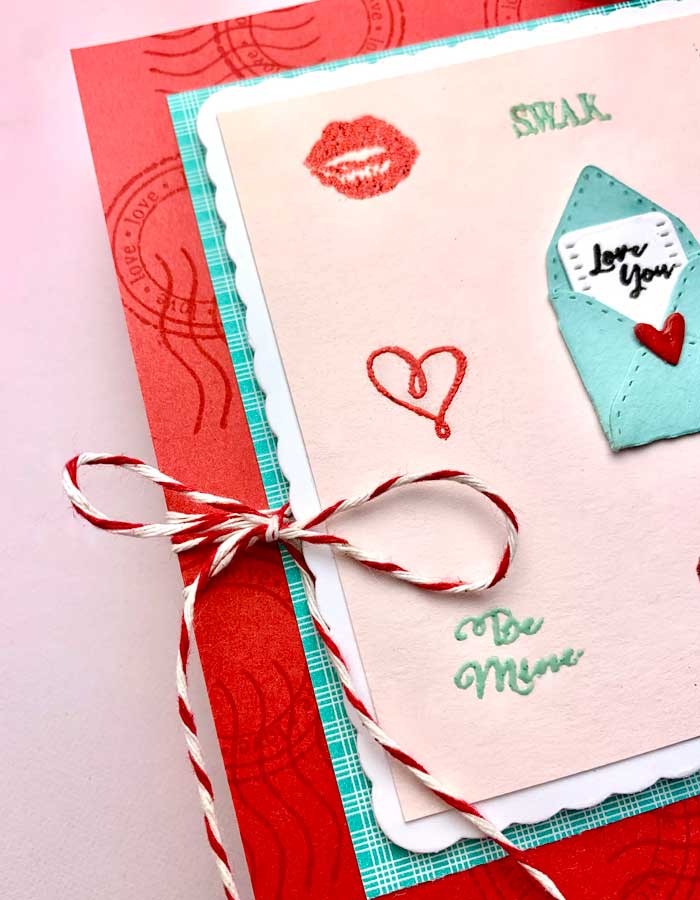
With all the embossing done, I set the panel aside while I made a tiny little envelope from Robin’s Egg card stock using the Alexandra Renke envelope set. The set comes with an itty bitty note insert too, which I stamped a small “love you’ sentiment using Versafine black onyx ink (by the way, there are several tiny sentiments in the Loads of Love stamp set that are perfect for this – see below).
The background was next. Using a 5.25” square of Peppermint card stock, I stamped the ‘Love’ postmark with canceling lines around the perimeter, using lobster-red ink. I also made a scalloped square panel using the Papertrey Scallop Stacker.
I know, I know… the Scallop Stacker is a rectangle but you can easily make it a square if you use a partial cutting process. Just cut the first quarter of the panel, then remove the die and paper from the die-cutting machine, move up the die and realign it so that the bottom of the die is now at the bottom of your square panel, line up the scallop cuts already made, then cut again, making sure to stop cutting once you reach your previous cut… then VIOLA! a scalloped square.
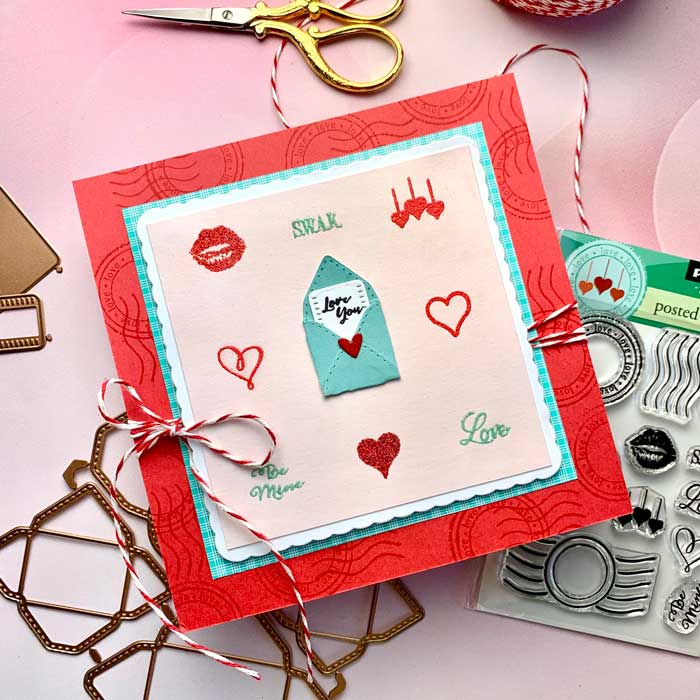
Time to assemble. A Hawaiian Shores Bitty Big plaid panel was added to the top of the Peppermint Red panel we made and set aside earlier. A few wraps of red baker’s twine were tied with a bow. Next, the Pale Rose embossed panel was applied to the top of the white scalloped panel, and a square of foam was added to the back to pop it up. This whole bit was added on top of the plaid paper. To finish, a tiny heart was applied to the envelope, then slathered with Glossy Accents to make a puffy, shiny heart. ♥
Goodies Used: