Storybook Christmas
Hi Crafty Friends,
Are you ready to have some more delightful fun with Joan Bardee of Dear Paperlicious? As always, Joan has knocked it out of the park with this super clever way to use the Storybook Christmas stamp and die set by Papertrey Ink – Ink To Paper. We just love her creativity!
Hello! Happy to be back sharing another card.
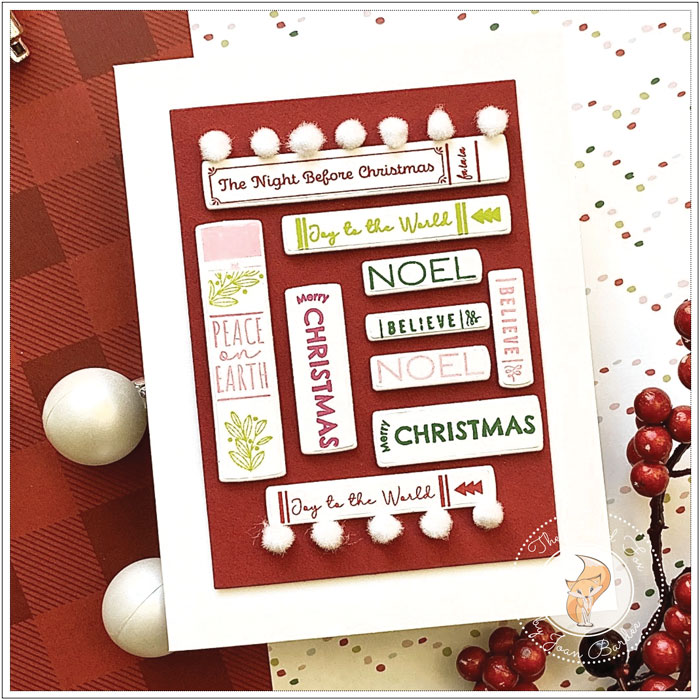
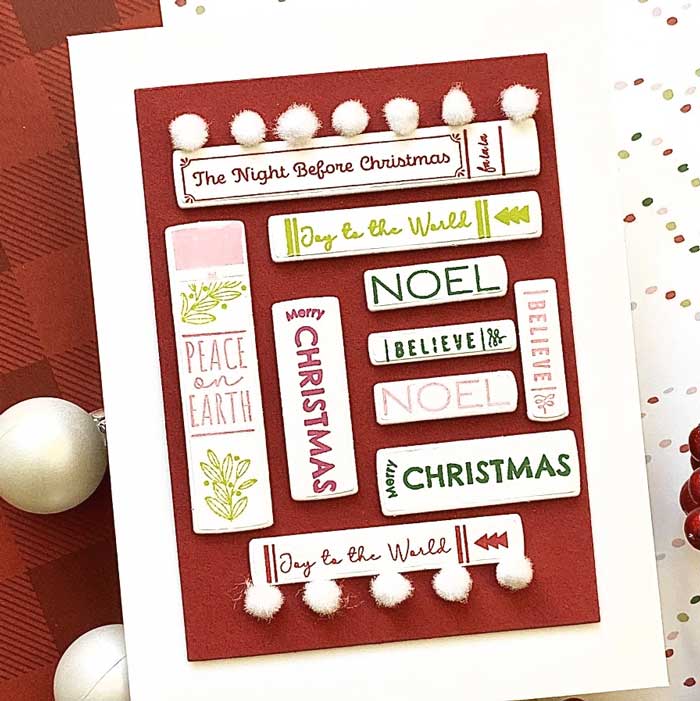
As soon as I saw Storybook Christmas, by Papertrey Ink, I fell in love with the fun images and coordinating dies. They’re designed to form a Christmas tree made up of stacked books, but I started with an even simpler graphic design.
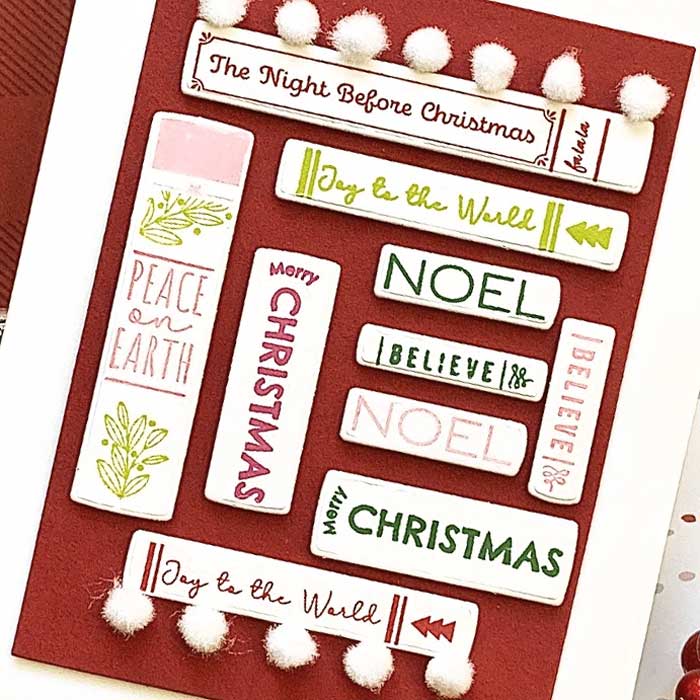
- My usual rule of thumb for Christmas cards is that if the design is non-traditional, use traditional colors, so I used 3 shades of red/pink and 2 shades of green.
- Stamped all the images on heavyweight white cardstock and then die cut the images – the dies in this set are open so they were very easy to line up.
- Trimmed a red cardstock panel. Set aside.
- Placed the die-cut pieces face up on grid paper and formed them into a rough rectangle. Fiddled around until I liked it — doesn’t need to be perfect (my life philosophy!).
- Took a large piece of light tack tape (like a large sticky note) and placed over all the images and flipped them over.
- Added strips of foam tape to the bottom of each image.
- Removed the liner from the foam tape, turned face up, and adhered to the red cardstock.
- It needed something, so it was time for a snack to think it over! Gems, sequins in the spaces in the design? Could have but went with some fun white pom poms on the top and bottom. Hint: use glue dots to adhere to pom-poms.
- Adhered red panel to an A2 card, scored on the left, and declared it DONE.
Get acquainted with Joan:

Goodies Used: