Sweet As Pie
Hi Creative Friends,
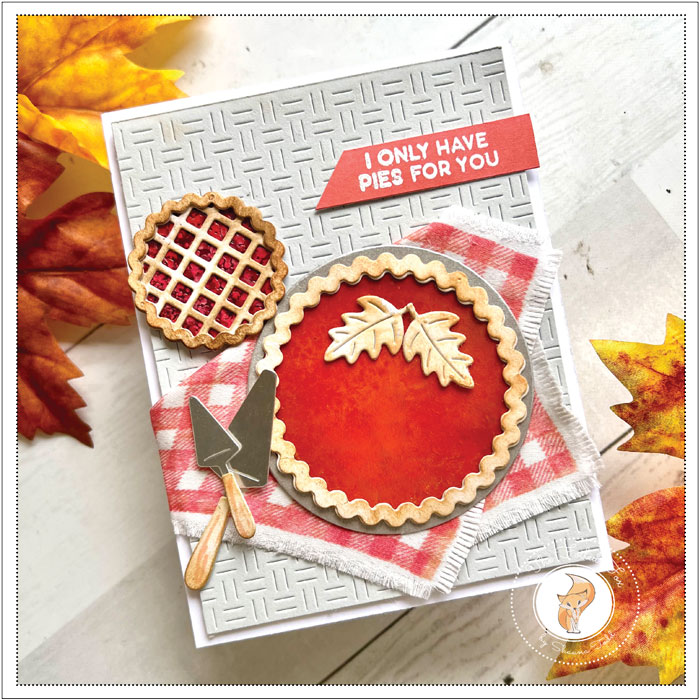
Today I am sharing a super fun card design using the uber-cute Sweet As Pie stamp and die set by Concord & 9th. I usually shy away from stamp and die sets that have food in them but this one is a blast to make… maybe ‘cuz I love to make pies? I don’t know but you have got to try this one. It is so much fun making the pies you like best and sending them on to a friend!
As I mentioned I had a blast making these pies, along with the charming tablecloth! So let’s jump in and get started.
I began by making an A2 white card base and a separate A2 white card stock panel. Then, using the new Basket Weave card front die, I embossed a piece of gray cardstock from the Concord & 9th card stock collection of papers. This collection of papers has so many luscious colors to choose from. There is every color of the rainbow.
I backed the basket weave panel with a thin foam backing, then applied it to the white A2 panel previously made.
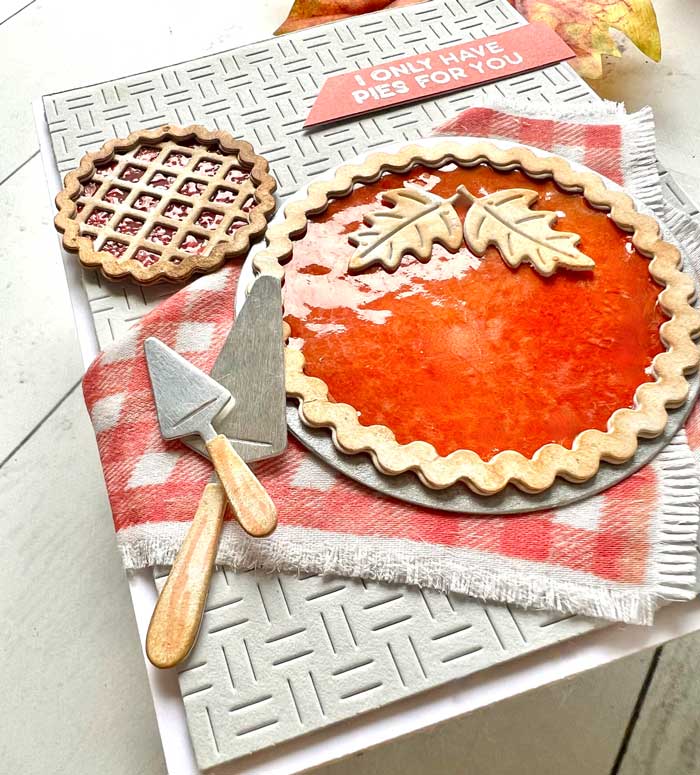
With the foundation done, on to the really fun stuff… making pies! I cut out the pie pieces for a large and small pie, using bristol paper with one exception. I used a piece of Spiced Cider paper from the Concord & 9th paper collection and cut out the large pie center, then blended on Spiced Cider ink on the edges to darken. For the small pie, I chose Honeysuckle cardstock and then colored it with Honeysuckle ink.
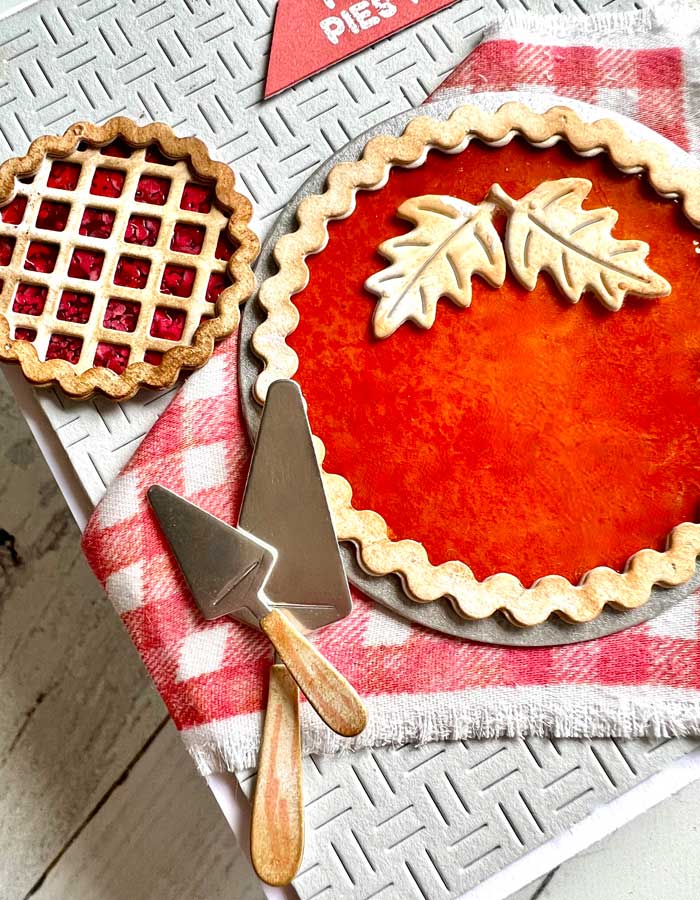
For each of the pie centers, I generously ink the tops with Versamark ink, sprinkled them with high-gloss clear embossing powder, lightly tapped off the excess, and heat set the embossing powder. Forget about using anti-static powder here. You want the embossing powder to stick everywhere!
This gave a nice glossy appearance but I took it a step further and repeated the process, then heat set the powder again. This gave a glistening top to my pumpkin pie, but I wanted a bit more for my berry pie so I added Cranberry on top of the embossed top, then ran it through my die-cutting machine. This created small ‘craters’ for the ink to sink into, making a delicious berry top!
Next, I worked on the crusts. Since these pieces were cut from bristol paper, I was able to easily blend on Rusty Hinge distress ink to resemble pie crust. At the same time, I cut out the ‘pie plate’ for the large pie and the pie servers from silver shimmery cardstock (see supply list). Then assembled the pies and servers.
Two things were left to make before assembly… the tablecloth and sentiment. The sentiment was stamped onto a piece of Honeysuckle paper and white heat embossed.
Making the tablecloth was extra fun! I used a piece of a worn pillowcase that I had saved for the backing on small quilted pieces. I ironed it flat, then mounted it in my stamp positioner. I used the Waffle Flower grip mat and it worked great!
I stamped the fabric using the checkered stamp and Honeysuckle ink, then die-cut it in my die-cutting machine using the matching die. It worked BETTER than I had even hoped – YAY!
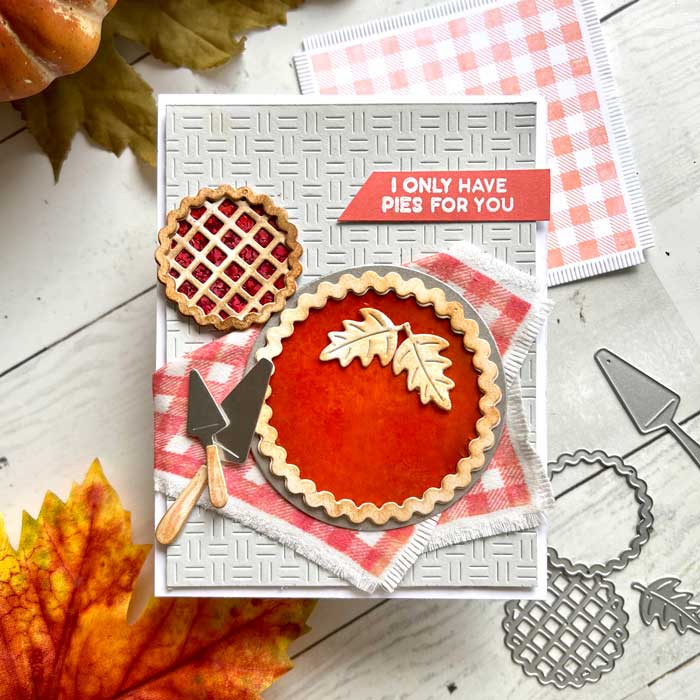
Ready to assemble, I arranged the tablecloth, then mounted it to the basket weave front, tucking the one side, and then applying it to the card front. Next, I arranged and mounted the pies and servers. The last step was to add the sentiment strip and I was all done!
Making these pies was so much fun and a lot less messy than making the real thing. I can’t wait to send it along to my friend! ♥
Goodies Used:
Sorry, the comment form is closed at this time.

October 30, 2023
Donna Mikasa
So charming Shauna! I love how realistic everything looks!
November 1, 2023
Shauna Todd
Thanks Donna! It was a blast!
October 30, 2023
LeAnne Pugliese
Yummy! I love every single thing about this….especially that amazing tablecloth! SO cute and delish!
November 1, 2023
Shauna Todd
Thank you kindly! Glad you liked it!