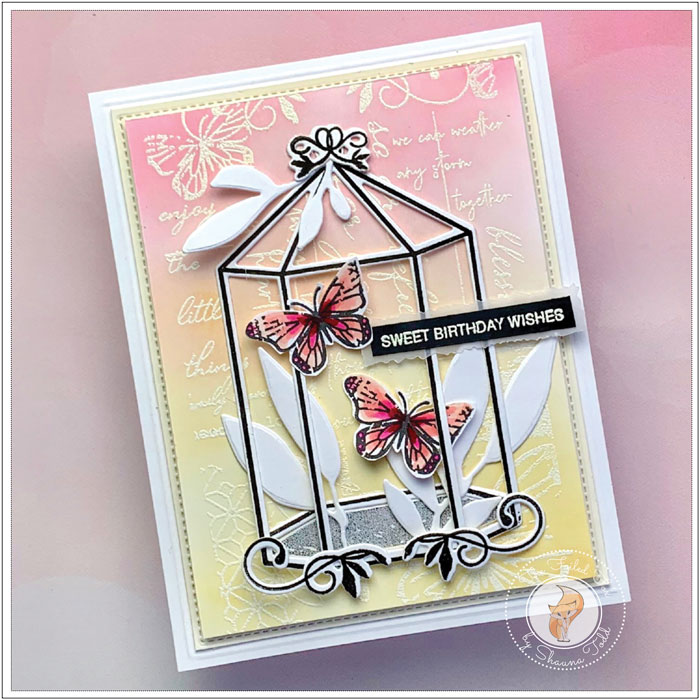
Vintage Flair Butterflies
Hi there,
Thanks for joining us today. We are sharing a new video that features the glorious Vintage Flair stamp and die set by Papertrey Ink-Ink To Paper. It has an awesome terrarium that you can decorate in so many ways, plus there is a companion piece, Vintage Flair Print that creates a gracious background.
To see all the steps, hints, and tips to create this design, be sure to check out the video below.
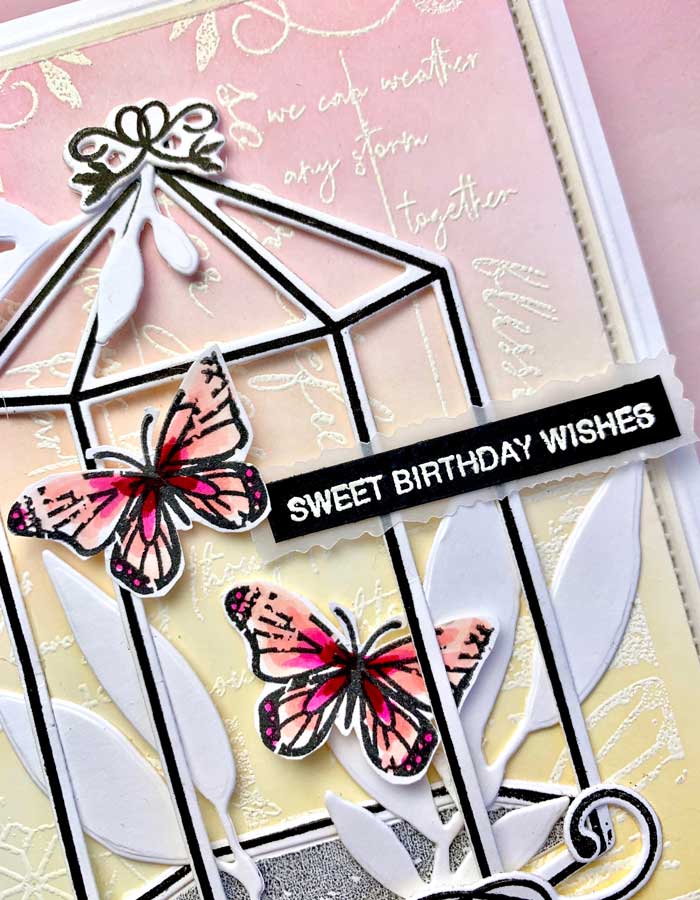
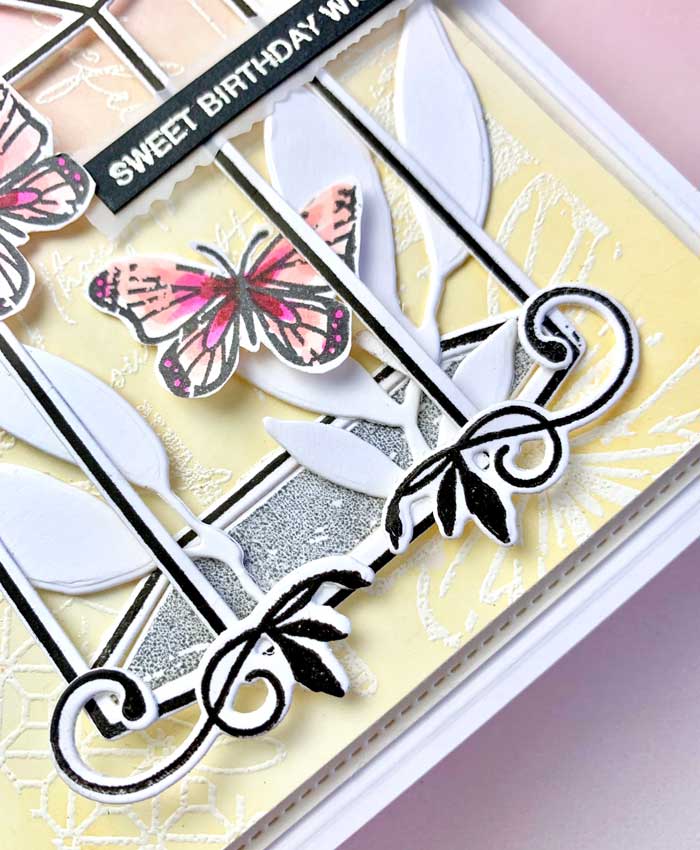
This is a multi-layered card design starting with stamping the Vintage Flair Print stamp onto a white card stock panel and heat embossing it with Vanilla White embossing powder (check out the complete supply list below). The panel was then colored by blending on a few distress oxide inks: Scattered Straw, Dried Marigold, Spun Sugar, and Worn Lipstick.
With the Vintage Flair panel embossed and colored, the layers went like this: first, a white card stock card base, a blind-scored white panel, a Vintage Cream card stock panel that had been die-cut with a stitched line using a die from the Lawn Fawn Stackables was added, and finally the colored Vintage Flair Print panel.
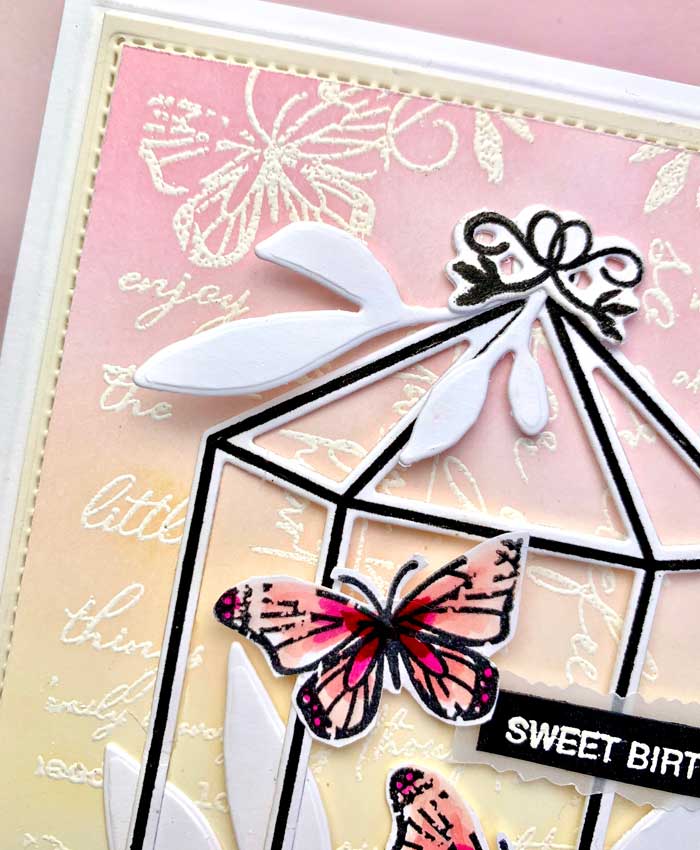
Now that all the layers were stacked together, it was time to decorate the card front. To do this, a terrarium was stamped with Versafine Black ink (along with the scrolly ornamental bits), then cut out using the matching dies. I also had cut out some leaves from white card stock using the Floral Delicacies die set.
The butterflies were stamped with a Copic friendly ink, then colored with a few Copic markers: R01, R20, R32, RV04, and R39.
All these elements were gathered together and arranged on the front panel. To finish, the “Sweet Birthday Wishes” from the Just Sentiments: Tagged mini stamp set was stamped with Versamark ink and white heat embossed. A thin strip of vellum was cut with some deckle scissors, mounted on the back of the sentiment strip, and then placed on the card front.
VIOLA! Everything was complete and the card was ready to send! ♥
Goodies Used: