Warm and Festive Greetings with Karin markers
Hi Crafty Friends,
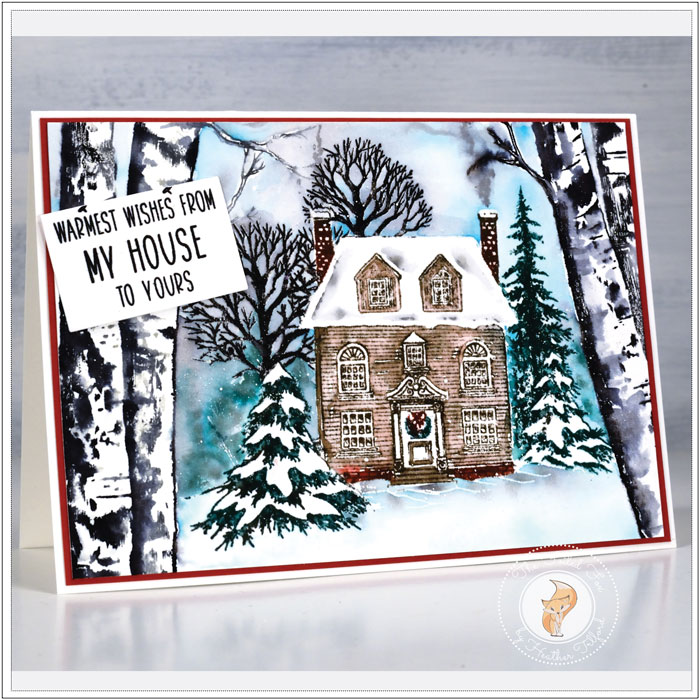
We are so delighted to share a charming holiday scene by Heather Telford . She has created a warm and festive card design using the fabulous Karin water-based markers (a new addition in our shop-YAY!) and some wonderful stamps by Penny Black. Take a look at how beautiful this inviting scene is and how she makes these amazing markers sing!
I am very happy to be here on the Foiled Fox blog today especially as I have been trying out the Karin brush markers and they are a treat! The Foiled Fox sent me the box of 26 markers (they come in packs of 12, 26, 60 & 72) and I plan to try them for a variety of techniques. They performed beautifully on this first technique and I am very positive about future projects.

The Karin brush markers are water-based ink-filled markers. I will be using them for a variety of techniques such as drawing, coloring, blending, and lettering but I decided to try them first direct to stamp. The tip of each marker is brush shaped but does not have bristles. It is a flexible tip which makes it suitable for lettering but made from nylon which makes is generally stronger than a felt tip. The ink inside the markers is highly pigmented so a little goes a long way. It also meant that inking a stamp did not require heavy pressure. I don’t want to damage the brush tips when applying ink to stamps so I was very happy to be able to lightly apply the ink to the stamps and see it appear bold and blendable once stamped.
I stamped the PB ‘birches’ stamp twice on hot pressed watercolor paper inking it with the ‘black’ and the ‘neutral grey 3’ markers. I gave the stamp a spritz of water before stamping as I usually do if I’m after a watercolor effect but I could have skipped that step as the ink from the markers stays wet after stamping and was easy to blend into the tree trunks with a paintbrush and water. After finishing the birches I placed a piece of frog tape along the edges to mask them before I stamped the PB ‘warm reception’ stamp.
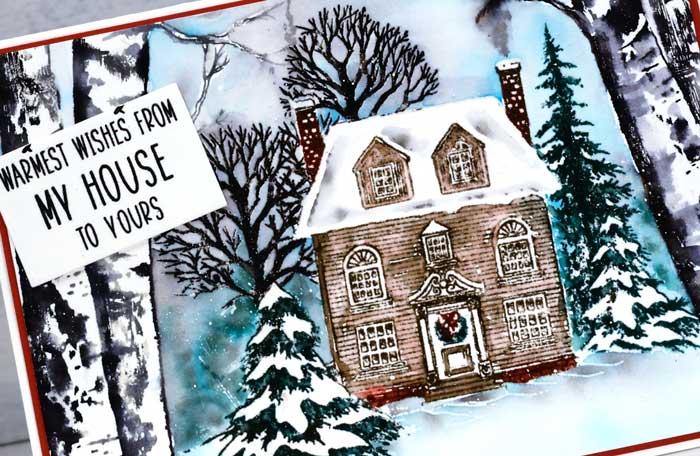
I had the panel in a stamp positioner so I could work with one or two colors at a time on different parts of the house stamp. I inked the bare trees in black first and was happy to see how dark the ink was after one impression. Next, I moved onto the evergreen trees and chose the lush green marker. The lush green is definitely the darkest of the greens in the 26 pack but I wanted it to be even darker so I held it tip to tip with the sepia marker pointing down, transferring some brown ink to the tip of the lush green marker. This bit of brown added to the green was enough to darken the color on the trees on either side of the house ( and yes I was still inking the stamp with the markers ). After stamping, I did a bit of blending of the image with a fine tip water-brush but you could also use a paintbrush. I inked the chimneys with a mix of black and sepia and the bricks at the base of the house with a mix of sepia and red. This time I applied both markers to the stamp rather than transfer ink tip to tip. To ink the house I used the sepia marker which stamped dark brown. After blending the brown to color the house I dabbed it with a paper towel which removed a bit of water and ink to give a slightly aged reddish-brown appearance. I left the front door white but inked the wreath with the red and green already used.
At this point, it all looked pretty but I wanted to color in the sky. Sometimes I paint the sky first but I was too excited to be working with the new markers to plan ahead! I decided to make a pale sky with the neutral grey 3 and the arctic blue. To ‘waterproof’ the house and trees I embossed the ‘warm reception’ stamp in clear with Versamark and clear powder. It was still in the stamp positioner so I just stamped right over the top. The embossing gave the resist I needed to be able to add sky around the house and over the trees without diluting the colored stamping at all. I painted a bit of water where I wanted sky and then touched the tip of the marker to the wet paper, that’s right I just touched the tip lightly to the paper and ink bloomed out to fill the wet area. I was then able to blend it further with the water brush and create a pale sky. (By the way touching the marker tip to a wet area for soft blooming ink is going to be wonderful for no-line watercolor but that is a card for another day!)
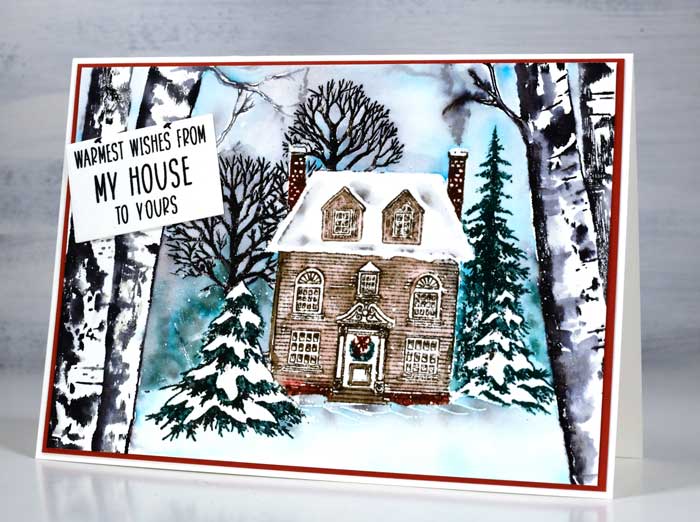
I also added the grey and pale blue ink to the snowy area in front of the house and, while the sky was still wet, added some very abstract tree shapes in green to the wet ink on the left of the house. I stamped the ‘house’ sentiment from the PB set ‘Christmas Feeling’ and drew two nails on it so it appeared to be tacked to the trees. I also splattered some Dr Ph Martin’s bleed-proof white paint over the scene to look like a light fall of snow. The panel is framed with a very narrow brownish red frame. That one is ready to send and I am keen to try the markers on their next technique!
Hope you enjoyed this scene sent from my craft room to yours. See you again soon!
Learn more about Heather:

Goodies List: