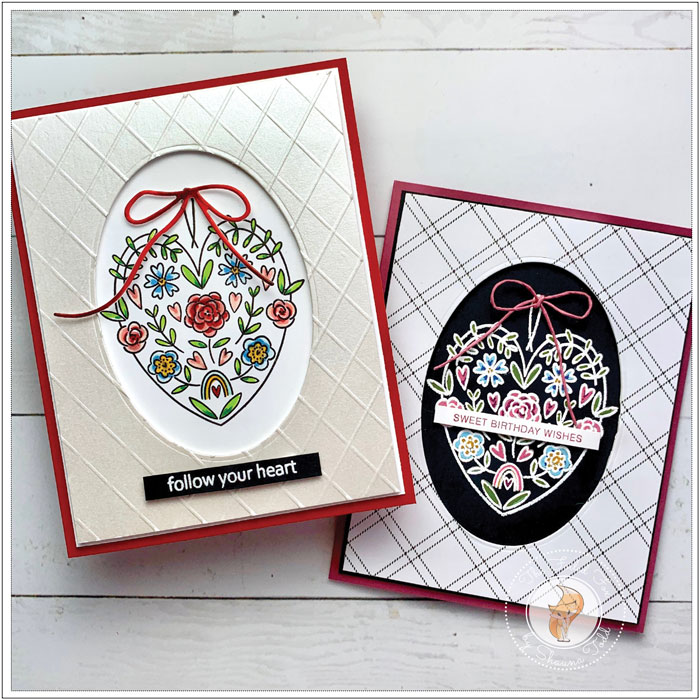
The Yin and Yang of Floral Hearts
Hi Crafty Friends,
I am starting today with two ways to create a charming floral heart card design using the new Penny Black Floral Heart mini stamp. This duo of card designs is the yin and yang of each other. Each opposite of one another yet complementary. One features a Copic marker colored heart with a beautiful cream lattice background. The other with the heart white heat embossed on a striking black and plaid background and then painted with gouache.
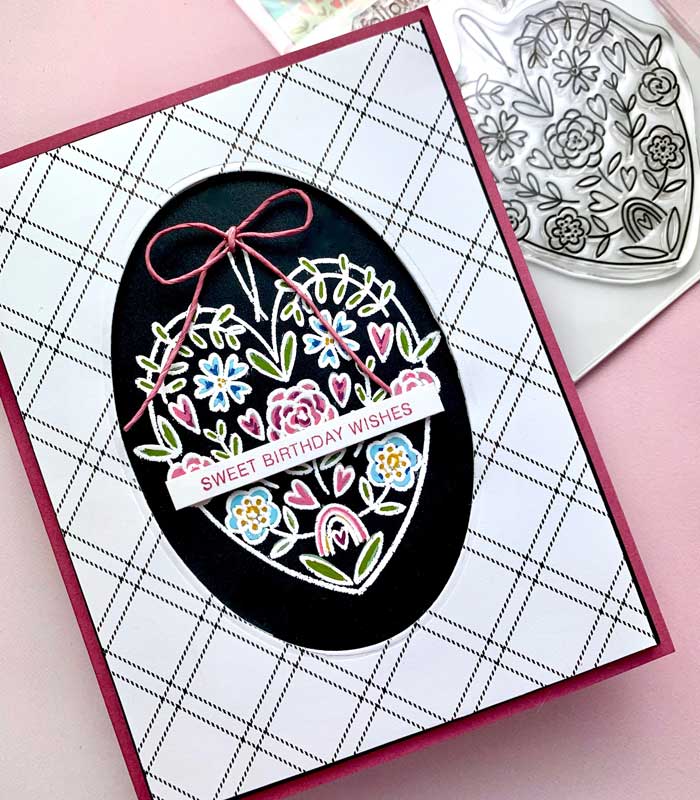
Let’s start with the dark design by placing a black licorice panel in a stamp positioner, centering the heart stamp on the panel, then stamping the heart using a good white ink. I like to use Lawn Fawn’s Yeti ink. It stamps a clear, crisp line.
Though I white heat embossed the design later, I wanted to first paint the design with gouache paints. The gouache paints are perfect for dark surfaces since they are opaque and paint vivid colors. Another tip for painting on dark surfaces is to stamp the image first with white or light ink using a stamp positioner, then paint your design with gouache while the panel is still in the positioner. This way, once all the painting is done and DRY, you can go back and stamp the image again in the same spot using Versamark ink, then white heat emboss. This creates a crisp, white embossing line.
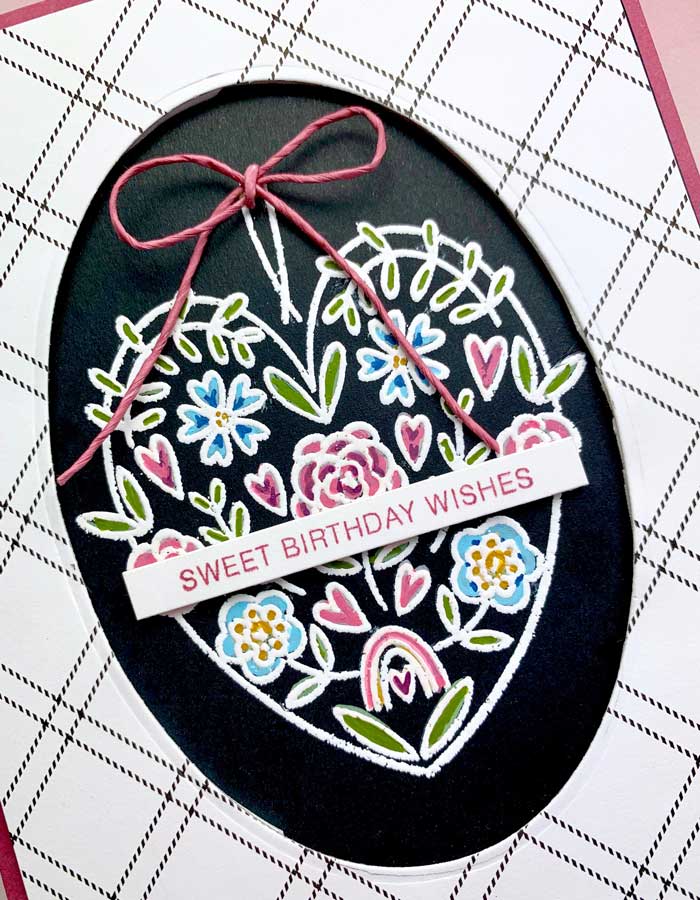
Once the heart was painted and heat embossed, I went on to create a surround for the heart. Using a plaid patterned paper (this one from The Stamp Market’s Color Crush patterned paper), I cut out an oval in the panel, using Lawn Fawn’s Oval Stackables, then added a foam backing to the plaid paper.
The card was nearly done! I only had to mount the painted heart panel to an Autumn Rose card stock card base, then add the foam-backed plaid panel on top. I created a super slim sentiment strip, stamped with my sentiment from Papertrey Ink-Ink To Paper’s Just Sentiments: Tagged mini stamp. The sentiment was stamped using a matching Autumn Rose ink, then a twine bow was attached to the top.
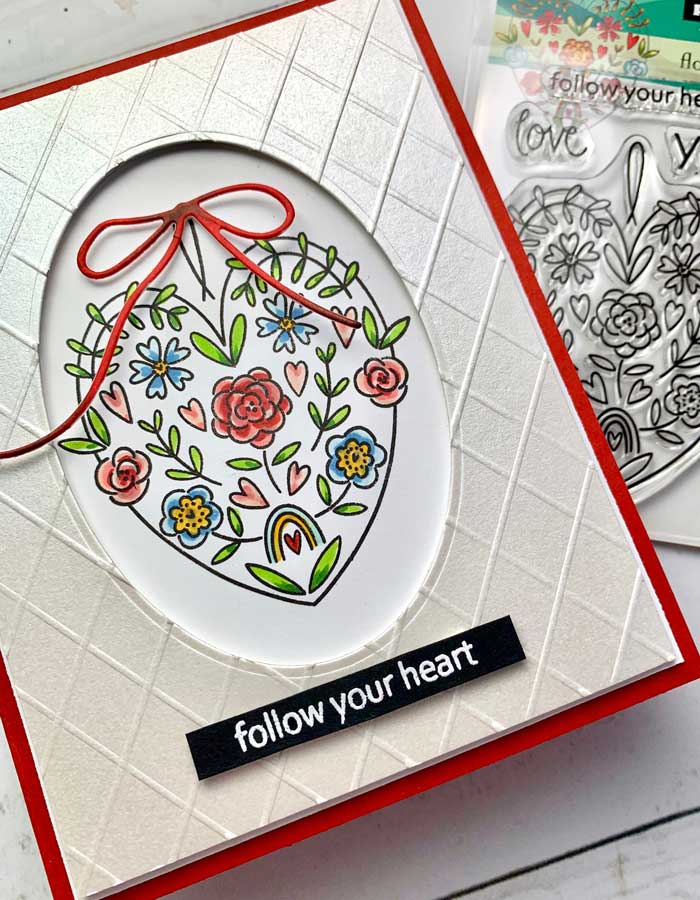
Next up was the light-colored heart. For this one, the heart was stamped with a Copic friendly ink, like MFT’s Extreme Hybrid black ink onto a white card panel. The heart was then colored with a few Copic markers shown in the supply list below.
Following the same steps as the first card, once the coloring was done, I mounted the heart panel to a red Peppermint card stock card base, then began creating the surround.
This was done using a Shimmer Quartz panel (this is awesome cardstock-so shimmery!). The oval was cut out of the center with the same oval die as before. Using a scoreboard, I placed the panel on the board with one of the corners of the panel directly on a scoreline, then made sure the opposite corner (so diagonally) was on the same scoreline and made my first score. After the first score was made, I held the panel firmly in the same position and continued to score diagonally across the panel, making sure I skipped three lines, then scored on the fourth one. Once the whole panel was scored with diagonal lines, I placed the other corner on a scoreline, with the opposite corner on the scoreline (just like before), and scored across the panel in the exact same way as before.
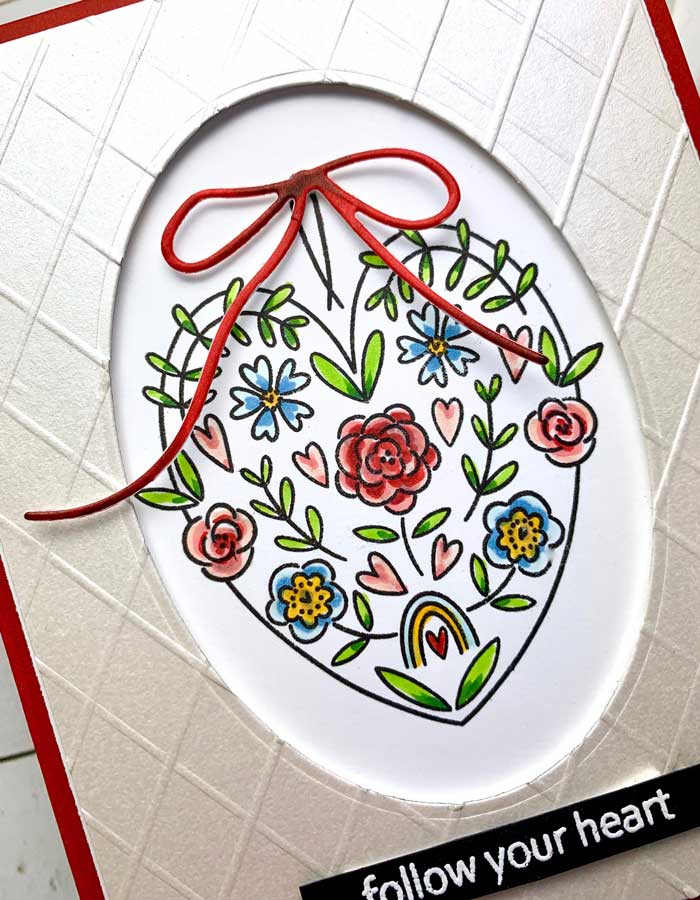
(Hints: make sure you cut the oval out first before scoring and score on the back of the panel so the scoreline will protrude on the front!)
Viola! the panel is perfectly scored. A foam backing can be added to the back so it pops up. It was then stacked on top of the heart panel and card base.
For this card’s finishing touches, a sentiment strip was created using black licorice card stock. Then the sentiment from the stamp set was stamped and white embossing. The strip was then mounted with some foam tape and a bow added. By the way, this bow was cut from Papertrey Ink’s Birthday Bouquet die set by you can easily use a twine bow like before.
And there we have it, all done and ready for mailing! ♥
Goodies Used: