Nifty Gift Card Holder
Hello everyone this fine December day,
We are thilled to welcome May Flaum of Craft with May back with us today. It is always so exciting to be part of one of May’s projects. She is one of the most creative and innovative crafters I know. She is so clever! This fun and easy gift card holder is a great example of her boundless creativity! So, keep reading and see what she has done… oh, and don’t forget to pop over to her blog for more artistic and resourceful ideas and check out her 28 Lilac Lane line of embellishments. If you haven’t seen them yet, you are in for a real treat. She packs so much fun into each bottle and kits!
Now, here’s May…
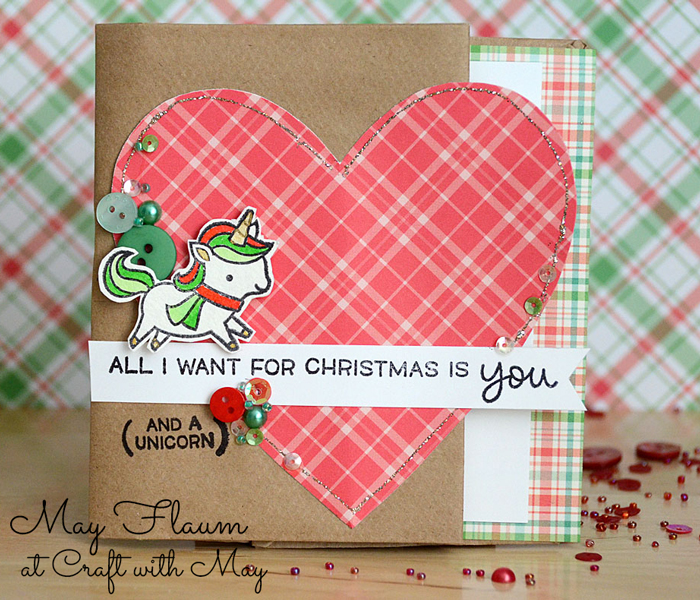
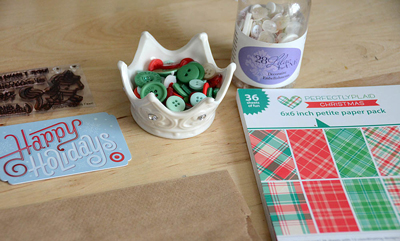
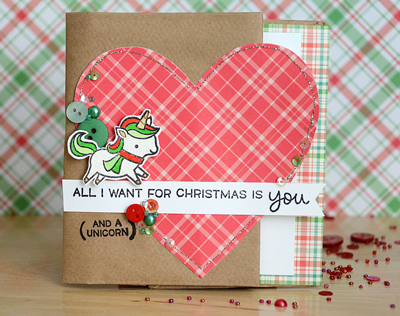
When it comes to gift giving, I’ve found that gift cards are frequently a favorite for both me and those receiving them. What could be better? With such a standard gift, I like to add my own personal touch by creating a gift card holder or card. Today I’ve got a holiday option with one cute little stamp set and some of my 28 Lilac Lane embellishments. What could be better? I am going to show you my favorite way to transform a brown lunch bag into a giftable card! Just add money or a gift card and you’re ready to rock.
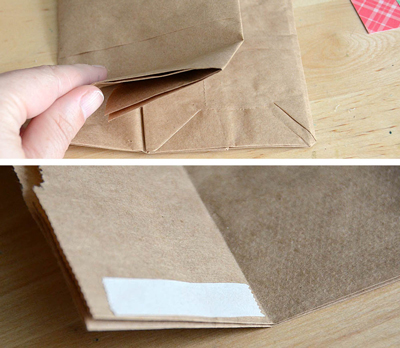
The first step will be to fold the bag, and glue the top and bottom of the pouch area for the gift card. I folded my bag in three – though unevenly as you can see in the photos. Here’s the great part: You can adjust this to be ANY variation you’d like!
 |
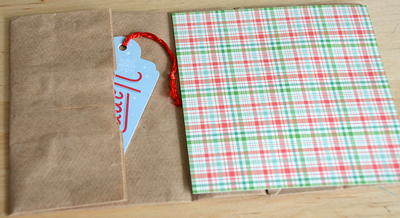 |
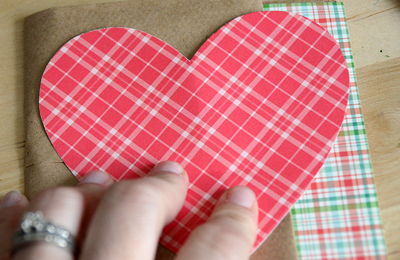
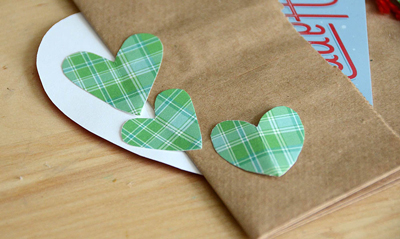
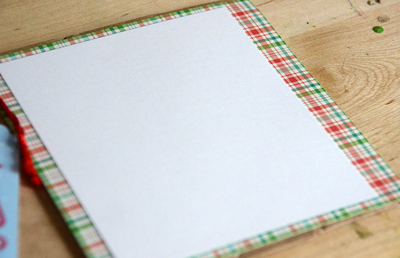
Once the card is folded, it’s time to decorate. I used patterned paper on the inside trimmed to be slightly smaller than the back side of the bag. Then I hand cut hearts (just fold and cut, just like in school!) and trimmed them until the size I wanted for the front and inside of my card.
 |
 |
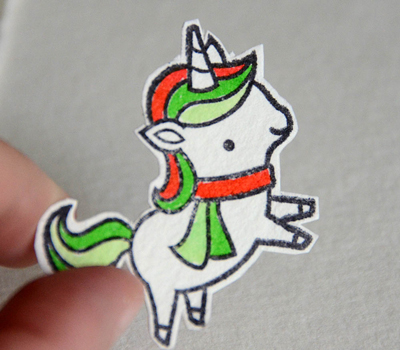
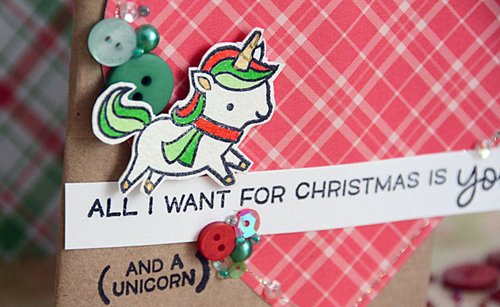
With these basics down, I stamped my unicorn and sentiment on white cardstock and colored the unicorn. Any color medium or marker would work fine! Cut out the unicorn (and the sentiment) and position as desired on the front of the card.
 |
 |
 |
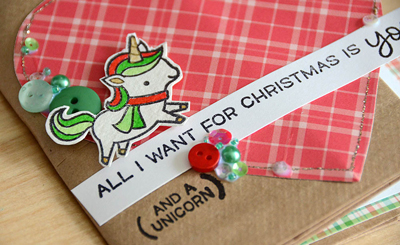
With the unicorn and sentiment set, it’s decoration time! Just add 2-3 clusters of sequins, beads, and buttons from one of my 28 Lilac Lane mixes. I like to cluster in just a few spots when I don’t want my card to become too heavy. As a finishing touch I added a bit of gold glitter glue, as well as stamping the “and a unicorn” part of the sentiment directly on the card front.
I love how this turned out – and how easy it is to make a gift card holder from a lunch bag! I hope I’ve inspired you to add some handmade touches to this holiday season. Happy Crafting!
 |
 |
Key Supplies:
|
28 Lilac |
 Lawn |
 Lawn Fawn |
 Lawn |
 Archival |
 X-Press It |
Sorry, the comment form is closed at this time.

December 7, 2016
Rhonda Strickland
May Flaum is SUPER awesome!! I Love her and all of her ideas. :o) Thanks for the chance to win.
December 7, 2016
Amy Cooley
I always love seeing Lawn Fawn projects. They make the cutest products! I love how you turned this paper bag into the cutest craft!
December 8, 2016
Denise Bryant
Pretty layering and embellishments on this sweet lunch bag card! Love it!
December 16, 2016
Teresa
Thanks for sharing! Cute idea!