Peaceful Winter
Hi, my creative friends,
Today, I am sharing a peaceful and wintery card design I was totally smitten with an Instagram reel I saw by @carolanncrafting. It reminded me of how simple, yet utterly elegant, a card design can be when using only one main ink color.
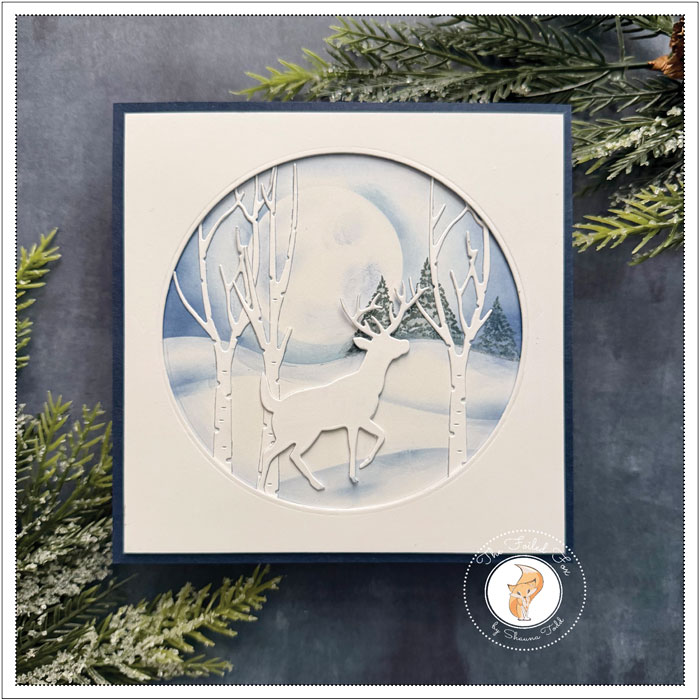
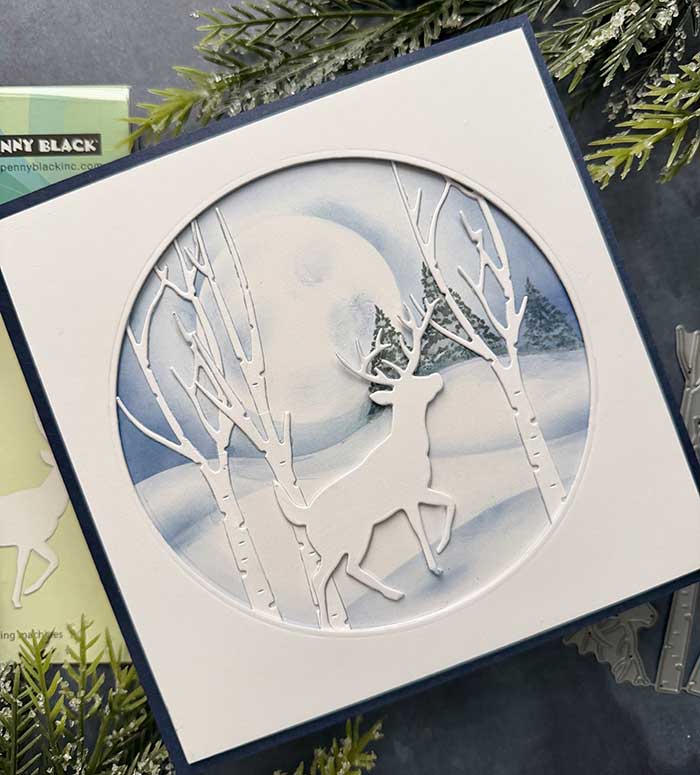
I began by cutting two large square panels from white cardstock. Then, using a large circle die (my die was nearly 5″), cut out the center from one of the squares. Then, placing one panel over the other, I VERY lightly traced the circle onto the uncut panel. I will use this as a guide when creating the scene.
Next, using some masking paper, I cut out a small circle for the moon and pressed it onto the panel. Then, used Chipped Sapphire ink, a hillside stencil (there are a few suggestions in the supply list below), and a blending brush to start to create the scene.
A hillside stencil was positioned on the panel, and ink was blended on for the sky. A second hillside was created by moving the stencil down and carefully adding a little ink on the edge of the stencil. More ink was added to the sky and around the moon to give a clear definition to the moon.
Hint: if you are a little confused about the process, check out Carol Ann’s quick reel here.
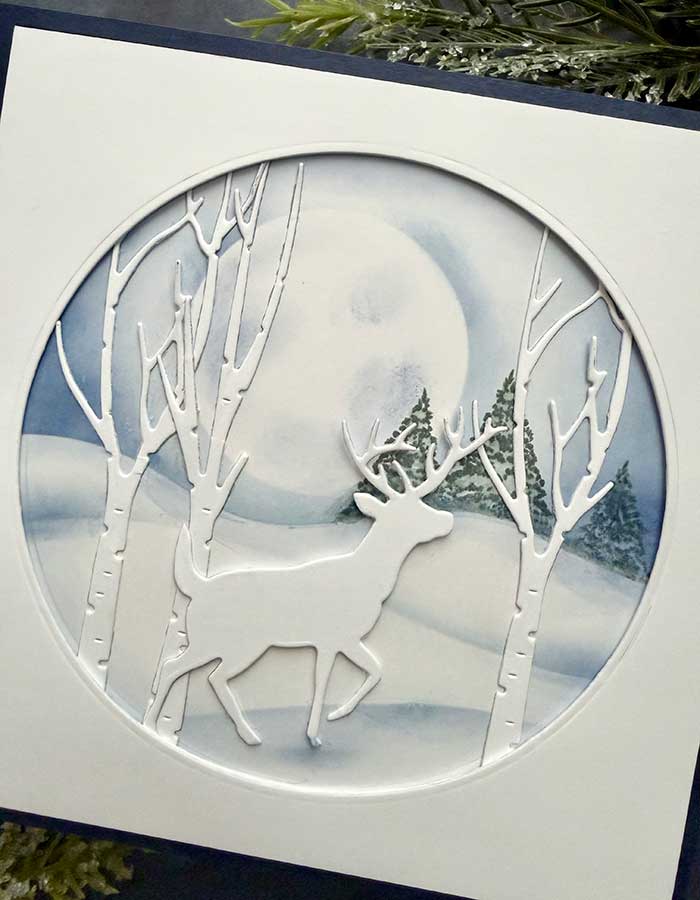
When the background was complete, I removed the moon mask and gently added a little more blue ink inside the moon,
I added some trees using a tree stamp from the Peaceful stamp set by Penny Black. The trees were stamped with Iced Spruce ink, and I made sure my hillside stencil was in place so as not to stamp the entire tree, just the tree tops to make it look like trees were in the distance.
With the background complete, I cut out the trees and deer from white cardstock using the Beneath the Birches die set by Penny Black. The trees were added to the scene with some glue.
A foam backing was added to the panel with the cut-out circle, then glued to the newly created background. The deer was pressed into place with a few foam squares.
To complete the card, the whole assembly was added to a slightly larger square Night blue cardstock panel. From there, I added it to a matching Night blue cardstock card base.
No sentiment was added. I thought the scene spoke for itself!
I hope you liked the project for today and hope you will join me for my next crafting adventure! ♥
Goodies Used: