A Floral Focus
HI Crafty Firends,
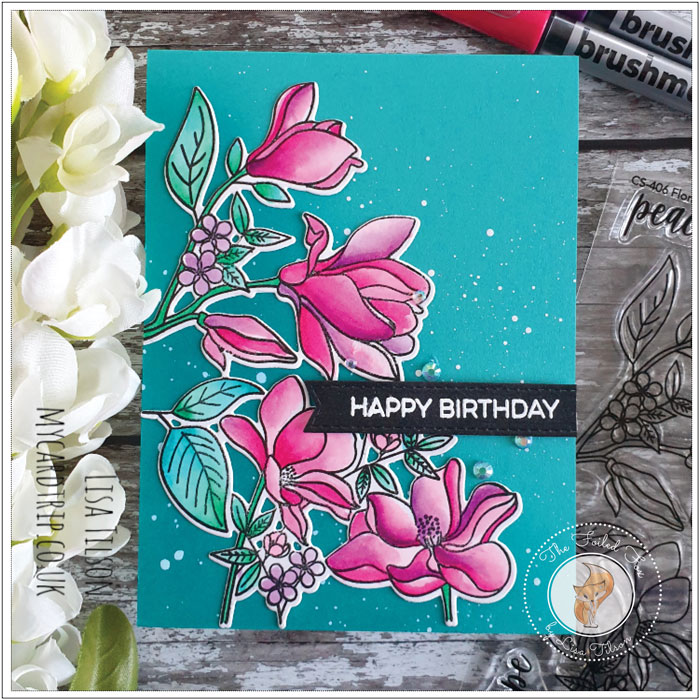
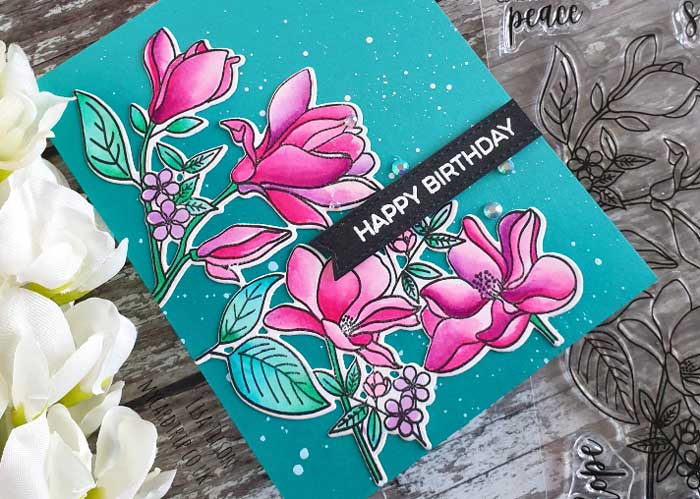
Woohoo! We have an awesome new card design by Lisa Tilson from the My Card Trip blog. This card uses My Favorite Things Floral Focus stamp and die set and is exploding with gorgeous color. The flowers are so beautifully painted, using the Karin BrushmarkerPRO watercolor markers and the bright background sets it off. Lisa deserves three rounds of applause for this true beauty!
Hello everyone, Lisa here today to share some floral inspiration with you using a beautiful floral image from MFT and some Karin Brush Markers. The Karin Markers are new to me. I was looking forward to trying them out so I broke out one of my favourite floral images from My Favorite Things – the lovely Floral Focus.
I used the Karin Brushmarker Pro 27 marker set (you get 26 coloured markers, plus a blender brush), and as I do with all my colouring mediums, I did swatch all the colours first so that I could see what I was playing with. I used a normal Derwent fine tip waterbrush for swatching, but I did like the blender brush from the set and thought it worked equally as well when I tested it out.
So here is my card for today. You know that saying, go bold or go home. Well, there you have it! I actually LOVE all that colour. It made for a refreshing change from white space which I so often veer towards.
The MFT Floral Focus set can be tricky to die-cut, so what I do when I use this set, is first take the coordinating solid Dienamic and run it through the die cutting machine with my chosen cardstock – in this case, Strathmore Bristol Smooth. I then pop the negative card panel into my MISTI, take the stamp and place it into the negative space. You can kind of feel when it is right just by moving it around and it just sort of slots into place. Using the MISTI, I pick the stamp up, put my positive die cut piece into the negative space, and then stamp as normal. I find this gives me the best chance of lining it up.
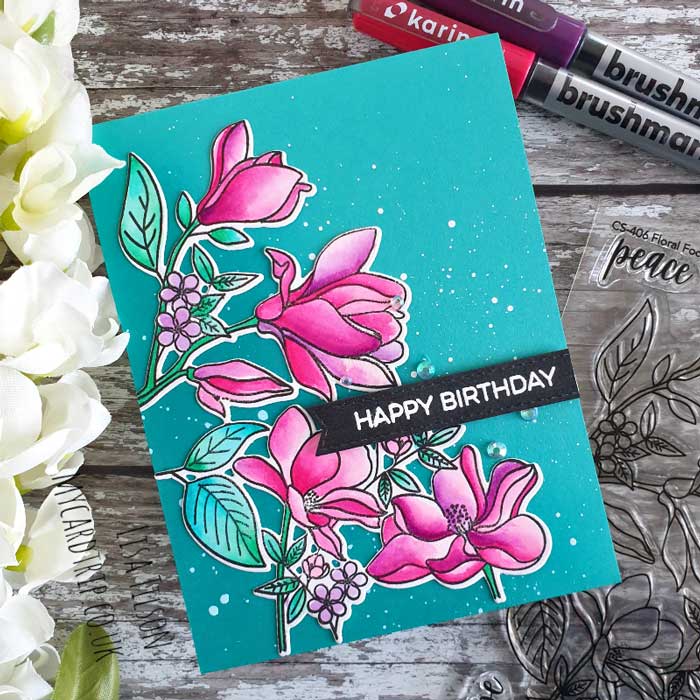
So I did all that – making sure to stamp it with Versafine Onyx Black ink or Nocturne as these are waterproof inks. I then used just 5 markers from the set to watercolour my image. I used Turquoise and Ocean Teal for the leaves and Cerise, Lilac, and Magenta for my flowers. I began by using my lightest shade (Cerise) as a base layer on most petals (some I left white at this stage). Once dry, I went in with Magenta, here and there, and blended it out – making sure to leave some petals left with just Cerise on them. When that layer was dry, I went in with Lilac here and there, blending it as I went. Some of the white petals just have a tiny bit of Lilac on, just to add differentiation. I really just played around until I was happy with the final look and set it aside to dry.
Next, I took some scrap turquoise/teal cardstock from my stash and made an A2 top folding base card. I took Peacock Feathers Distress Ink and blended that down the left hand side and across the bottom, just to add depth in that left bottom corner, fading it out towards the top right corner. I then popped the card into my splat box and splattered some white gouache all over the front using two different sized brushes. I left that to dry and worked on my sentiment.
The sentiment is from MFT Essential Sentiments and was stamped onto black cardstock using Versamark Ink. I added Hero Arts White Embossing powder and heat set before trimming it out with a banner die from MFT Stitched Sentiment Strips. I adhered the floral image flat onto the base card using Multi Medium Matte and then I popped up the sentiment with foam tape, trimming it off on the right hand side. To finish the card, I added a few iridescent jewels.
I loved having a play with the Karin Markers – I think you get a good range of colours in the set that I used, and the colours are really beautiful. I found that by and large they blended very well on Bristol Strathmore Smooth (except the greys for some reason). I have also had Fabriano Artistico cardstock recommended for use with these markers. I shall be trying that out next time.
Thank you so much for joining me today, I hope that you enjoyed seeing the card and the markers in action. Take good care of yourselves out there.
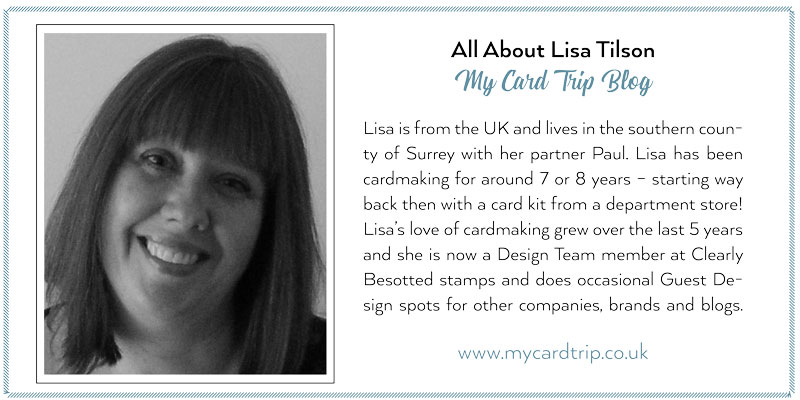
Learn more about Lisa:
Goodies Used: