A Frightful Trick or Treat
Hi Creative Friends,
This time of year is so much fun. You can create wonderful Autumn scenes or in this case, a frightful Halloween one when you use a few of the awesome, new stamps, dies, and stencils from Papertrey Ink.
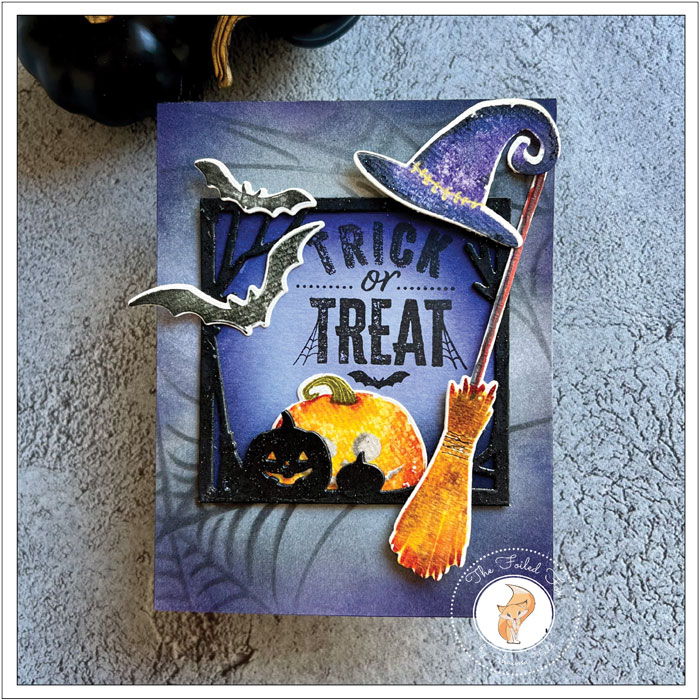
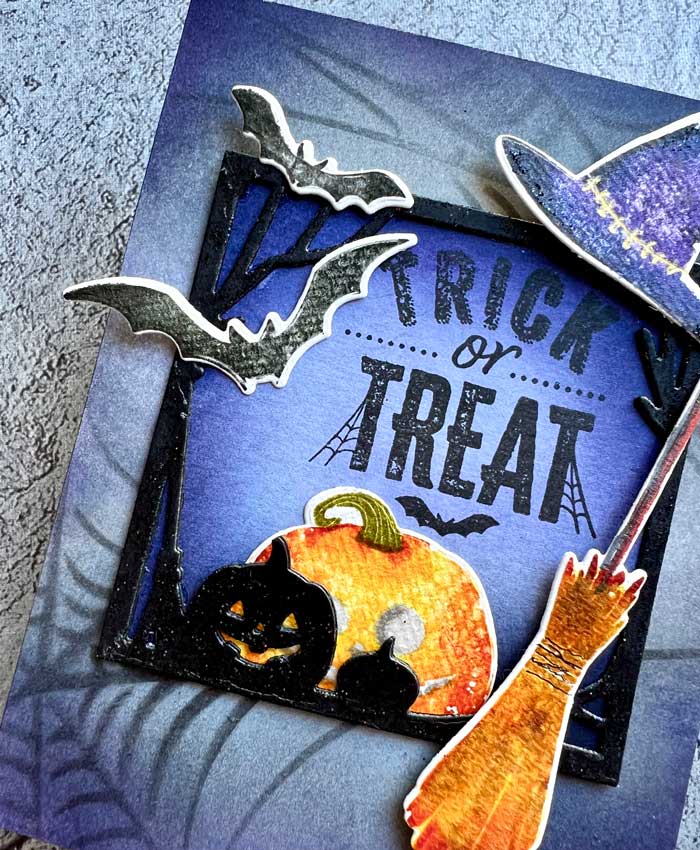
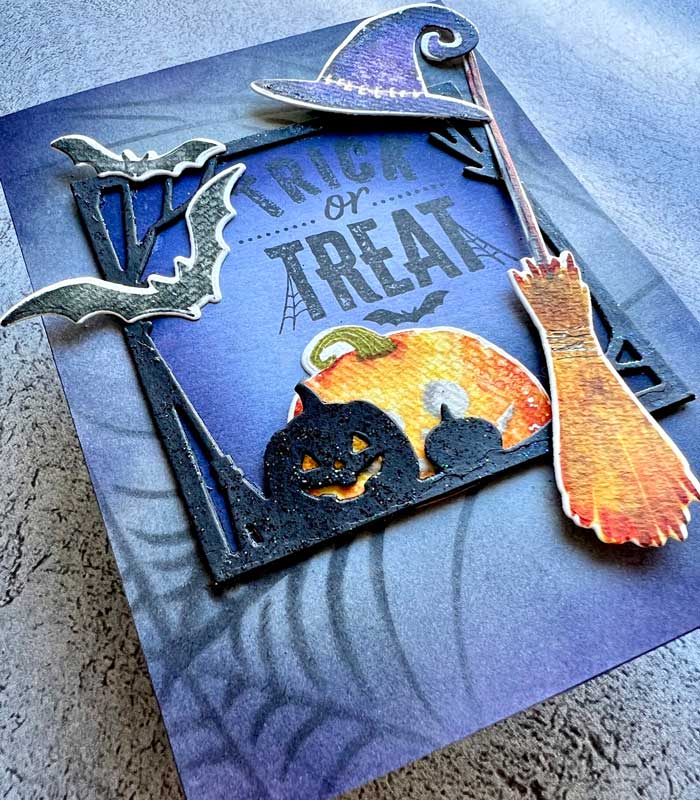
In this new release, there are some fun stamps and dies like Frightful Frames and Spooky Halloween to make a great Halloween scene. I started by cutting out two black cardstock Frightful Frames, then stacking and gluing them together.
With the frames set aside, I made a background for the frame by using a piece of bristol paper, then blended on a few distress inks. I first used a light coat of Faded Jeans over all of it, then followed it up with Chipped Sapphire and Villainous Potion on the edges. To darken it a little, I added a smattering of Black Soot distress ink.
Next, I cut out the elements of the Spooky Halloween die set from a piece of watercolor paper and then mounted it in my stamp positioner. The corresponding stamps were positioned over the cutouts, ready to stamp. I used a few yellows and oranges from Papertrey Ink’s ink collection for the pumpkin (see supply list below), Weathervane grey and True Black for the bats, more yellows, oranges, and browns for the broom. Finally, I used Villainous Potion and a little Chipped Sapphire and Black Soot around the edges of the witch hat.
All the pieces needed to put this card design together were nearly done. I just needed a background. So, using an A2-sized piece of bristol paper, I blended a light coat of Lost Shadow distress ink over all the panel. Then, added a little Chipped Sapphire around the edges.
Using the Papertrey Ink Spider Web stencil, I added the webs in the corner using Black Soot distress ink. The neat thing about the stencil is that not only are there awesome webs but they are positioned perfectly in the corners for you! Once the webs were stenciled on, I added more Chipped Sapphire, then smatterings of Villainous Potion and Black Soot… but not enough to block out the spider webs.
To put it all together, I made an A2-sized black cardstock card base and mounted the spider web background. Before I mounted the Frightful frame, I positioned the Trick or Treat stamp from the Spooky Labels stamp set over the frame’s background and stamped it with Versafine Black ink. I used my stamp positioner for this so I could stamp again if I needed to.
Now that the frame’s background was finished, I mounted the background behind the frame, then to add a little sparkle, smeared a little Black Diamond Glitter Stickles on the black frame.
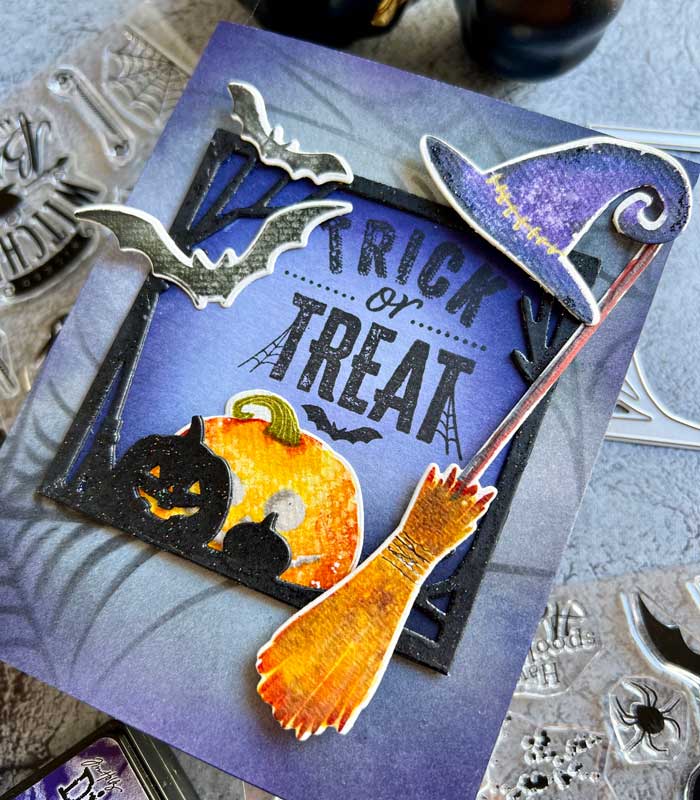
The frame was ready to be mounted to the front of the card and the other scary elements like the bats, pumpkin, broom, and witch hat were tucked here and there and secured with adhesive foam squares.
That completes my frightful Halloween card for today. As many of you know, I love making Halloween cards because you can throw caution to the wind and create any fanciful design you would like… as long as it is scary! ♥
Goodies Used: