Beautiful and Bold Pink Poinsettia
Hi Everyone,
There are so many wonderful themes for holiday cards that it gets my creative juices going into hyper-drive! Poinsettias are one of my favorite icons of the holiday season so making them are a natural!
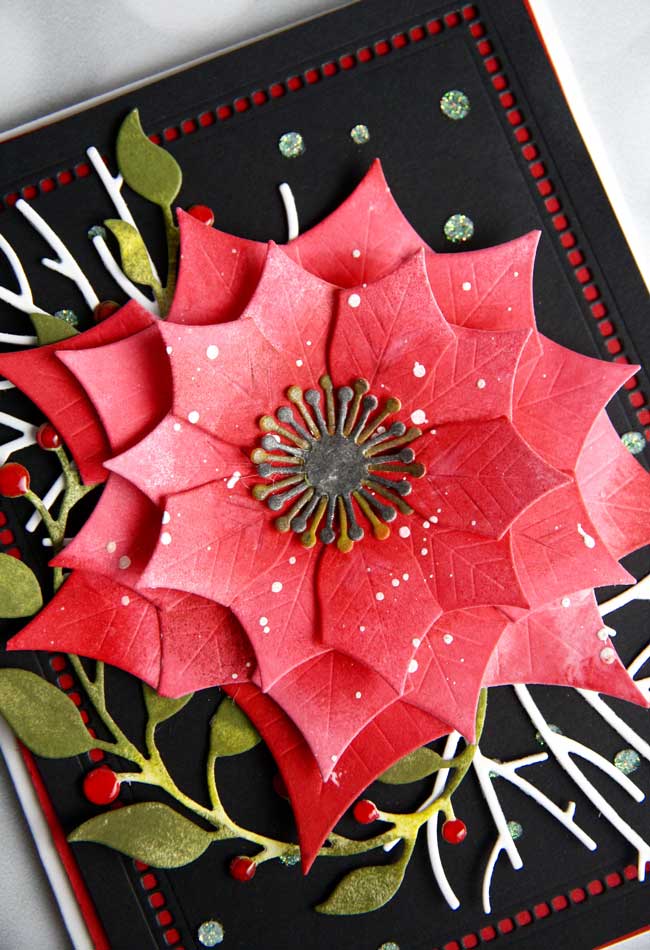
Over the next few days, you will see a few of them since there are several great poinsettias die sets available. In this card design, I have used the My Favorite Things Perfect Poinsettia Die-namics. It creates a very large blossom with vein embossed leaves as an extra bonus.
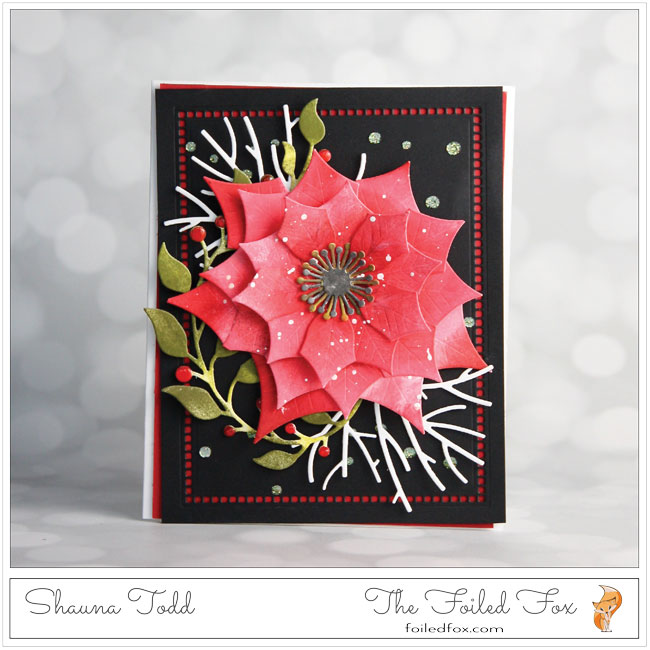
This card design starts off with, of course, the poinsettia dies set. The large blossom in this set is great for the main focal point. So, to begin, I cut two full sets of leaves, plus a couple more of the single leaves just to round out the flower.
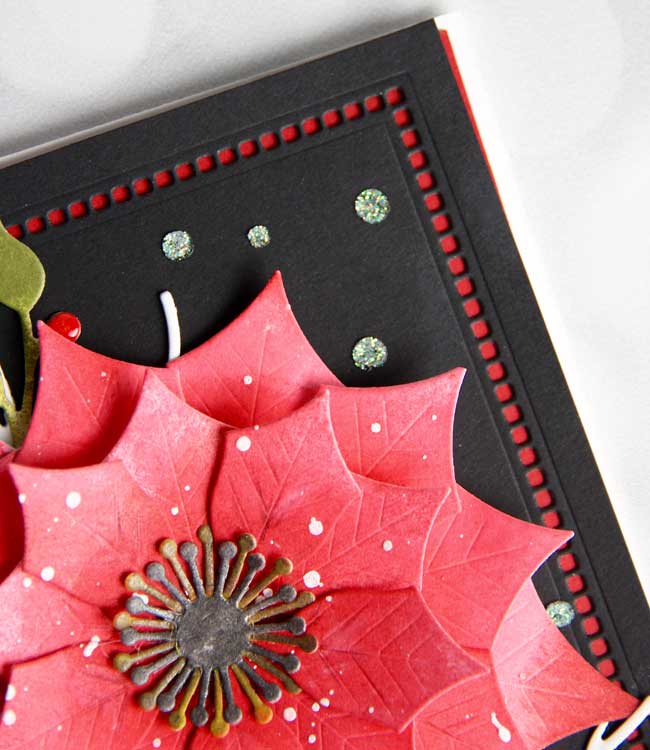
For this poinsettia, I didn’t go “full-on” red, instead, I chose to make it one of those lovely pinkish poinsettias. So, I used Worn Lipstick, Festive Berries and Aged Mahogany distress inks to blend onto the leaves, making the colors more intense in the center of each leaf.
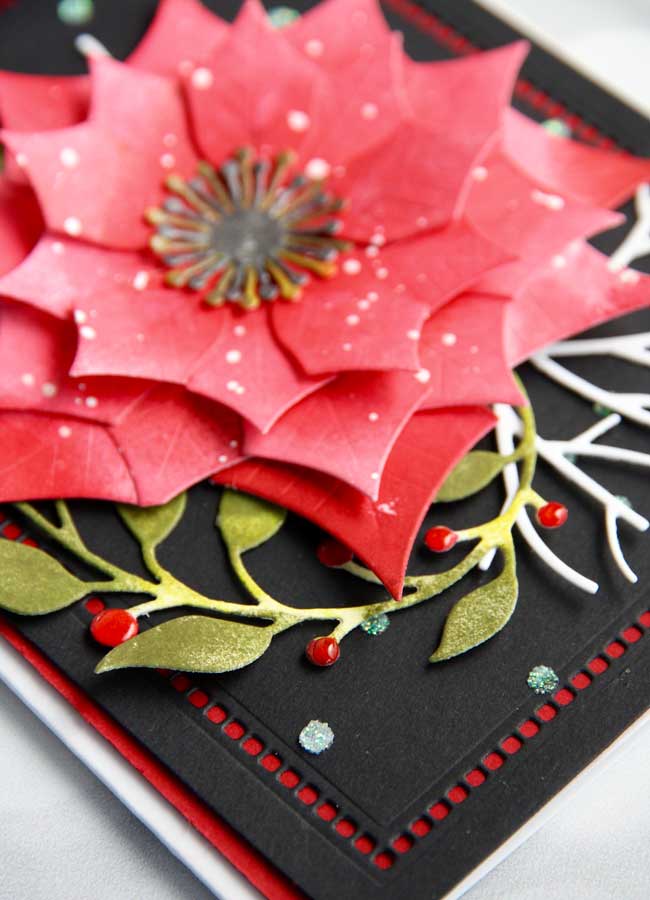
Once all the leaves were colored, I stacked the four groupings of leaves one on top of the other, slightly rotating each leaf grouping to round out the flower, then glued each layer in the center. The loose leaves were then attached to the back to make the blossom that much fuller. I then lightly splattered white ink (Dr. Ph. Martin Bleedproof white) over the leaves and let dry.
While the ink was drying, I colored two of the centers with Wild Honey and Black Soot distress ink and attached them in the center after the white ink was dry.
With the main focal point done, I cut two of the full trees from the Penny Black’s Winter Tree dies and a piece of Neenah white card stock. I also cut one Penny Black “Berry Flourish” and colored it with Forest Green, Peeled Paint, and Crushed Olive distress inks and then colored the berries with a red Copic marker.
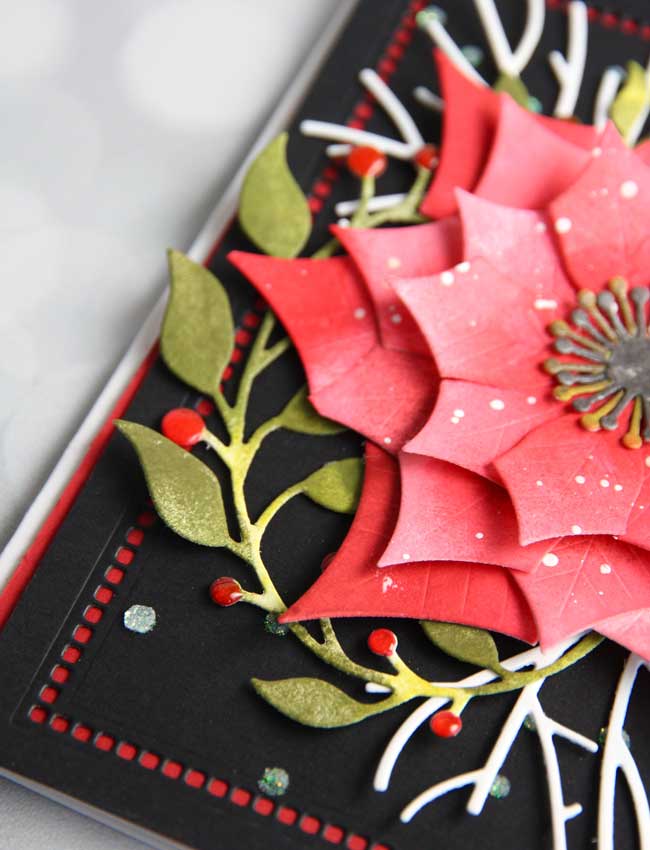
I thought it would be a nice touch to make the berries dimensional so I squeezed on some Glossy Accents to each berry and let dry – and just to prove that miracles happen, I actually let it dry completely before going to the next step!
While the ‘berries’ were drying, I cut a black cardstock panel with the Spellbinders Venice Lace Hemstitch Rectangles and a plain red cardstock panel the same size.
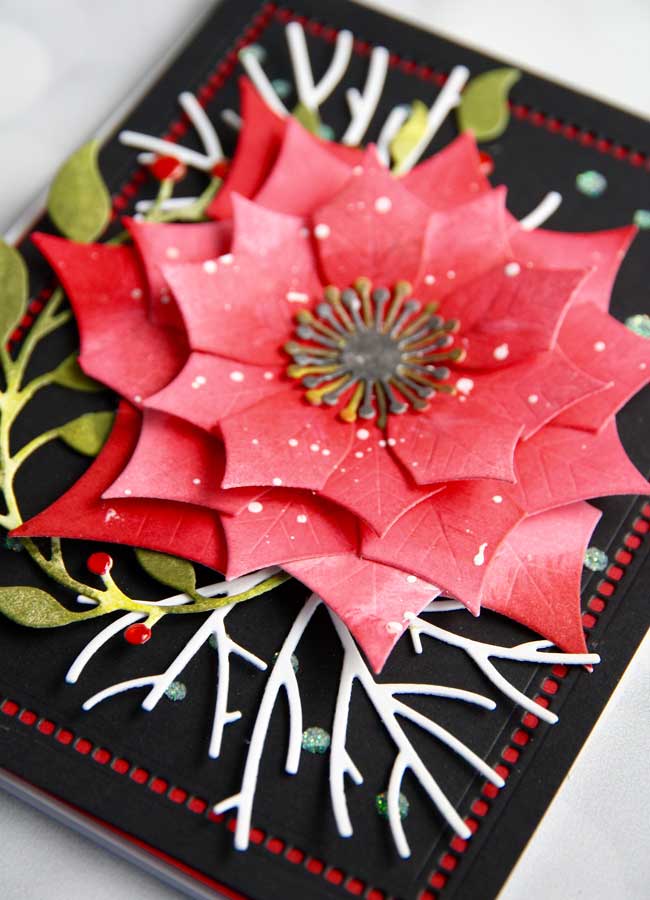
The only thing left to do before the assembly was to add a few glittery dots onto the black panel. I used the My Favorite Things Snowfall stencil and Nuvo Moonstone Glitter Paste to make that happen.
The final steps were to put this all together by first starting with a white card base, adding the red panel on top, slightly askew, then placing the black panel slightly offset from the red. I added the white tree branches I cut earlier, then the newly dried Berry Flourish and placed the Poinsettia on top.
And there you have it – a bold, beautiful poinsettia for this holiday card. Thanks so much for joining me!
![]()
Goodies Used:
Sorry, the comment form is closed at this time.

December 4, 2018
Teri S.
Beyond gorgeous! I’d never have thought to put the white branches, from a tree die no less, behind the poinsettia, but it looks wonderful. Thanks Shauna.
December 5, 2018
SuzyQ
TOTALLY STUNNING! It looks so real. The black and red background with the greenery and berries draw one into the whole composition. white splatters and so much You are so talented.