Cheerful Card Duo with Sunburst Die
Hi Crafty Friends,
We have two card designs to share with you today! Each features the awesome Sunburst die by Ink To Paper but one is for a new arrival and the other for a birthday. I guess we can say each design is celebrating a birthday!!
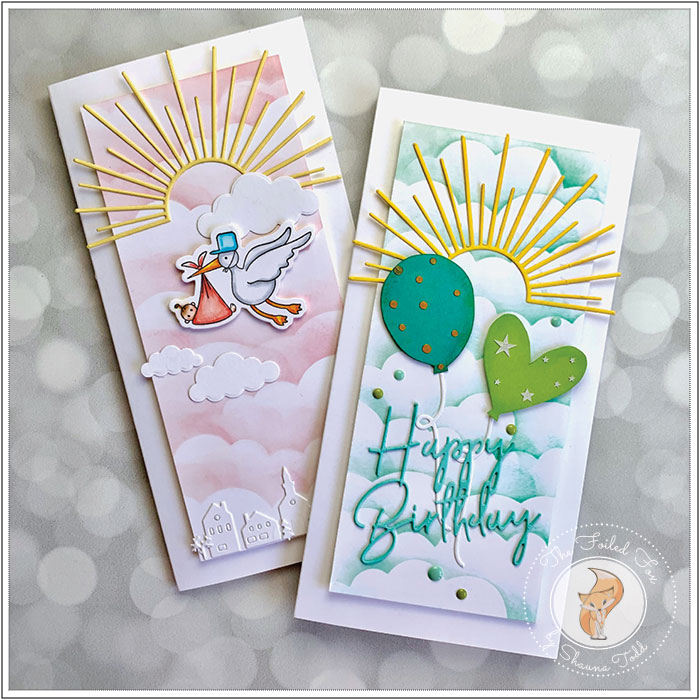
Both of the cards are made the exact same way. I only changed up the background and supporting elements to fit the occasion.
Since you can never have enough birthday cards, I started with this one. I created a long 4.5″ x 8.5″ (when folded) white card base, then cut a top panel 3.5″ x 7.5″.
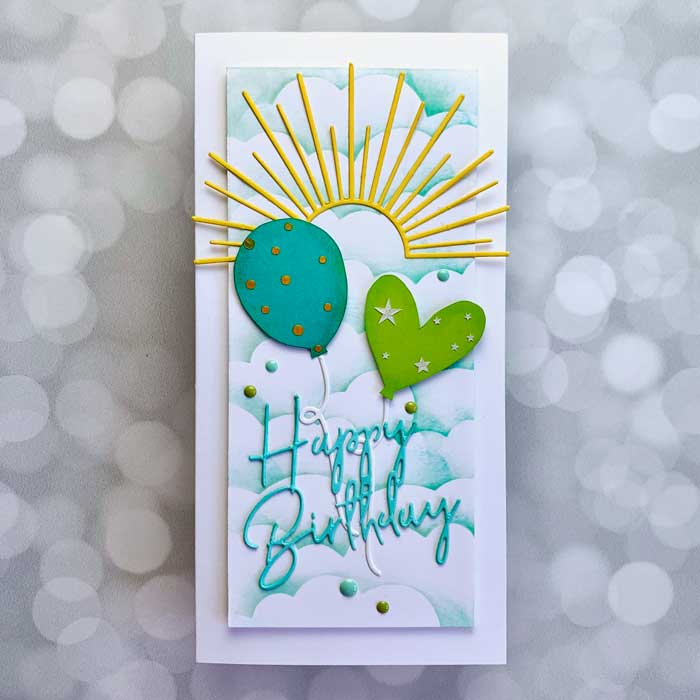
Using the panel and starting at the bottom, I lightly blended on clouds using the Cloud stencil by My Favorite Things and Peacock Feathers distress ink. Once that was done, I mounted a piece of foam onto the back and attached it to the card front.
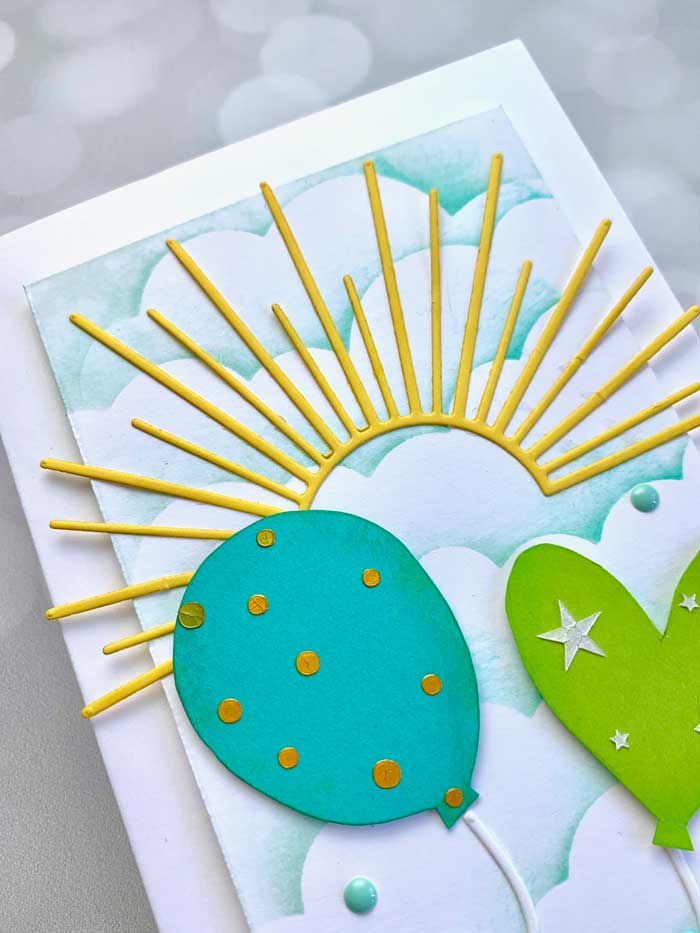
Next, I cut two balloons from the Ink To Paper Balloon Wishes die set. One I cut from Candy Necklace card stock and the other Easter Grass. I also added stars to one and circle to another using two MFT stencils: Star Confetti and Round Confetti and gold or white texture paste (see supply list below). In retrospect, I wished I had just used the balloon stamps in Balloon Wishes stamp set and then simply cut them out… but isn’t that just the way it goes sometimes?
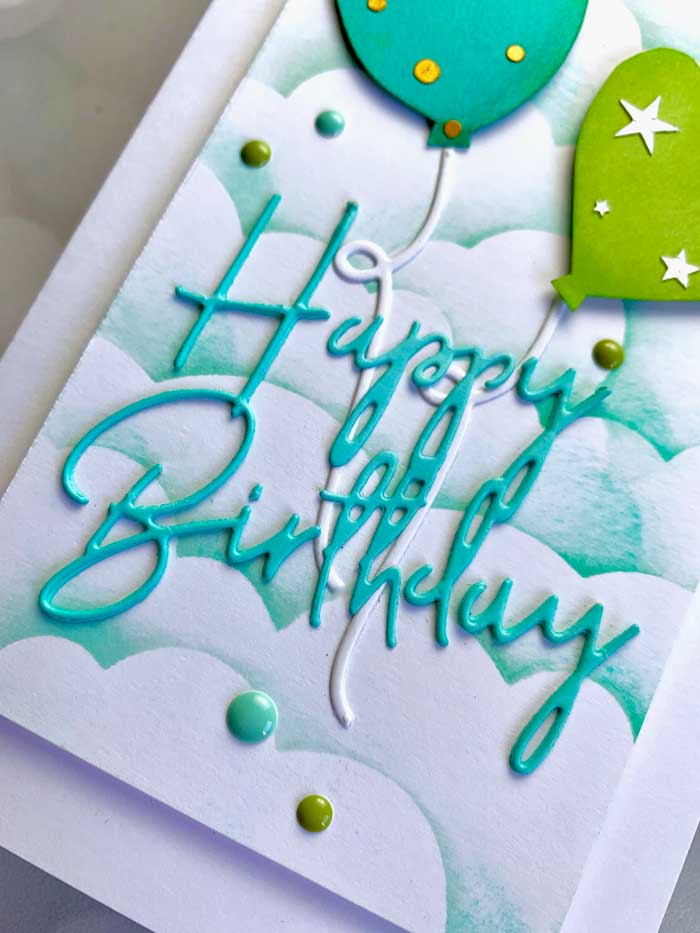
While the texture paste was drying, I cut out two “Happy Birthday” sentiments from the It’s A Sign: Happy Birthday from Robin’s Egg cardstock and a Sunburst from Marshmallow Chick card stock.
With all the elements ready, I assembled the card by attaching the Sunburst at top with some glue and then the balloons with foam tape. The balloon strings were glue on too.
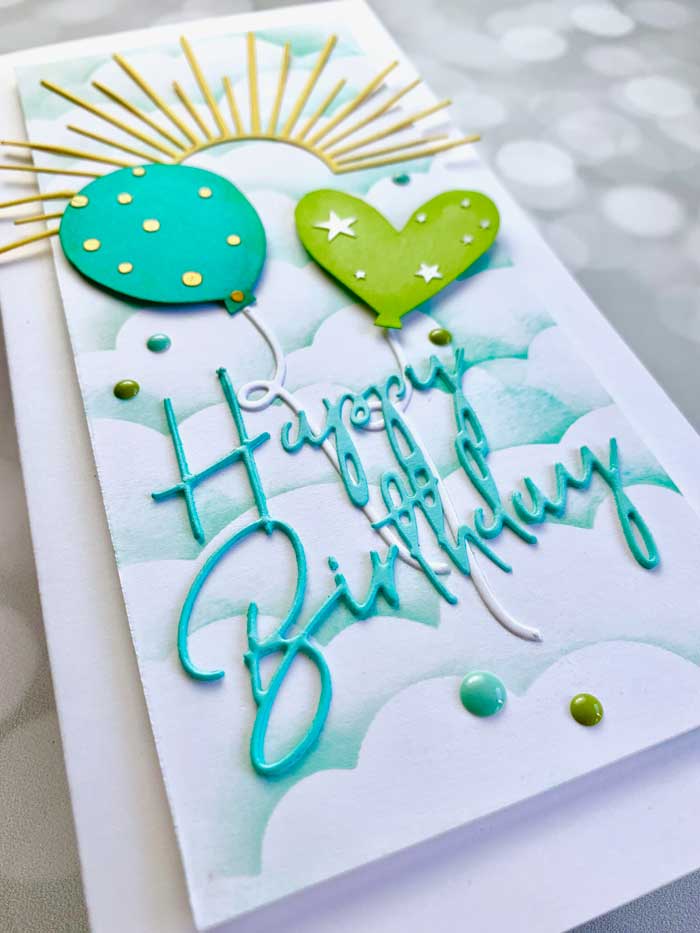
Finally, the “Happy Birthday” was stacked, glued, then added to the card. I sprinkled on a few blue and green enamel dots and was done – YAY!
~ ~ ~ ~ ~ ~ ~ ~ ~
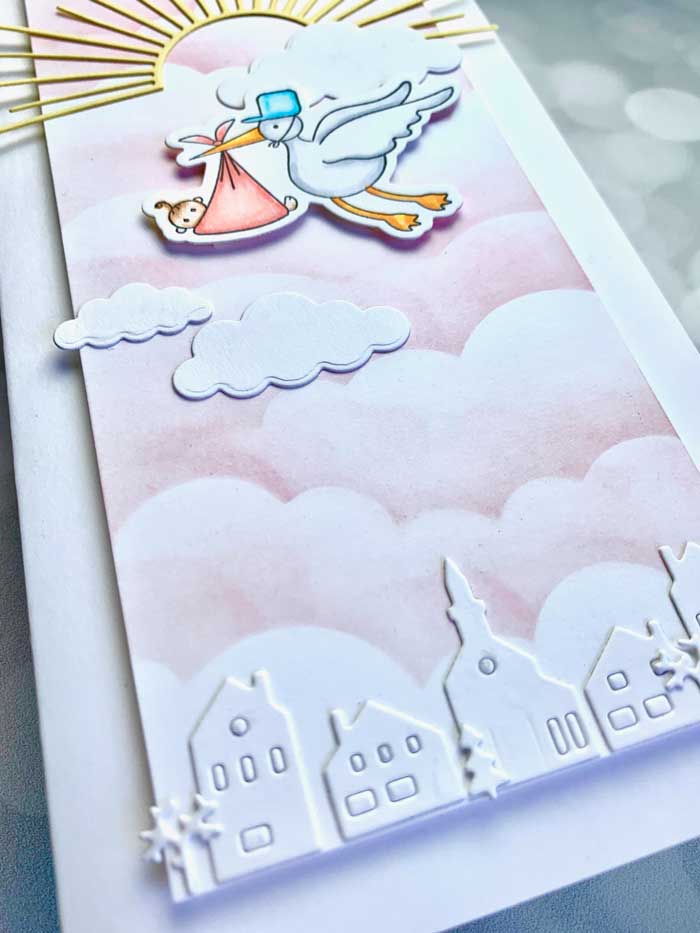
I needed a new baby card for my nephew’s new little girl bundle of joy. I couldn’t think of anything more iconic than a cute stork to celebrate the occasion but first I got started by making the card base and the top panel the exact same way as the previous card, only changing up the cloud color to Ink To Paper’s Hibiscus Burst. A foam rectangle was then mounted on the back and the panel adhered to the card base.
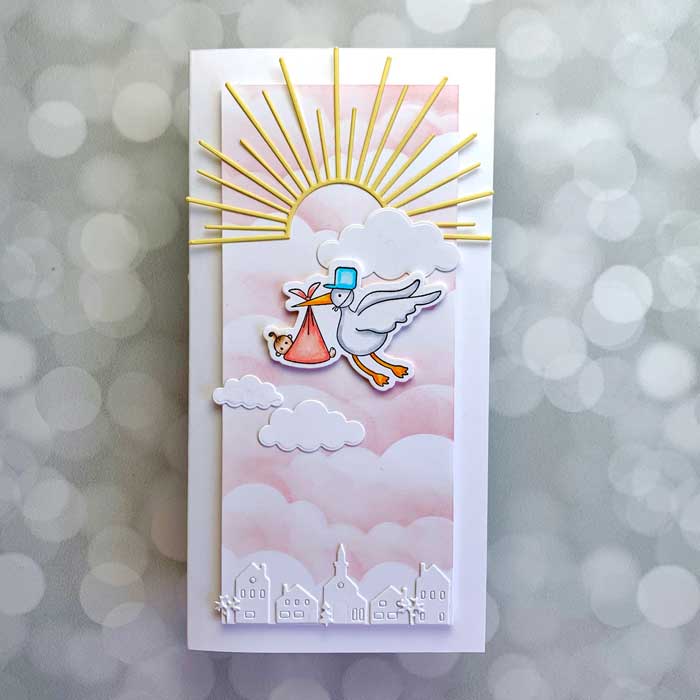
Now it was time to add the stork. I used the Spellbinders New Arrival stamp and die set for the stock and stamped it onto Neenah white card stock, then colored it with Copic markers. The colors I used were: B00, BG02, BG15, C1, C3, E00, E07, R000, R01, R22, Y38, C1, and C3.

After the stork was colored, I cut it out with the matching die. While I was at it, I also cut a few clouds from the MFT Cute Cloud Outlines and a row of houses from Penny Black’s Around Town (you could use any town die cuts you have) from white card stock. The Sunburst was cut from Butter Mint cardstock.
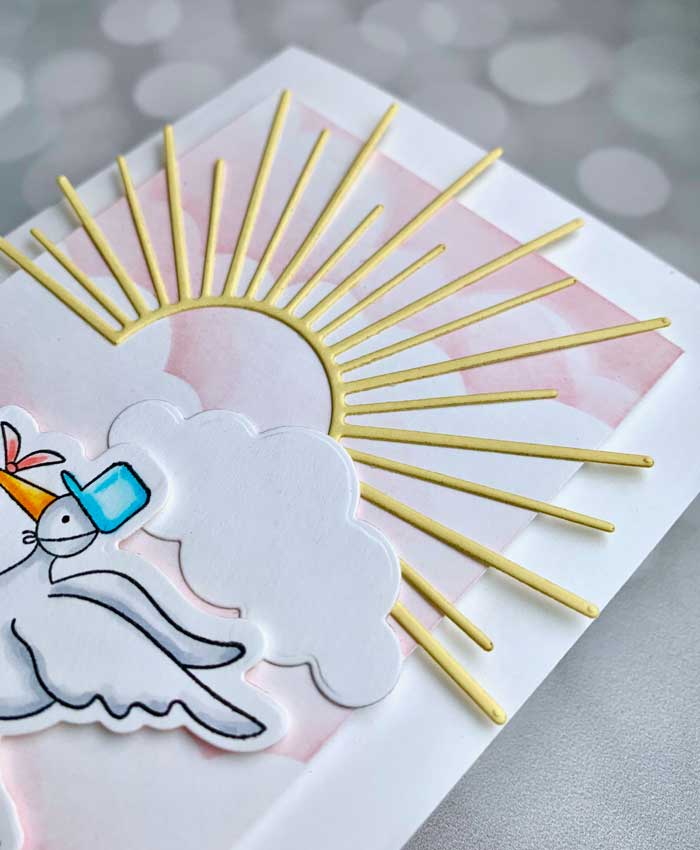
On to assembly… I added the houses and trees at the very bottom, then the Sunburst at the top. The stork was adhered with a bit of foam tape and the clouds nestled in between.
And there we have it… ready for baby.
I hope you enjoyed these two card designs. They were loads of fun to make! ♥
Goodies Used: