Fantasy Florals In Colored Pencil
Hi Crafty Friends,
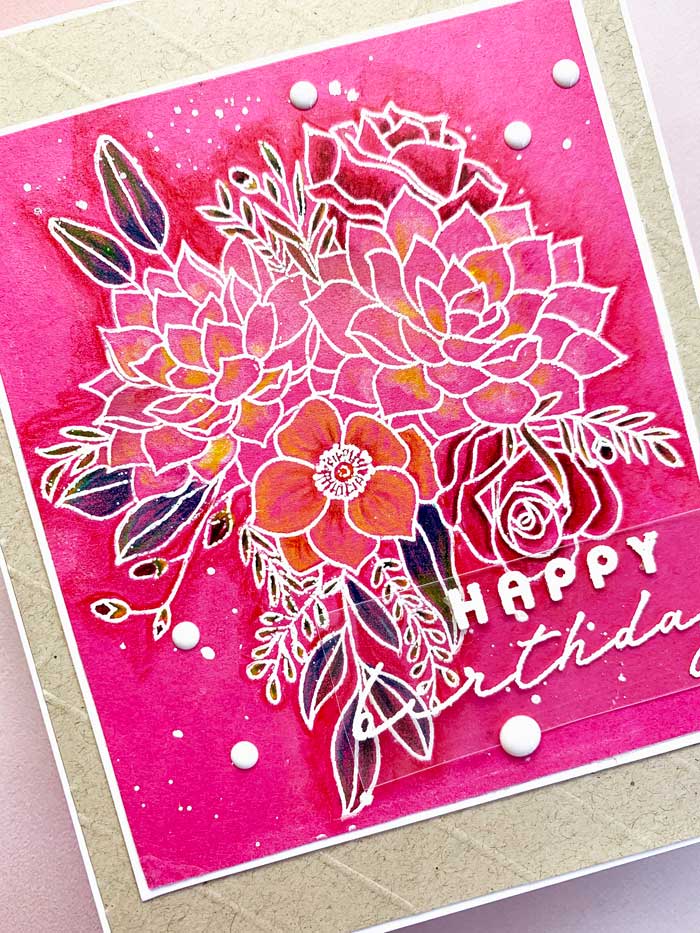
I am back featuring a new card design colored by Inktense colored pencils. For this project, I have used the popular My Favorite Things Fantasy Florals stamp set stamped onto bright Fuchsia card stock for a bright, cheery look.
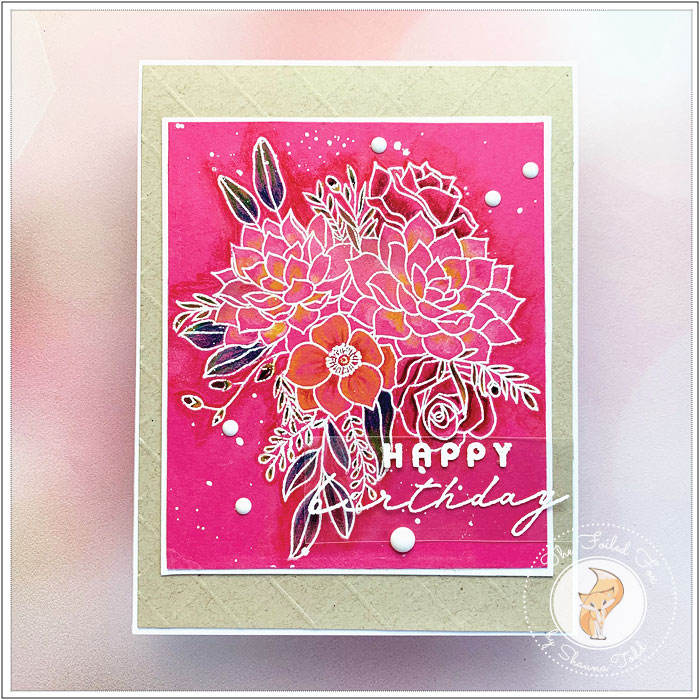
I wondered how it would look if I colored on bright card stock so I decided to experiment. I LOVE my Inktense colored pencils for their blend-ability and their intense color so they were a perfect ingredient to the making of this card design. Along with the Inktense pencils, I am using Fuchsia card stock for a bright Spring-like bouquet.
The floral stamp in the My Favorite Things Fantasy Florals is a beautiful burst of flowers. I thought it would be a good candidate for this experiment.
I stamped the design first with white ink onto a Fuchsia card panel and then, after the design was completely colored, I stamped it again with Versamark ink and heat emboss with white embossing powder. I don’t know if you ever tried coloring with colored pencils, or most mediums after the design has been heat embossed but at least for me, I invariably end up touching the embossed parts with color resulting in the design looking all muddled and like a 5 year old did it.
So, with this in mind, I first placed a Fuchsia panel in my stamp positioner tool, then stamped it with my favorite white ink, Lawn Fawn’s Yeti pigment ink. I left the panel in the positioner to do the entire coloring so I could return later to stamp again and heat emboss.
For the largest flowers, I colored them first with white pencil and then added bits of color in the shaded areas. I continued on with the others flowers, choosing oranges, pink and reds and of course greens for the leaves. After the floral display was colored, I added a darker pink to go around the design so it would stand out.
After the coloring was complete and the panel still in my stamp positioner, as promised, I stamped the design again with Versarmark ink (after adding anti-static powder over the design first, of course). I stamped again to make sure I had a good impression and then it was safe to remove from the positioner, sprinkle with white embossing powder and heat emboss. YAY! … a clean impression.
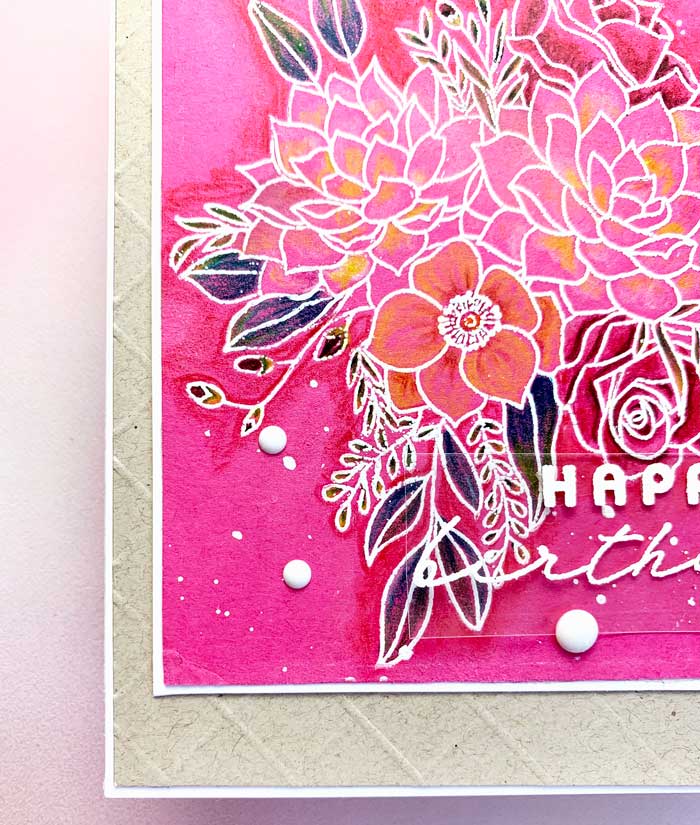
To finish with the panel, I covered the main part of the floral pattern with a scrap of paper and splattered the perimeter with Dr. Ph. Martin’s white Bleed-proof ink. It is my very favorite white to add splatters because they really stand out proud and are super white!! After the ink was dry, I mounted the floral panel onto a slightly larger Neenah white panel and set it aside.
To assemble the card, I first created a lattice embossed design on a piece of Desert Storm card stock. I did this by starting with a larger square piece of card stock, placed it on my score board with a point at the top and bottom, then scored down that line. This created a diagonal line. Keeping the paper in the same position, I added lines 1/2″ apart across the panel, then rotated it to the other two points (for a diagonal line) and repeated the pattern.
When the scoring was finished, I cut it into a rectangle and mounted it onto a slightly larger Neenah white card base. Next, I added the floral panel.
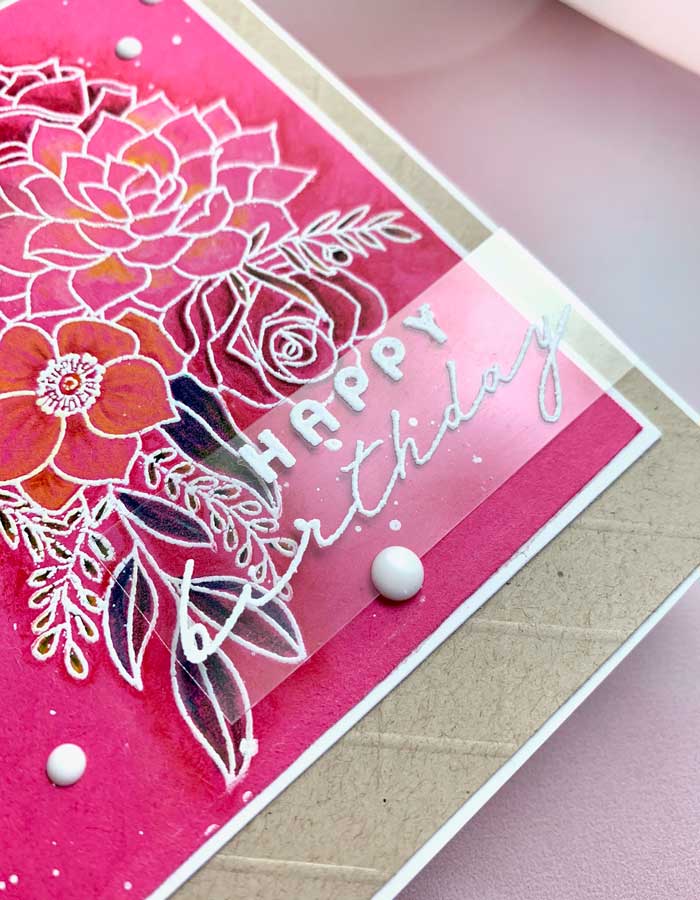
I was still missing a sentiment! I couldn’t bear to stamp and emboss on the design or cover the flowers in any way so I stamped on a piece of heat resistant acetate with Versamark ink and heat embossed it with white embossing powder. By the way, be sure you liberally add anti-static powder before stamping and heat embossing!!
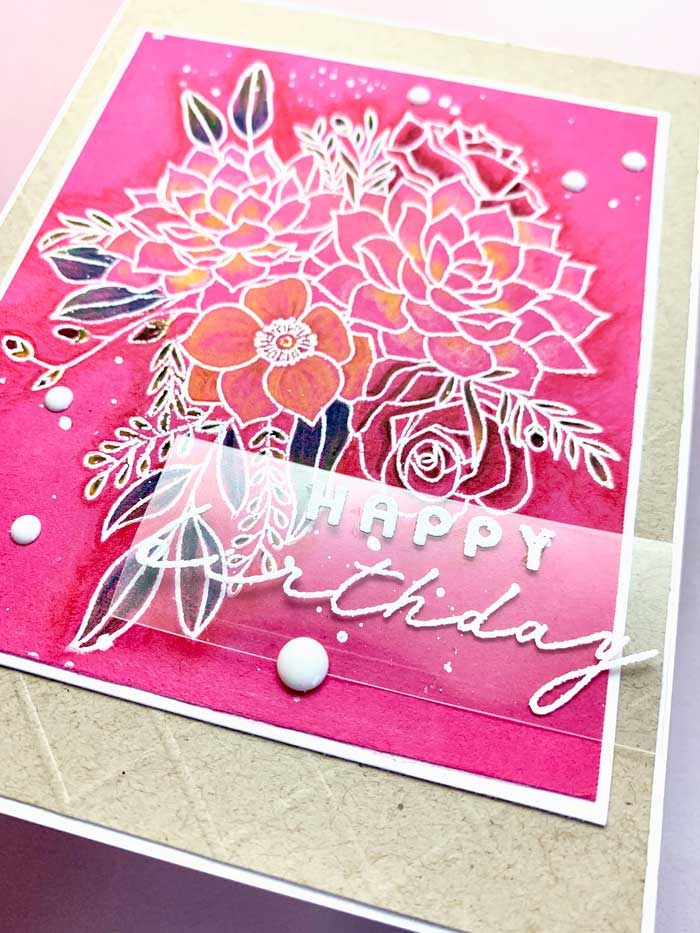
The sentiment was then mounted with tiny rolled up glue dots behind the letters. For the finishing touch, white enamel dots were added.
And there we have it! Done!
Thank you for joining me today – it was a pleasure! ♥
Goodies Used:
Sorry, the comment form is closed at this time.

April 26, 2020
Teri S.
I was away & missed a bunch of emails, so am slowly getting caught up. That’s why this comment is two months after the post. lol This card is spectacular Shauna! Thanks for the detailed written instructions on the process.
April 27, 2020
Shauna Todd
Thank you, Teri! I hope you were away for pleasure… glad you are back!