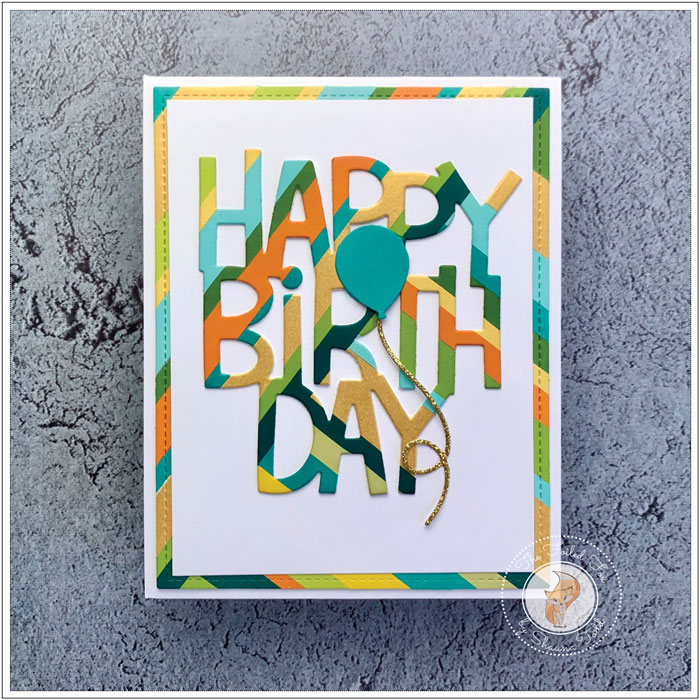
Have A Happy Birthday
Hi Crafty Friends,
Ready for a simple card design that you can make in any color scheme? By using strips of paper and the new Lawn Fawn Giant Happy Birthday Lawn Cuts (die), you can create a quick but super fun card. Varying the color can change the mood entirely.
This card design starts with an A2 white card stock card base. With the card base set aside, I began making the striped background and letters. In truth, they are one and the same. Let me explain.
I first cut strips of complementary colored cardstock in a few widths for each color (check out the supply list for all the colors used). The widths I used were 1/4″, 3/8″, and 5/8″ but of course you can use any size width you prefer.

Next, I cut a 80lb. (you want to use a lighter weight paper here) white card panel and a same-sized panel of Stick-It Double-Sided Adhesive paper. Then, I peeled off the release paper from one side of the Stick-It panel and adhered to the white panel. Then, I took off the other piece of release paper. Now the white card panel is fully sticky and ready to apply the strips.
I applied the first strip point to point (diagonally), from upper left corner to lower right corner, then varying strip colors and widths, I butted up the paper nice and tight to one another until I finished the one half. I found it easily to apply the strip by rotating the paper horizontally (see pic below).
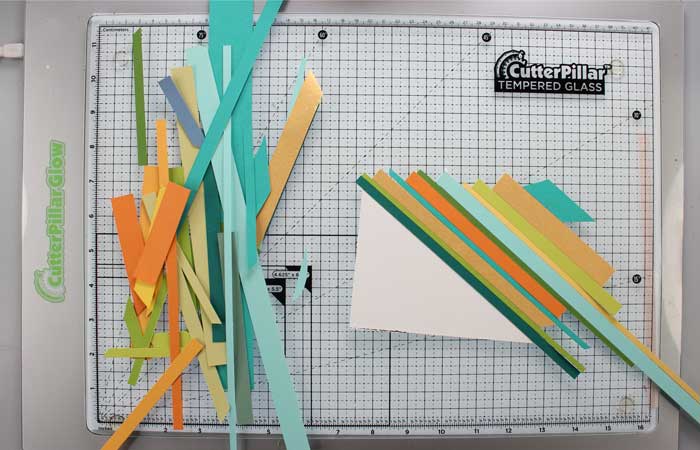
With the first half done, I changed directions and added the strips the same as before. I found it easiest to begin in the middle and work out on both side. By the way, you don’t have to change direction but it does a whimsical element to the stripes!
Once done, I trimmed off the sides, then using the largest stitched rectangle die from Lawn Fawn, I cut the panel. Then, I have a perfect stripped panel with a stitched edge. From there, I centered the Happy Birthday die onto the striped panel and cut it out.

Then I had two pieces, the cut-out Happy Birthday and the striped stitched panel with a gaping hole in it. I applied the striped, stitched panel to the white card base (don’t worry, the hole will be covered up – no one will know!).
Next, I added a 110lb. white card stock panel that fit right inside the stitched edge. Finally, I adhered the cut-out Happy Birthday on top.
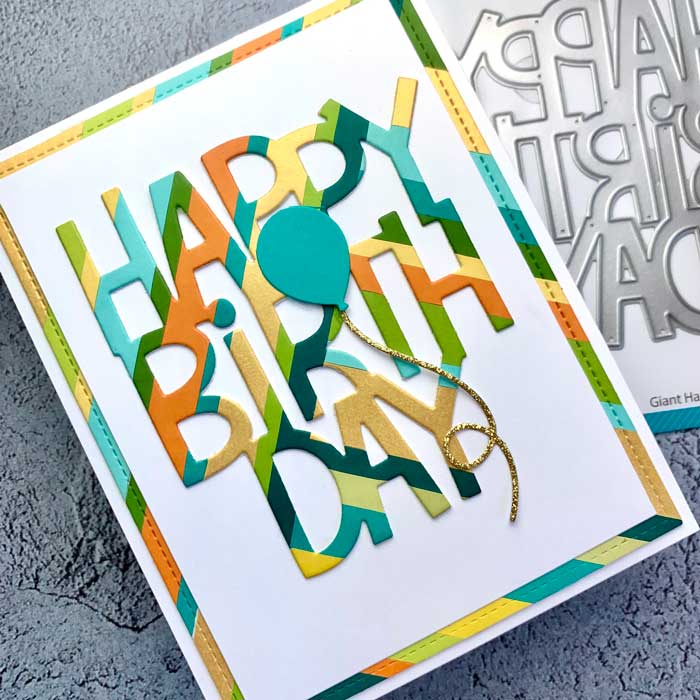
The only thing left to do was to add a balloon cut from Robin’s Egg card stock and a gold glittery balloon tail. And there we have it, a birthday card suitable for anyone on your birthday list! ♥
Goodies Used: