Joyful Snowflakes
Hello Creative Friends,
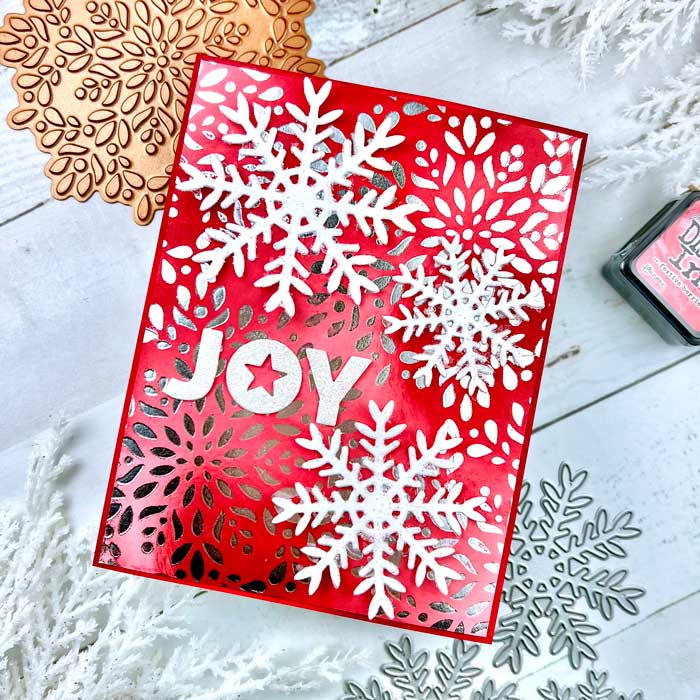
As promised, I am sharing another card featuring silver foiled snowflakes. If you remember yesterday’s snowflake card (click here to view) it featured a snowflake sky. In this design, the whole background is filled with snowflakes using the fantastic Fanciful Snowflake hot foil plate by Papertrey Ink.
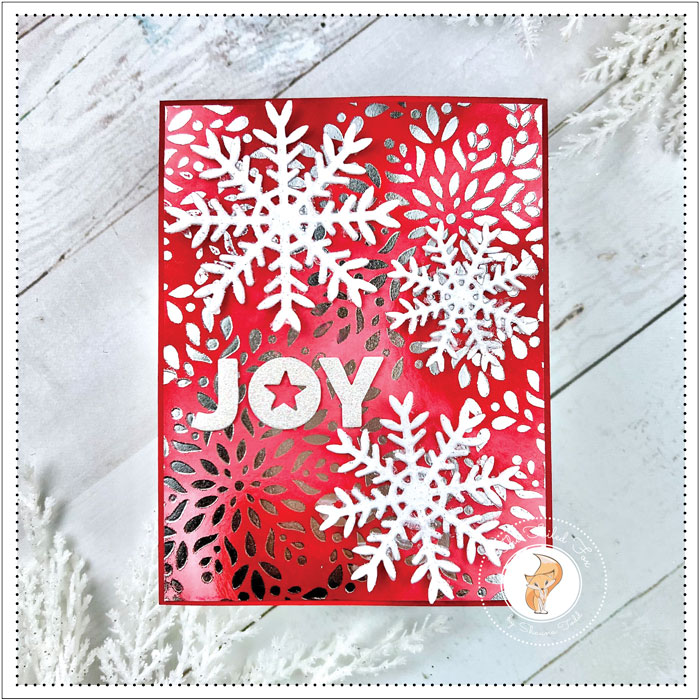
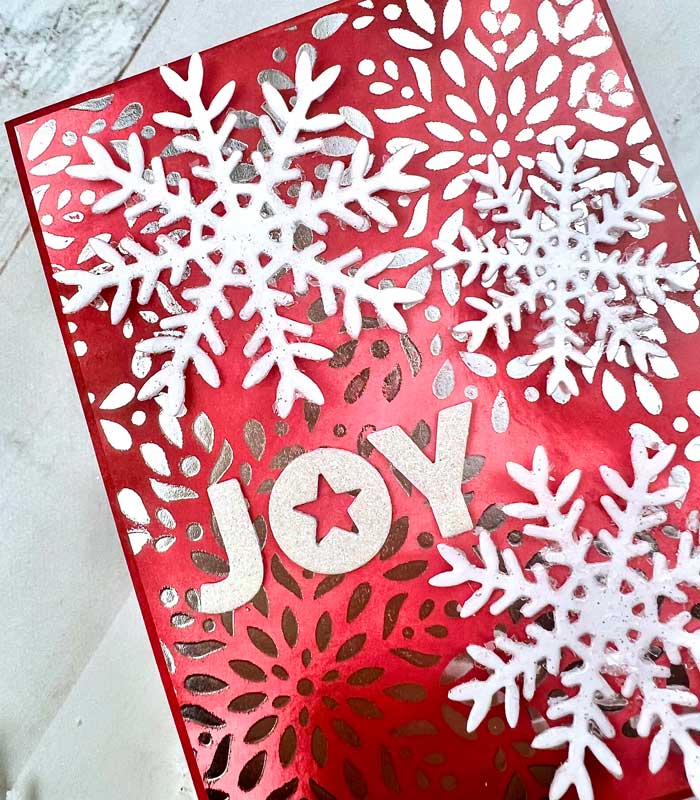
The entire background of this design is filled with foiled snowflakes. We will get to how I did it in a minute but first I had to prepare the background panel. I did this with a piece of Bristol paper, covering it with Saltwater Taffy distress ink, then adding bursts of Festive Berries distress ink. In some places, I deepened the spots of Festive Berries with a bit of Aged Mahogany.
While the ink was drying, I turned on my Glimmer Hot Foil Machine and let it warm up. I made a sandwich of the Fanciful Snowflake hot foil plate with silver foil in the middle (pretty side up against the paper panel and then inked the panel. All this was placed on the platform and started the timer on the Glimmer machine.
When the timer stopped blinking, I ran the whole assembly through my die-cutting machine. By the way, I did add a cardstock shim to the top to apply a little more pressure.
I went back and through slowly a few times in my die-cutting machine, then removed the panel and peeled off the foil, and VIOLA! my first snowflake was done. I repeated these steps a few more times until my whole panel was covered with shimmering silver foil snowflakes.
Next, using a piece of heavyweight (110lb) white card stock, I cut out the snowflakes from the Layered Snowflake Flurries by Papertrey Ink, then spread a thin layer of white Glitz Gel on top. For more glitz, I lightly sprinkled them with Diamond Dust Glitter, a chunky glitter!
I also cut out the word ‘Joy’ from white glitter paper and another from white card stock. I stacked and glued them to give them more height.
To complete the pieces needed for assembly, I made an A2 white card stock card base. Then, using another A2 Bristol panel and blended on Festive Berries distress ink to the edges and a dash of Aged Mahogany to deepen the color. This panel was glued to the top of the card base.
Next, the snowflake panel was trimmed on all sides and mounted on the top of the card base.
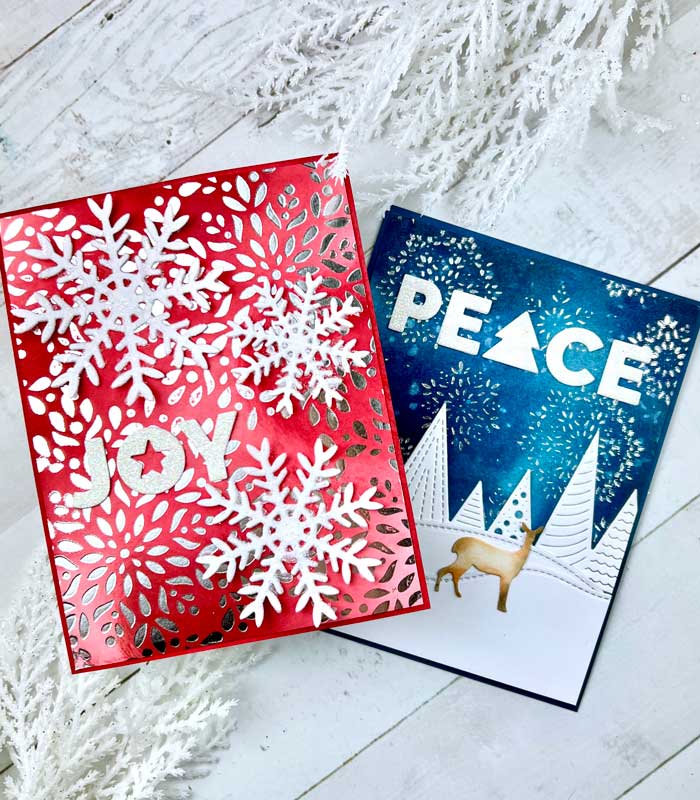
The only thing left was to mount the glittery snowflakes and JOY sentiment.
I hope you enjoyed this duo of snowflakes. You will have to let me know which card design you liked best (this one, or the one yesterday). Thanks for joining me and I will see you next time! ♥
Goodies Used: