Sending Birthday Wishes – Birthday Card
Hi there,
Today we are featuring two fun little cutting dies by CottageCutz. The Rose Doily and the Doodle Flowers are the highlights of this card. Sometimes, I think we overlook the simplest dies. These 2 CottageCutz make the perfect addition to this card project. Along with these two die cuts, there is lots of fun layering of simple elements. Let’s get started….
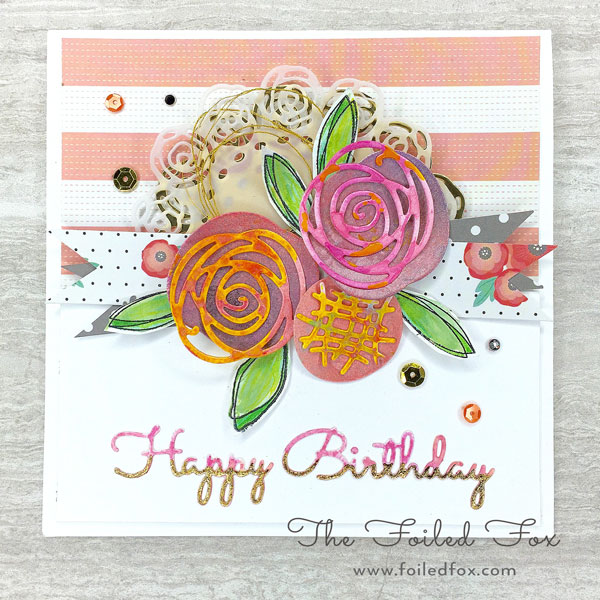
To start, I am using a 100lb. Neenah Solar White card base 5.5″ square. I love square cards and this size makes good use of an 8.5″ x 11″ piece of card stock….simply use a piece 5.5″ by 11″ (this side is already cut for you) and score at 5.5″ on the long side. The next steps I will list in numeric steps for easy following:
Let’s get all the cutting out of the way, shall we?
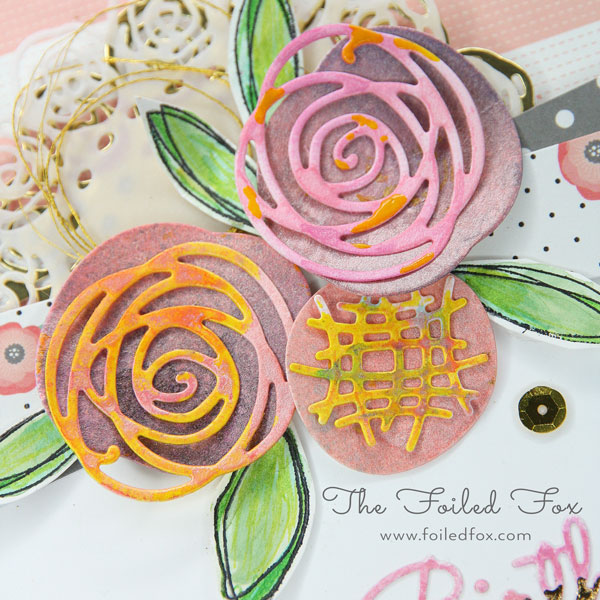
- Cut one each, using the Rose Doilies die from CottageCutz. I used a gold foil card stock and vellum.
- Using watercolor paper (I used Canson XL Watercolor ) cut 2 complete sets of flowers, using the Doodle Flowers die. This will give you 2 complete flowers of each size.
- Out of the Cottage Living paper pack, I used the gray and white polka dots, coral flowers with with white polka background and the coral and white stripes. First, I cut a 2.125″ X 5.25″ each of the coral and white stripe and white Neenah card stock. I mounted it to a 5.25″ x 5.25″ piece of the same Neenah white card stock, with the coral stripe at the top and the small piece of white card stock butting up against it. This fills the base piece of 5.25″ x 5.25″ and it provides a nice base to mount everything on, with the added benefit of giving a little dimension too.
- Then, cut one banner each from the coral flowers and the grey polka dots – approximately 3/4″ x 5.5″
- Die cut “Happy Birthday” from Impression Obsession’s Greeting Die Set from a scrap of watercolor paper.
Ok, now that all the cutting is out of the way, we can get to the coloring and assembly. (by the way, can you see the shimmer?)
- Color the flowers with watercolor or any method you would like. I used the Shimmerz spray paints. They are so easy to use and make the flowers soooo sparkly. I sprayed the base of the flower with a combination of Cotton Candy, Mango Tango and Walkin’ a Tight Heliotrope – just have some fun.
- Color the inserts with the Cotton Candy and Mango Tango, then add some yellow accents with the Dandelion IrRESISTible Pico Embellisher.
- After the flower parts are dry, add a dap of glue to the middle of the flower base and press on the insert for each flower.
- Stamp some complimentary leaves – make a bunch (6-8) so you have enough. I used the leaves from the LJD Scribble Roses stamp set. I watercolored them but these can be done with the Shimmerz green spray too. This would give you a sparkly leaf.
Assembly:
- Start with the 2 tone paper base (coral stripe and white cardstock – 5.25″ x 5.25″ see above) we created and start adding layers by first positioning the two doilies on top of one another but slightly offset.
- Add the 2 banners in the middle with them offset from one another
- Arrange the flowers and leaves to your liking. I like to use large glue dots to adhere them to the card – it is a quick and effective way to position and glue on elements like flowers.
- Wind around your fingers a few times some DMC Metallic Thread. Tuck in front of the doilies but behind the flowers and banners.
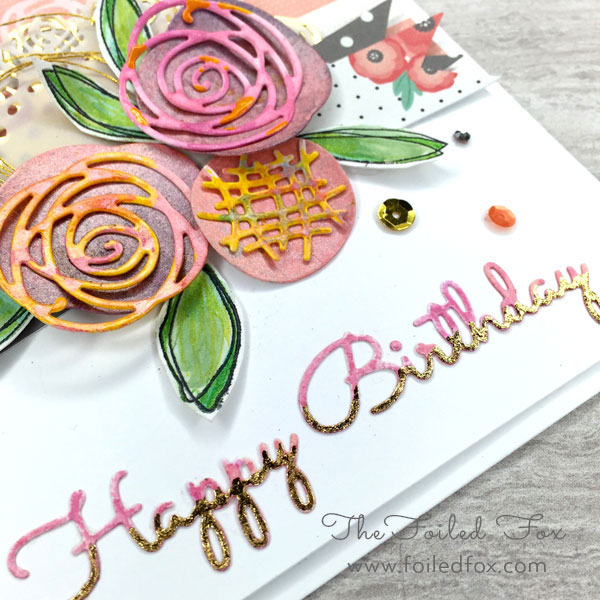
- Add your sentiment. For this card, I die cut “Happy Birthday” from the Greeting set by Impression Obsession but you could use anything you have in your stash. Then, I sprayed with the Shimmerz Cotton Candy and Mango Tango and let it dry.
- To create the effect of the half foiled “happy birthday” like shown, I took a page out of Carissa Wiley book. She does such a great job with this treatment to die cut sentiments. It isn’t hard either… just a like detailed. Check out her video on how to create this look – it’s dramatic and very special.
- Adhere the greeting to the card.
Viola! You are done!

Supplies:
Neenah Card Stock
Canson XL Watercolor Paper
Doodle Blooms by CottageCutz (flowers)
LJD Scribble Roses stamp set (leaves)
Rose Doily by CottageCutz (doily)
Cottage Living Paper Pack
Vellum Paper – 5″ x 5″ piece
Gold Card Stock – 5″ x 5″ piece
Greeting Die Set by Impression Obsession
Cotton Candy Spritz Shimmerz Paint Spray
Mango Tango Vibez Shimmerz Paint Spray
Walkin’ a Heliotrope Shimmer Paint Spray
Dandelion IrRESISTible Pico Embellisher
DMC Metallic Thread – Gold
Assorted Sequin
