Summer Vibes
Hi Creative Friends,
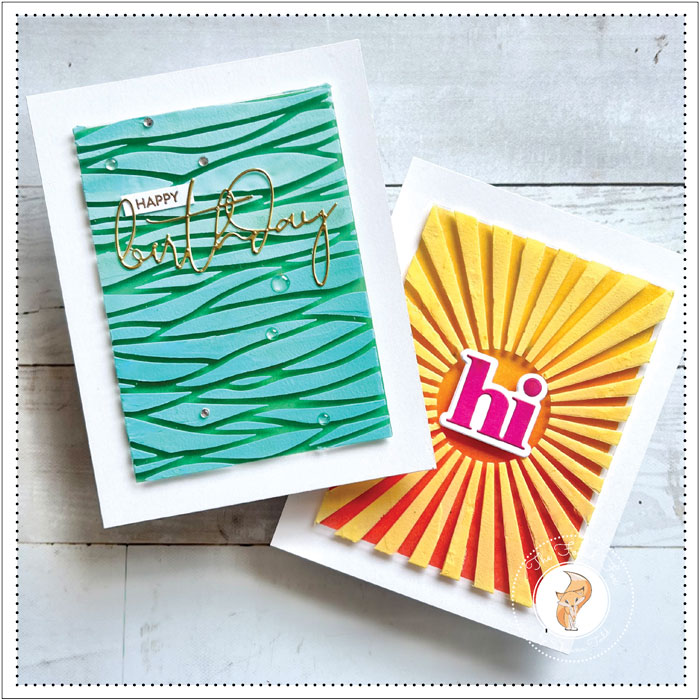
I am jumping in to share two card designs that are super fun to make (and give!). They have a cool, summer vibe.
Each of these card designs uses a stencil and texture paste for the main attraction.
Let’s start with the bright, sunburst one. To begin, I cut an A2-sized panel of Bristol paper, then taped it down inside my stamp positioner. I use the positioner because it has a grid on the pad and it is portable but you can tape down the paper onto virtually anything. I carefully apply the tape so that I mask a 1/2″ border all the way around the panel. Spellbinders Best Ever Craft Tape is great for this but Purple Tape or any other low tack tape works.
Once the panel was taped down, I blended on Squeezed Lemonade distress ink at the top, then graduated the color as I worked my way down the panel. The next colors in the graduation were Wild Honey to enhance the yellow, then Ripe Persimmon and Picked Raspberry distress inks. Festive Berries to darken and brighten the pink.
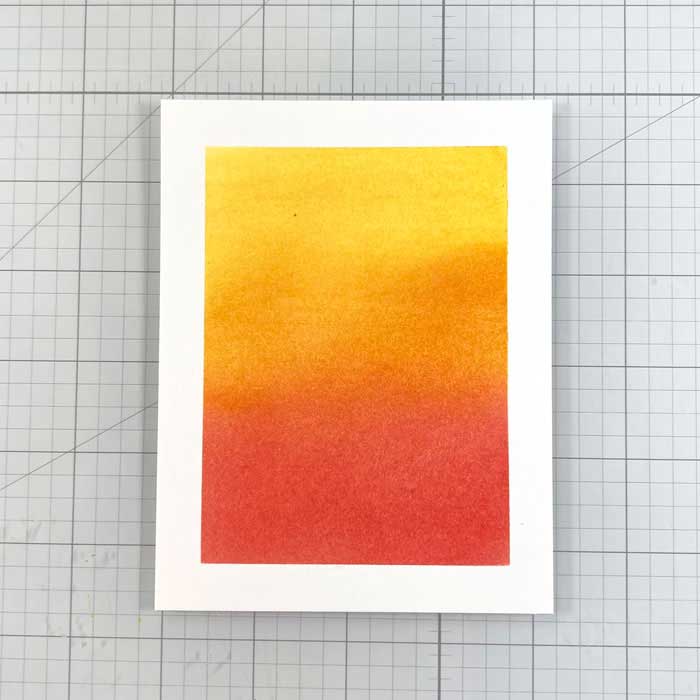
When I was satisfied with the panel, I carefully peeled off the tape and set it aside for now.
Next, I cut a piece of plastic or acetate panel the same size (3 1/4×4 1/2″) or a very small smidge more than the colored portion of the panel I just colored. It doesn’t matter if you use a plastic sheet or acetate, just make sure it is very stout!!
Once again, I used the stamp positioner and positioned the plastic panel, then secured the Radiating Rays stencil by My Favorite Things over the top (all supplies used are below). I didn’t want to add any adhesive to hold the plastic down since it would show when I finished. Instead, I relied on the stencil to keep the plastic in place. P.S. – you don’t have to use the stamp positioner but again, it is very convenient to use the grid and it is portable!
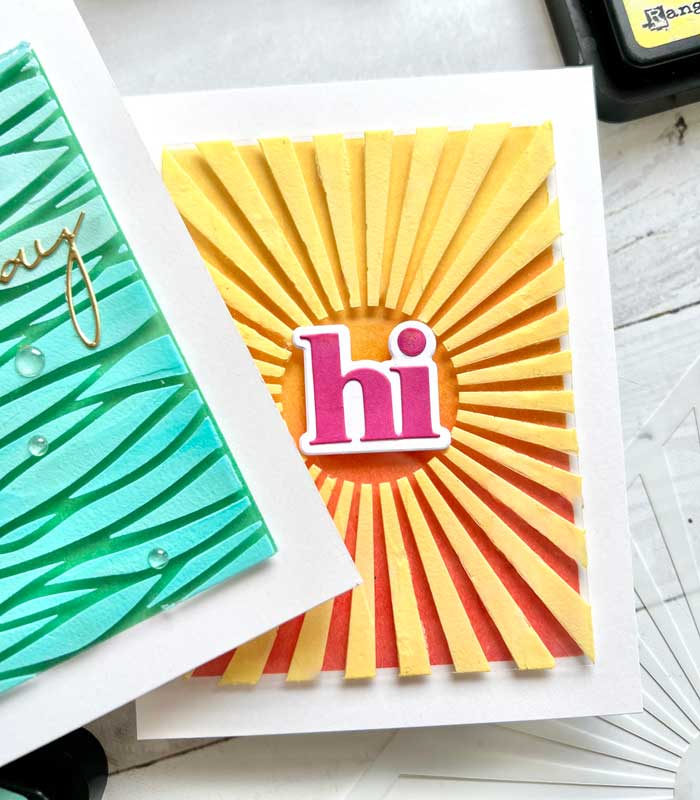
For the next step, I smooched some Squeezed Lemonade and Wild Honey distress inks onto my work surface, then added a blob of opaque texture paste, then mixed to the desired color. The paste was then spread over the stencil, making sure to spread it past the edges of the plastic panel. When done, the stencil was very carefully peeled off.
Using a craft knife, I gently placed the blade under the panel and removed it from the stamp positioner to a flat place to dry.
In the meantime, the inked panel was adhered to a white card stock card base and the word “hi” was cut out using the die from the Just Say More die set by Concord & 9th. I used Fuchsia colored paper and white for the shadow. They were then glued together and foam squares were added.
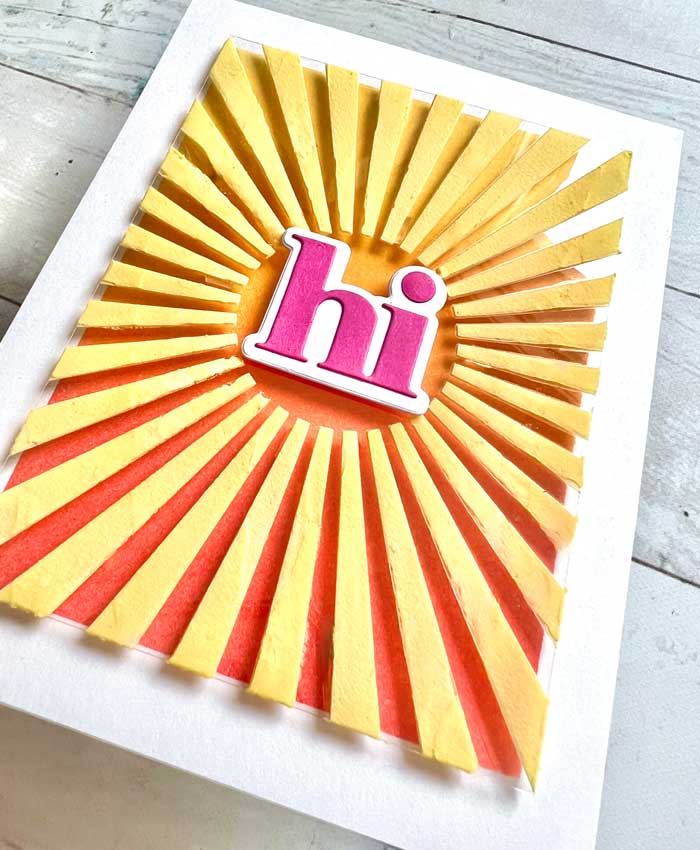
The texture paste was bone dry (make sure!) so everything was ready to assemble. I added small bits of Kooltak translucent foam tape to the back of several areas, then peeled off the release tape and adhered the panel over the top of the card, centering it over the colored part.
To finish, the ‘hi’ was mounted in the center.
That completes the first card. We are going to use the very same instructions with the wave card design. The only difference was that I used only Salvaged Patina and Peacock Feather distress inks for blending onto the A2-sized Bristol paper card panel. By the way, the camera doesn’t pick up the graduation of color but trust me, it is there!
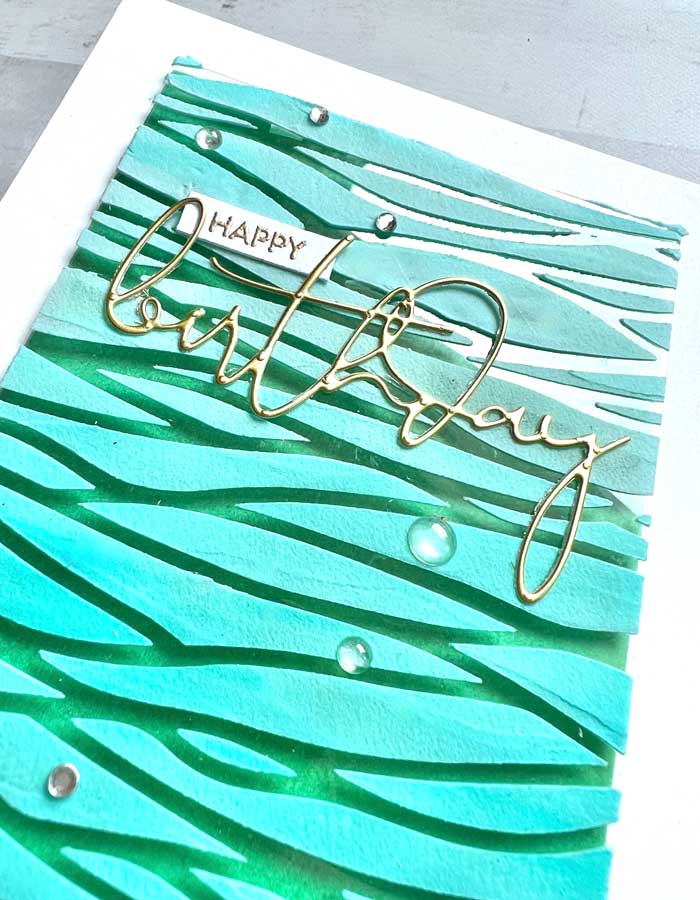
Using the same sized plastic panel, it was mounted in my stamp position, and the Layered Waves stencil by Honey Bee Stamps was mounted on top.
I mixed a blend of texture paste and Peacock Feathers on my work surface, then spread it over the stencil with my palette knife. When done, I carefully removed the panel and let it bone dry.
The ink-blended panel was mounted onto a white card stock card base and the wave panel was mounted using the Kooltak translucent tape, the same as before.
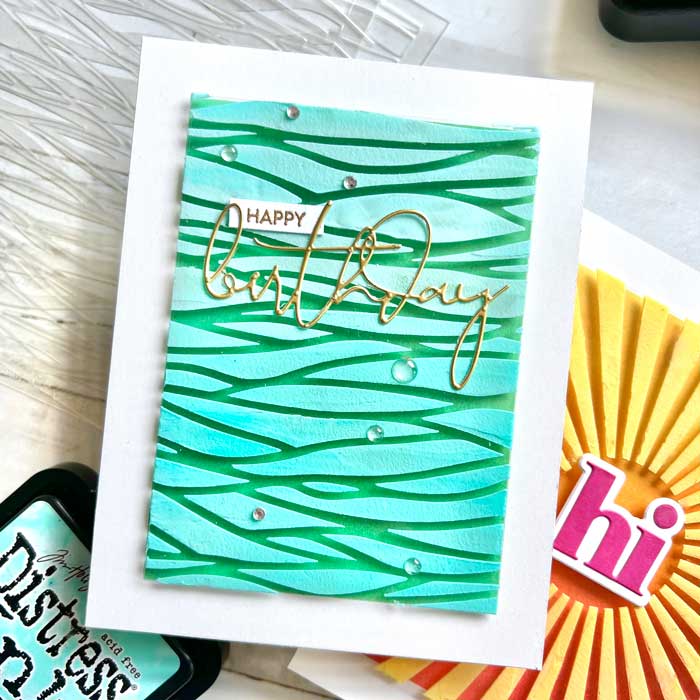
To finish, using gold foil cardstock, I cut out ‘birthday’ from Spellbinders Yana’s Layered Script dies and gold heat embossed ‘happy’ using the Mini Messages from Honey Bee Stamps. The sentiments and clear droplets were added to complete the design.
That’s it… all done. I hope you enjoyed it. I would love to know which was your favorite! ♥
Goodies Used: