Valentine Hearts and Flowers Card

I am squeezing in another Valentine’s Day card before the holiday is over – whew! I just made it. I hope you enjoy this one!
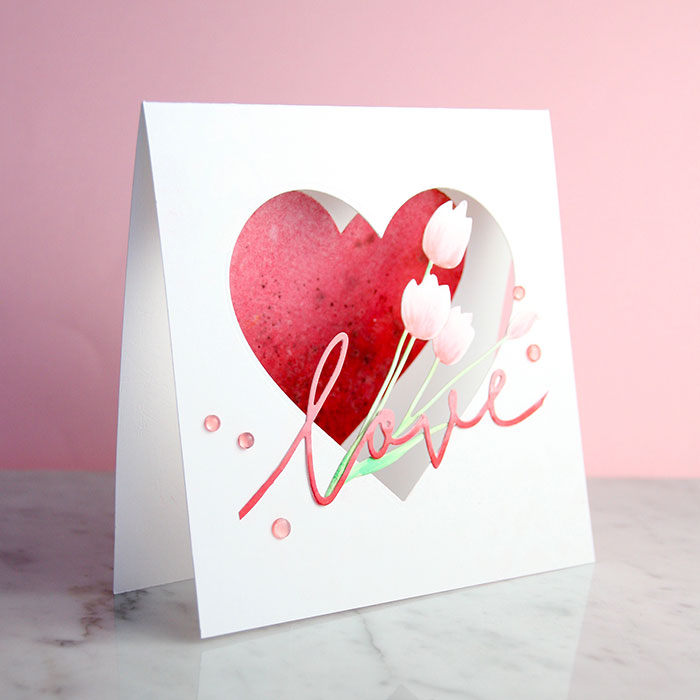
This card has a big red heart and beautiful flowers, all the essentials for a perfect Valentine’s Day. With a few Shimmerz sprays, Brusho and a heart die, along with the Penny Black’s Creative First Blooms die set, it all comes together.
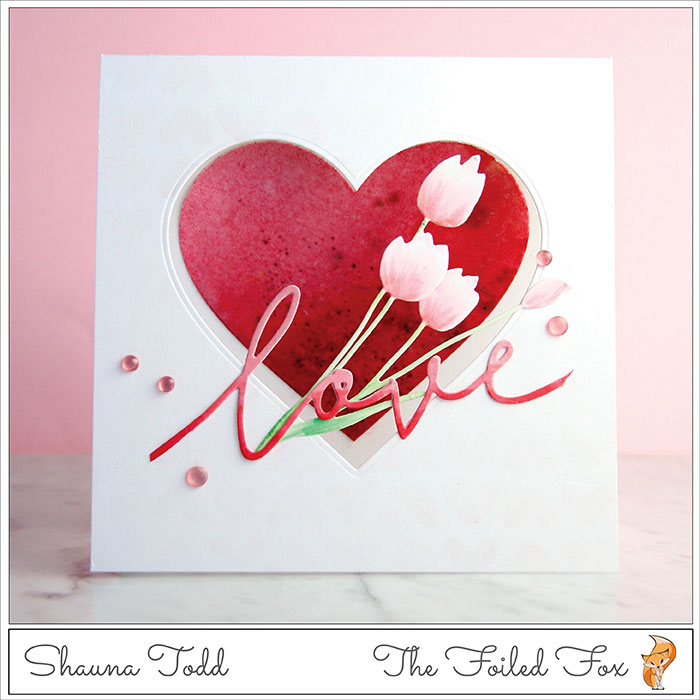
This card started out with a square Neenah white card base with a heart cut from the center of the front, using a large heart die from the Hero Arts Heart Infinity die set. I set aside the cut-out heart for a moment while I stenciled hearts on the front of the card using the My Favorite Things Full of Heart stencil, Delicata White Shimmer ink, and a blending tool. You can barely see it in the photos but believe me, its there and adds a nice shimmery touch ♥!
With the card base stenciled, I started to color the heart. To do this, I first sprayed the whole heart with the Cotton Candy Spritz Shimmerz spray, then using the Sweet Heart Vibez spray, I sprayed about two-thirds of the heart, leaving the upper left corner lighter. The right one-third of the heart was sprayed with Bed of Roses Spritz spray. This creates a gradation of color.
To spark it up a little and to give more depth of color, I then sprinkled a tiny bit of Brusho Scarlett and Brilliant Red crystals and lightly spritzed it with water. This gave it a more mottled look. I left the heart to dry naturally so the Brusho could continue to work its magic!
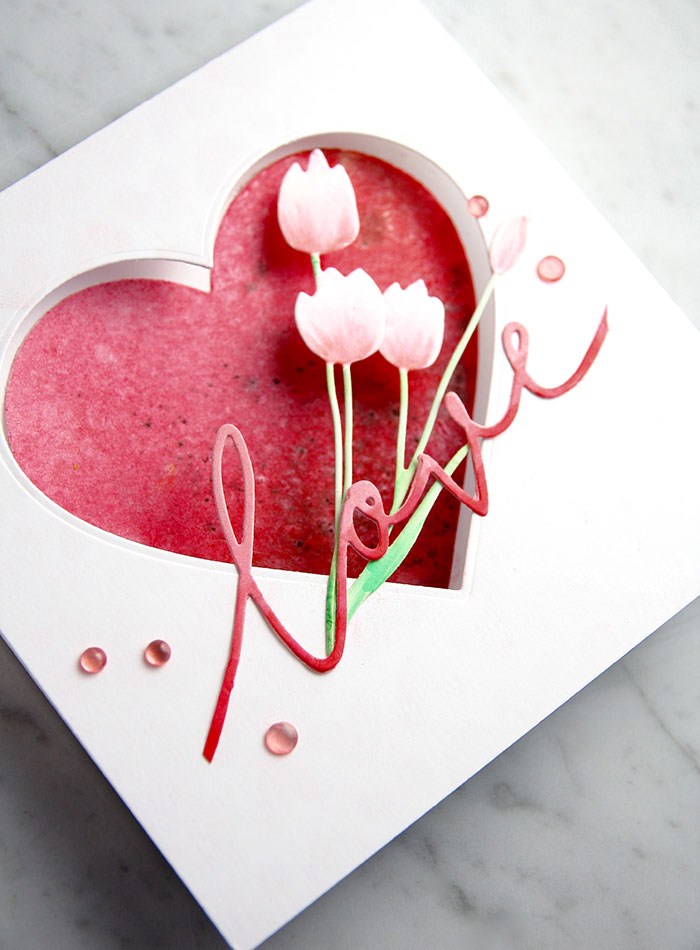
While the heart was drying, I cut some tulips from the Penny Black First Blooms die and a few ‘Love” sentiments from the Concord & 9th Love Always Dies. I then colored the flowers (front and back – since it will show to the other side with Copic Markers R81, RV13 and RV04. The leaves were colored with G21 and G03.
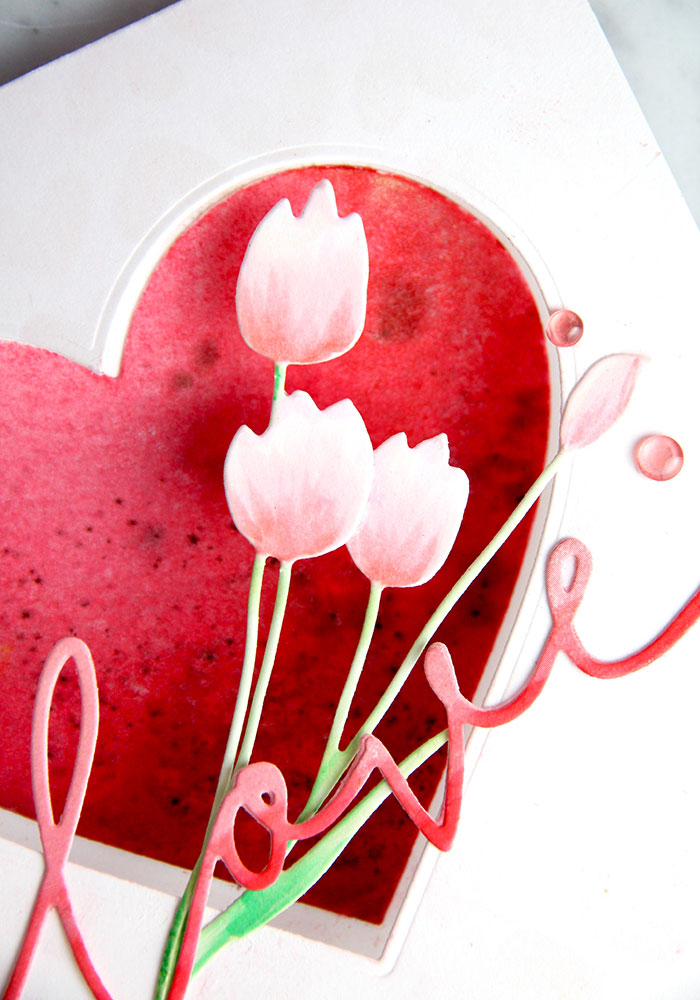
For the sentiment, I glued one ‘love’ on top of the other and then colored it with Copic markers in an ombre style. This is easily accomplished by first coloring all the word with RV13, then only the middle third with R35 and the bottom with R39. Now, all that is left to do is a simple assembly.
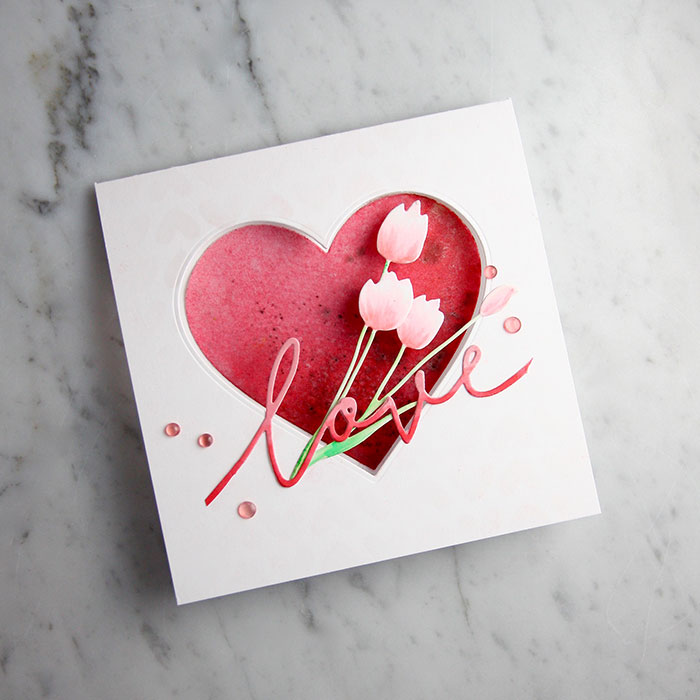
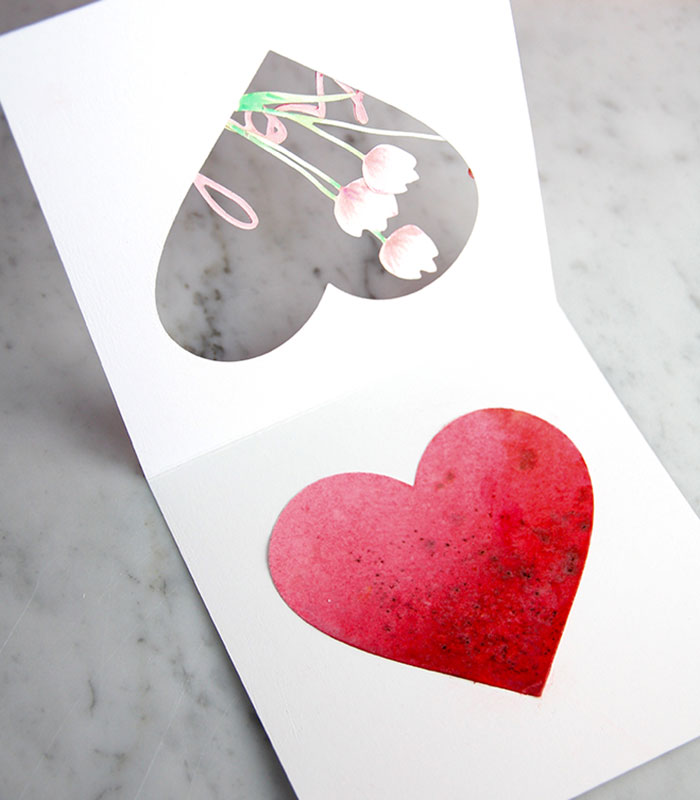
The colored heart was positioned and glued to the inside of the card to match up with the heart cut out on the front. Next, the tulips were arranged and glued on only the bits that overlap the card and the ‘love’ was layered over top and adhered. A few Queen & Co red and pink droplets were added.
Thanks for stopping by… see you next time!
![]()
Supply List:
 Penny |
 Hero |
 Concord |
 My |
 Shimmerz |
Sweet |
Bed of |
 Brusho |
Delicata |
 Neenah |
 R81 |
 RV13 |
 RV04 |
 R35 |
 R39 |
 G21 |
 G03 |
 Zig |
 Queen |
Sorry, the comment form is closed at this time.

February 15, 2018
Susan
This card is beautiful! A burning question – how did you extend the cursive “l” on the die cut to get the full letter on the card? (The original die is cut off on the left side.) Do you have a magic trick? If so, I’d love to know what you did as I definitely want to make a similar card.
Thanks for sharing your talent!
February 15, 2018
Shauna Todd
Believe it or not, the ‘love’ wasn’t extended, it just looks that way. The only thing I did was cut out the word ‘love’ with the ends still attached, then snip the ends (tails) of the word on the diagonal to free it from its ends. I hope that makes sense.
February 18, 2018
Susan
Thanks so much for sharing your talent and expertise. It is definitely an “optical” illusion after looking at the die and then the finished card.
I just love the cards you do and those that are shared on The Foiled Fox blog. I am learning so much!
February 16, 2018
Rosali
This is so very beautiful!!