Wandering Easter Bunny with his knapsack
Hi Crafty Friends,
This little bunny with his knapsack is another magical creation from Alexandra Renke. It is an adorable silhouette of an Easter Bunny on the move. Alexandra Renke calls this bunny the “Wander Rabbit” and he adds to any Spring scene.
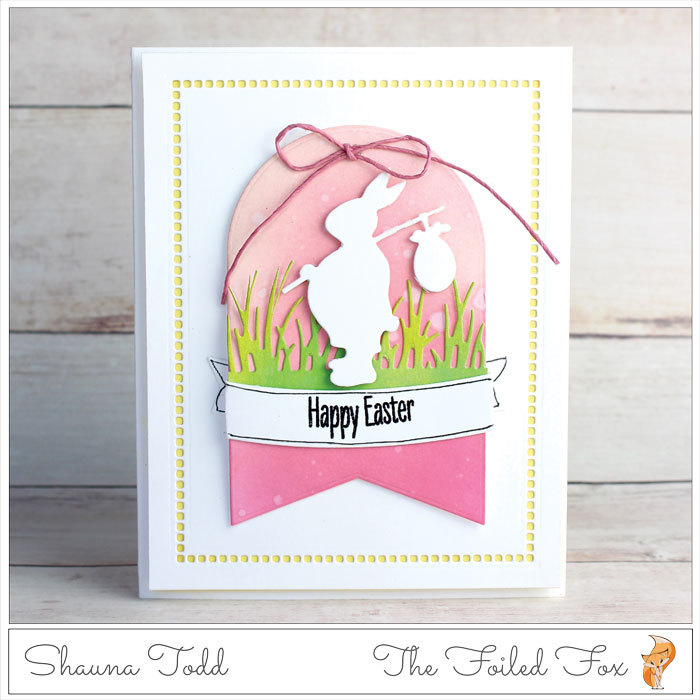
This card design is pretty simple. After you get all the supplies and panels ready, you are nearly done. So, with that in mind, I started with a white Neenah 100lb. card base. Then, I prepared a white cardstock panel slightly smaller than the card base front and a matching yellow Starfruit panel. Then, using the Spellbinders Venice Lace-Hemstitch rectangles, I die-cut the elegant, but simple hem stitch design into the white panel and layered the yellow panel underneath with a little glue so that the yellow peeks through the hemstitch design. Next, I added a rectangle of foam on the back of the panels and adhered them to the card base.
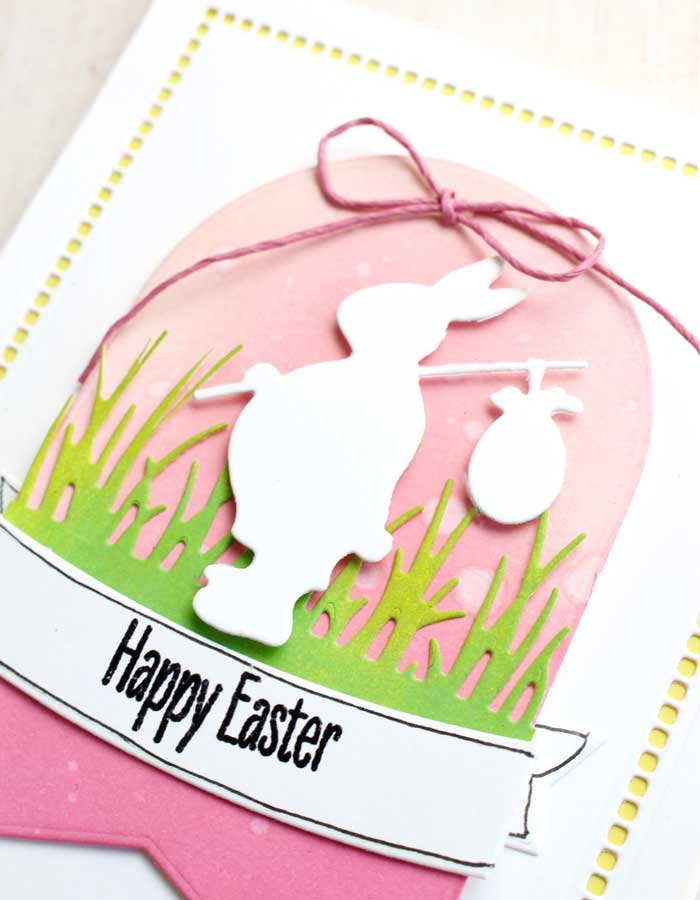
With the card base done, I set that aside and started work on the focal point – that adorable bunny! Using the My Favorite Things Tag Builder Blueprint 7, I cut one tag from Bristol paper and the matching banner. Starting with the bottom of the tag, I blended Picked Raspberry distress oxide ink, then Worn Lipstick distress oxide and finished at the top with Spun Sugar distress oxide ink. I sprinkled little dots of water on the tag and blotted them dry.
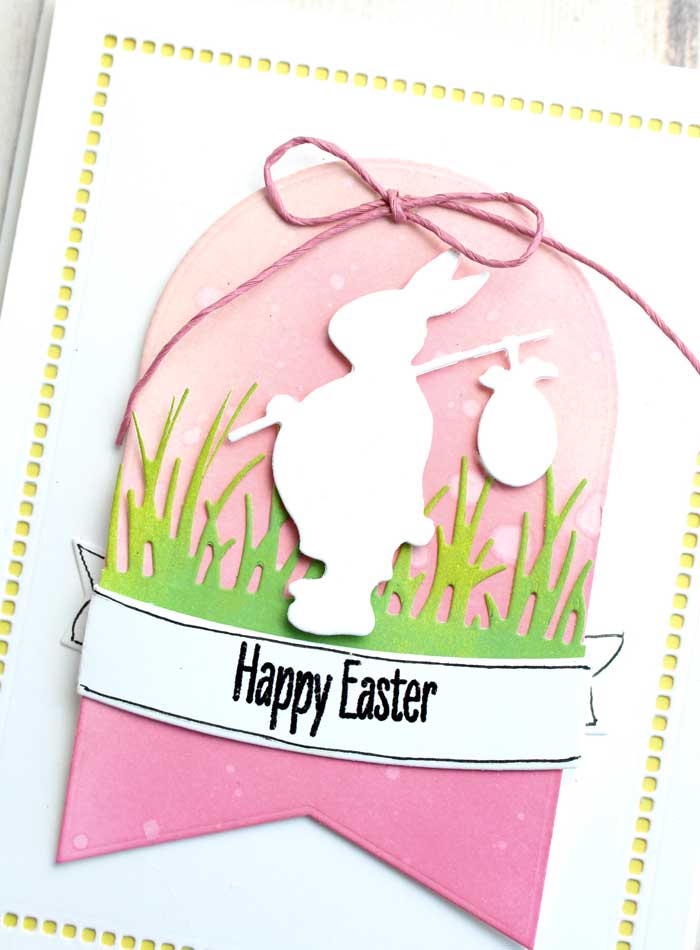
Next, I prepared the grass by first coloring a strip of paper with Mowed Lawn and Crushed Olive distress oxide ink, then cut the grass, using the Alexandra Renke Grassland die. I cut a short strip of ‘grass’, just the width of the tag and glued it in place. Then added the cut-out bunny on top with some foam tape.
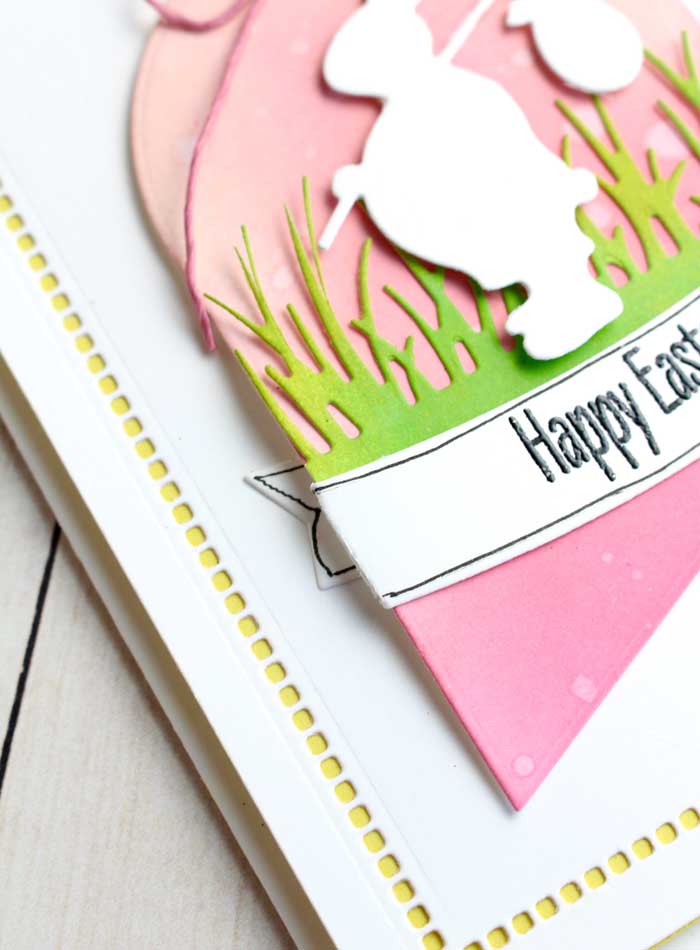
I just have a little left to do before this card is done! So, to finish, I stamped ‘Happy Easter’ from the Easter Bunnies stamp set by My Favorite Things onto the banner with Versamark ink and heat embossed it with the Ranger black embossing powder. I then hand drew the black outline with a Kuretake Zig .005 outline pen.
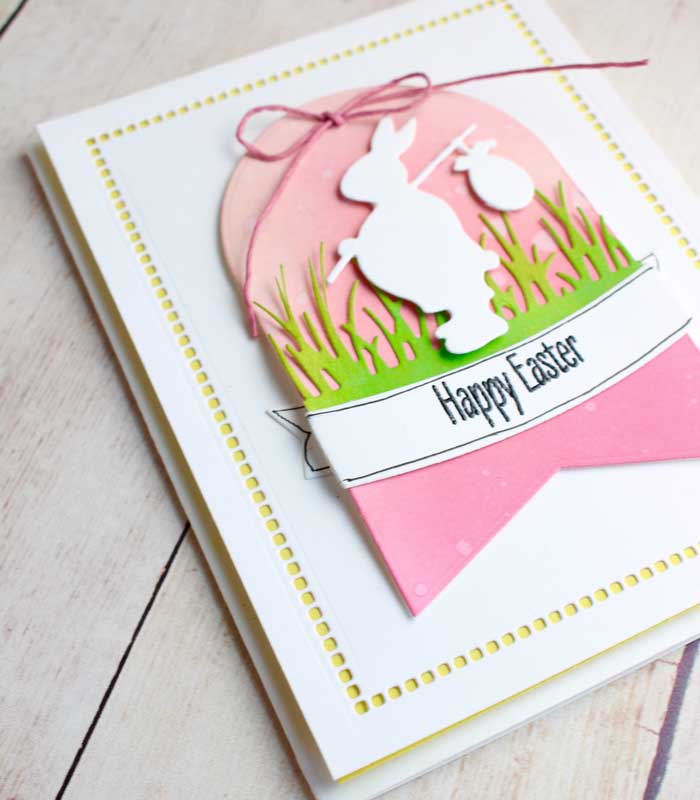
The banner was then fitted around the tag and the whole thing was adhered to the card base with foam tape. I added a twine bow and the card is now done. See how easy that was! ♥
Goodies Used: