I Sure Do Miss You by Lisa Tilson
Hi Crafty Friends,
As you know, slimline cards are all the rage, and for good reason! They give you lots of room to create a fabulous scene like the one from Lisa Tilson of My Card Trip blog. Lisa has made the most adorable card with an awesome outdoor setting. To do this, she used the very popular Adorable Adventures by My Favorite Things.
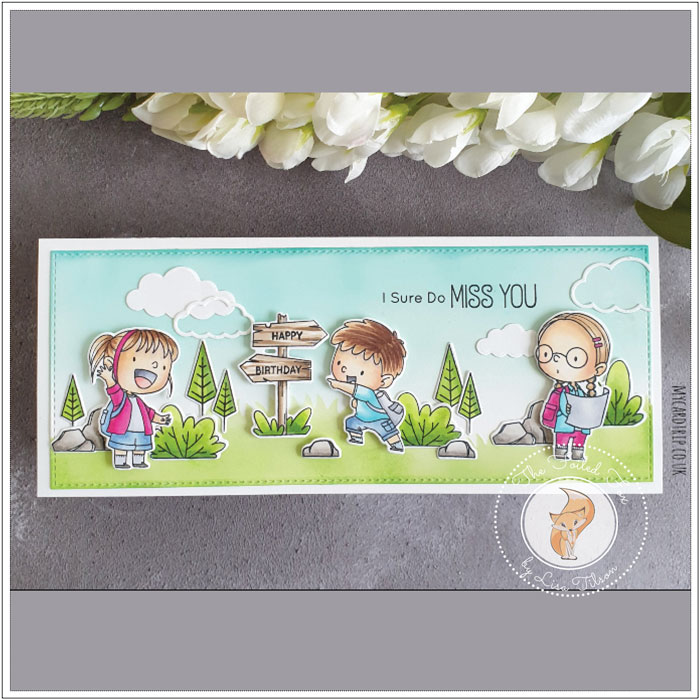
Hello again everybody, Lisa here today with another slimline card for you featuring the MFT Adorable Adventures set. When creating my previous card on the blog, I used a vertical format for my scene, but today, I wanted to share a card using the same set, but with a horizontal design. It gives a completely different look! Stamp sets where you get lots of images are perfect for scene building in this slimline format, you can often repeat certain aspects to create a seamless flow (and fill the panel), and then introduce new images to change the look. And of course, using different colours is everything!
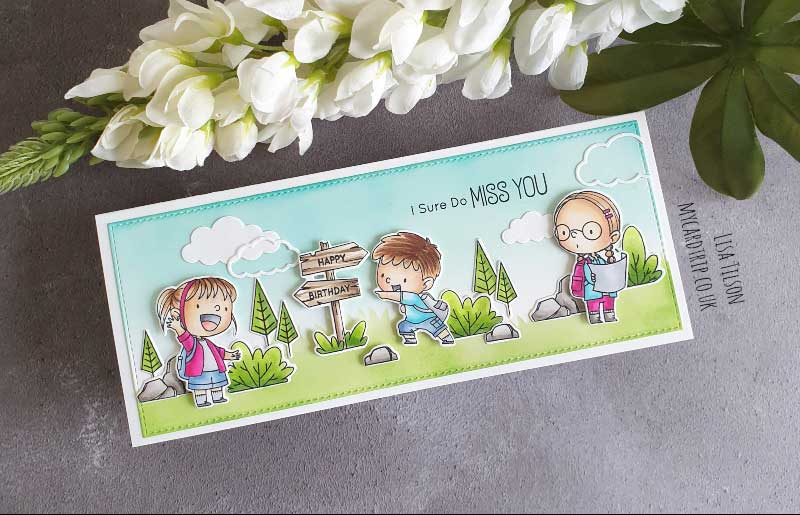
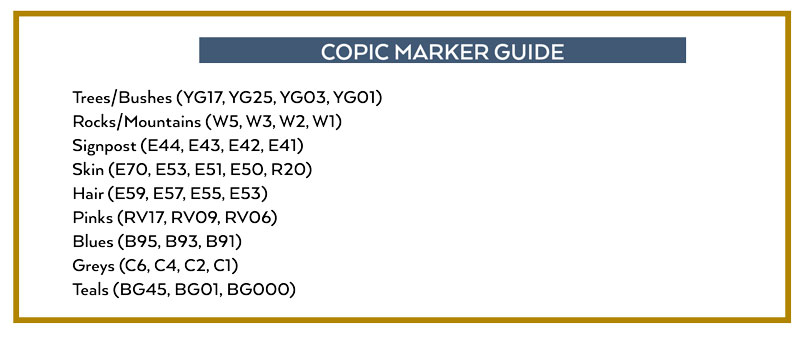
For this card, I began by doing my usual and stamping a bunch of images ready to create the scene. I knew I would only use three characters and I had an idea of how they would be placed. So, with that in mind, I could then work out approximately how many bushes or trees, or rocks, etc., I would need to colour. I did actually colour some mountains but didn’t include them in the end. I stamped them all onto Neenah 80lb cardstock using Memento Tuxedo Black ink. They were coloured with Copics and then cut with the coordinating die-namics. I set them to one side to work on the background.
First of all, I die cut the stitched panel from Neenah 80lb using the main slimline die in the set. MFT did bring out a set of slimline dies that cut a grassy border which is great if you want to create lots of layers in the scene. But for my scene today, I took the MFT Grassy Edges stencil and blended Mowed Lawn Distress Oxide onto the panel. As the stencil is 6” wide, and my card panel is wider, I simply moved the stencil along, lined it up so that you wouldn’t see where I joined the two sections together and carried on blending. If your stencil doesn’t line up easily, you can always place an image over it to hide the “join”. Just make sure when you blend your first section, you don’t go to the end of the stencil or you will end up with a line that is hard to disguise. After blending the grass, I took Peacock Feathers Distress Oxide and blended down from the top of the panel towards the grass. I used a heavier layer at the top of the panel and faded out to white before you get to the grass.
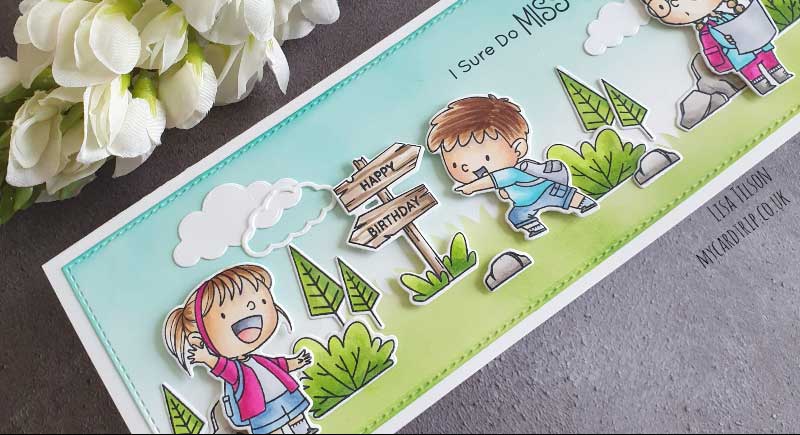
I played around with the images for my scene, took a photo, and then started to adhere all the pieces down, either with Multi Medium Matte or with Foam tape. It was at this point that I thought the sky looked a bit bare, so I die cut some clouds from MFT Cute Cloud Outlines and adhered those down, making sure to leave enough room for my sentiment. This sentiment is from the set and was stamped using Versafine Onyx Black Ink.
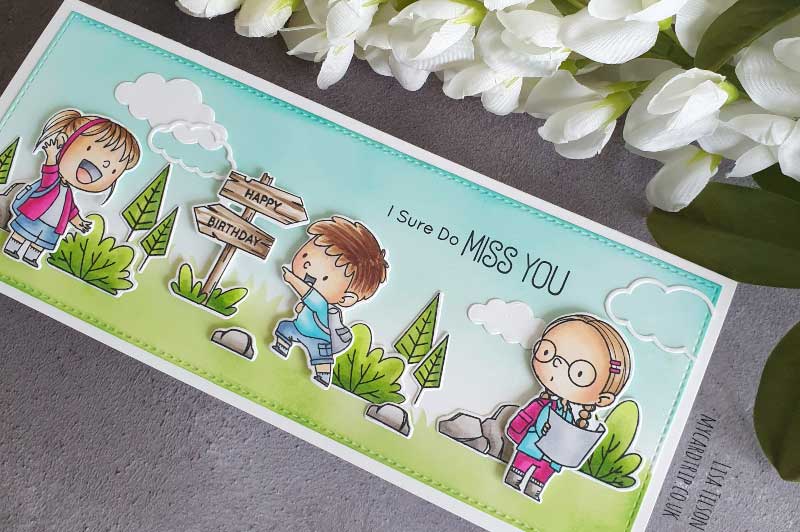
The completed panel was adhered to a top folding card base using double-sided tape. The card base measures 3.5” x 8.5” and I think that I forget to mention in my last post, but the stitched panel measures 3.25” x 8.25”. So, there we have it, the finished card for today. I do hope that you like it. I will be back to share another card with you soon and as always thank Foiled Fox for having me on the blog!
MORE ABOUT LISA:
Goodies Used:

