Splendid Spruce Trees
Hi Crafty Friends,
I am sharing another quick, but high impact card design. As usual, I am dashing around to get everything done so my friends and family know I view the holiday time rather loosely. I do manage to get all the cards and greetings mailed by Christmas but likely don’t arrive until after… but it is the thought that counts, right? (At least that is what I keep telling myself – haha!)
These three cards use the same Penny Black Splendid Spruce stamp set and the Mistletoe Greetings by Concord & 9th.
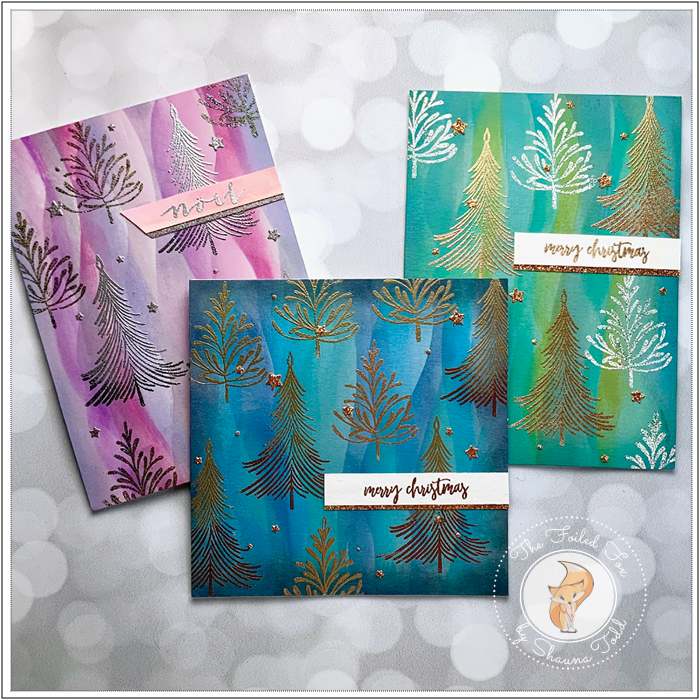
I have three different color variations of the same design so I will zip through the steps and just remember I used the exact same steps for the other two cards. But, for now, let’s start with the blue one.
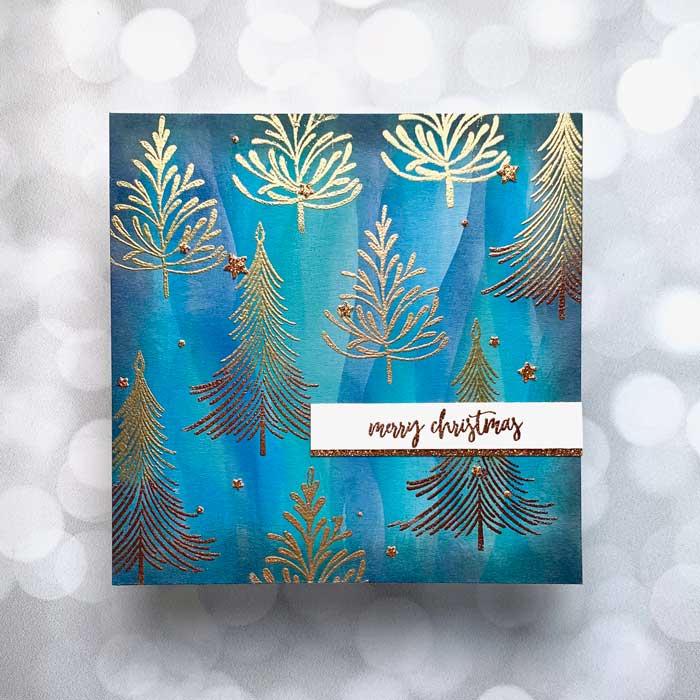
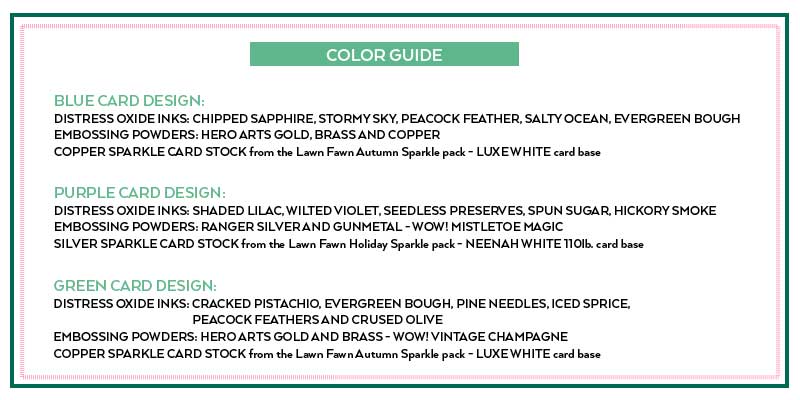
I began with a square Bristol paper panel (bristol paper is fabulous for ink blending – in particular Koh-I-Noor), a few distress oxide inks(Chipped Sapphire, Stormy Sky, Peacock Feather, Salty Ocean, and Evergreen Bough) and the MFT’s Drifts and Hills stencil. I positioned one edge of the stencil near the right edge of the panel. I blended on one of the distress oxide ink colors. Then rotated the stencil so I could use a different edge, moved it over a little to the left and blended with a different color of my chosen color palette. I continued to work across the panel, using a different edge of the stencil and color each time until the whole panel was colored. By rotating the edges of the stencil and using a different color each time, it gives it a vertical wave of varying colors. Finally, I added a little Chipped Sapphire distress oxide ink to the edges for more drama.

With the background now complete, it was time to move on to embossing two different trees from the Penny Black Splendid Spruce stamp set. First, and foremost, make sure the ink is dry and prep the panel with anti-static powder – this is really, really important! So, using Versamark ink, I started by stamping the larger tree. Then, sprinkled Hero Arts Gold embossing powder on the top two-thirds of the tree, tapped off the excess. Next, added Hero Arts Copper embossing powder on the lower third of the tree and tapped it off. The whole tree was then heat embossed. I continued to stamp a few more trees, using the same technique and stamp.
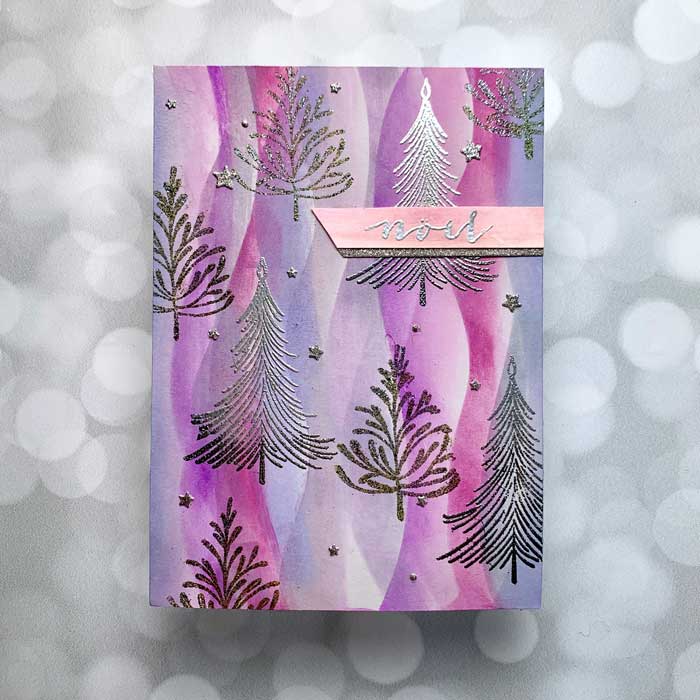
Next, I choose one of the smaller trees in the stamp set and filled in the spaces on the panel by stamping the tree in several places with Versamark ink, sprinkled Hero Arts Brass embossing powder and heat embossing all the small trees at one time.
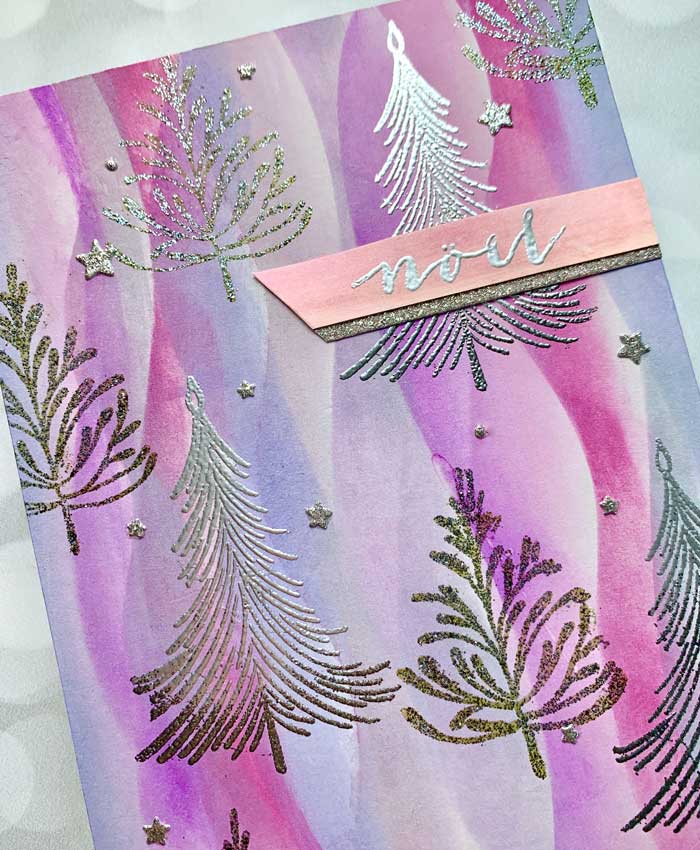
Once the background panel was done, I mounted it onto a white card base and got ready to add a few embellishments. I did this by cutting out a few stars from a piece of coppery, gold glitter paper found in the Lawn Fawn Autumn Sparkle paper pack and using the Lawn Fawn Starry Skies die. The stars and dots were then adhered to the panel with a dot of glue.

The final step was to stamp the sentiment. Using a strip of Luxe White (really it is a beautiful cream color) card stock and the Mistletoe Greetings stamp set by Concord & 9th, I stamped “Merry Christmas” with Versamark ink and gold heat embossed. A glitter strip was added to the bottom of the sentiment strip and the whole sentiment adhered to the card front.

I liked how this card turned out and how fast they were – so much that I made two more color variations. I hope you enjoy it too!🎄
Here is a color guide:
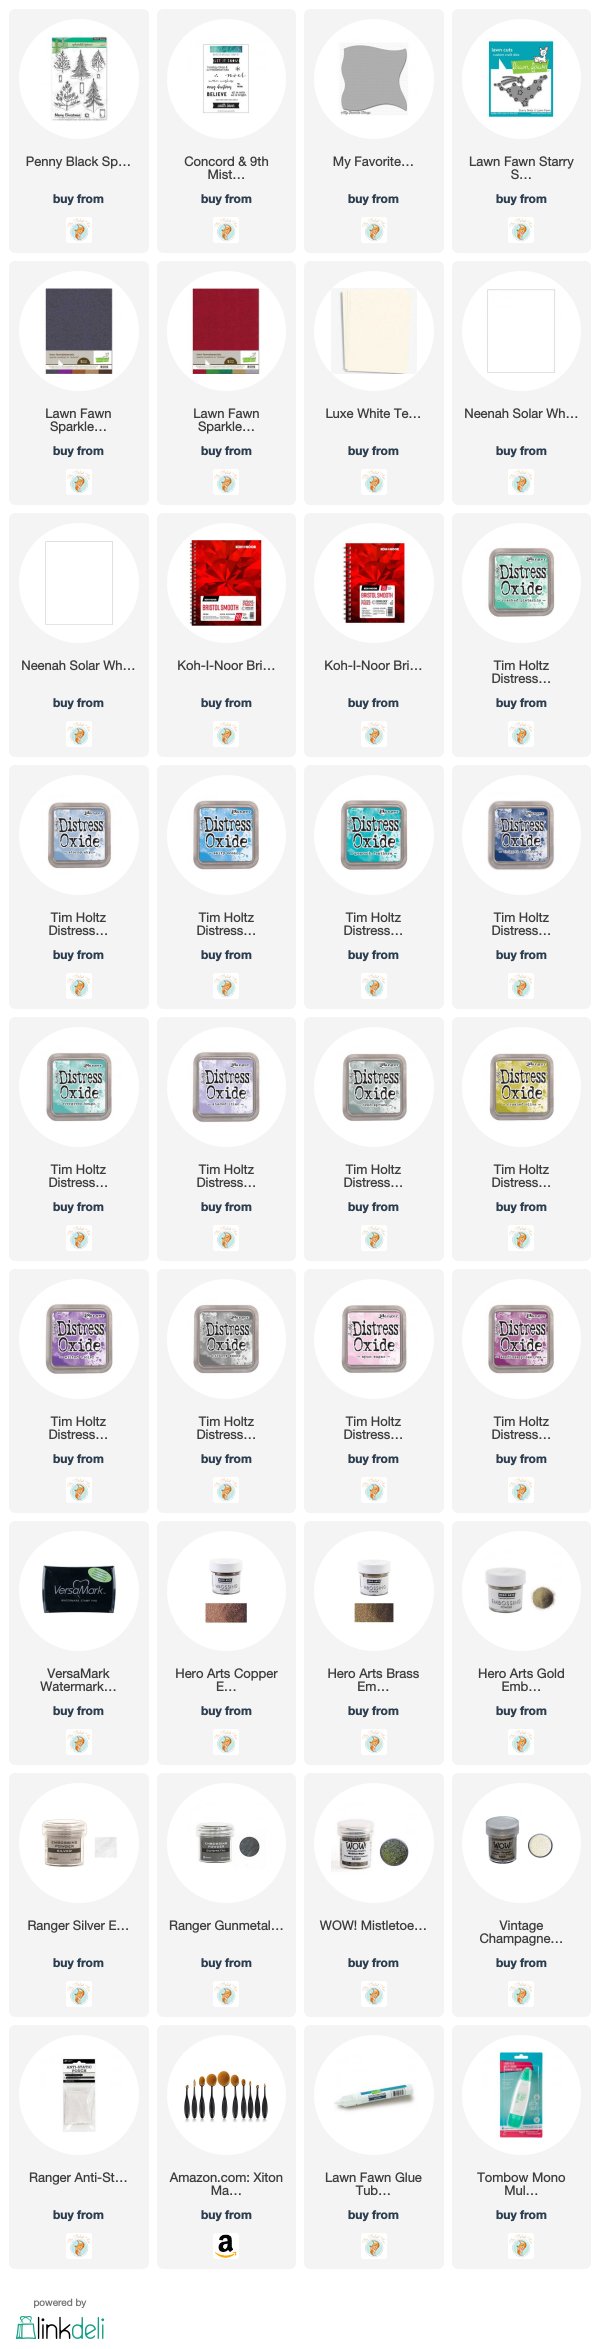
Goodies Used:
Sorry, the comment form is closed at this time.

December 18, 2019
Slbt
Lovely… appreciate the color guide!
December 18, 2019
Pauline Godfrey
WOW, these are absolutely stunning cards! Thanks for the tutorial on how this is done. Will definitely give this a try.
December 18, 2019
Christine
The vertical waves and embossed trees give an elegant look to your beautiful cards. Great design idea! TFS
December 19, 2019
l
WOWZERS! The Drifts & Hills stencil made such beautiful backgrounds!!!
December 19, 2019
Karen Walker
All three are stunning! Thanks for the detail explanation of how you created the gorgeous backgrounds!