
Hello Everyone,
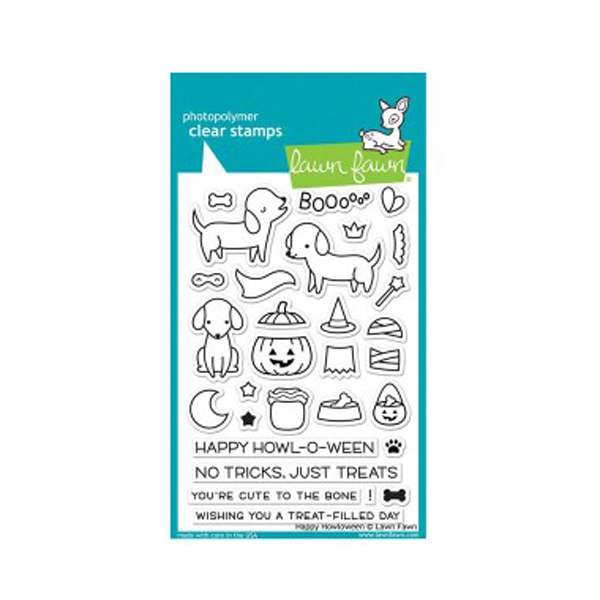
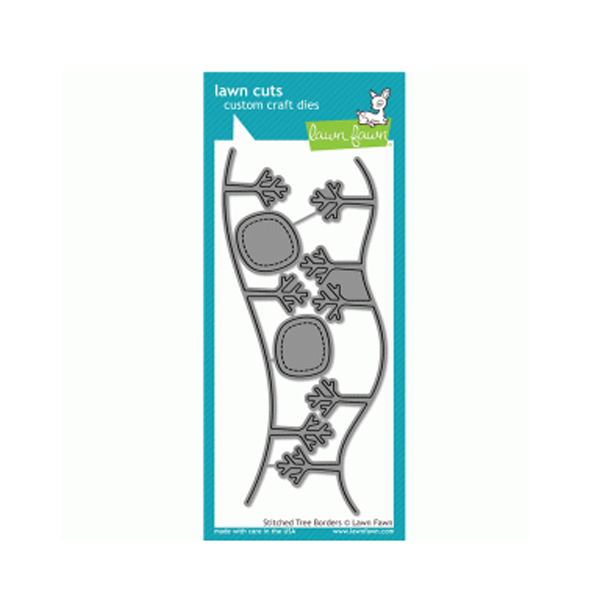
Back again … ready to start another fun project. Today is a scary Halloween card highlighting another Lawn Fawn stamp set from their new Fall release. The Happy Howloween stamp set, along with it’s companion lawn cuts and the supporting Stitched Tree Border Lawn Cuts set, help make this card up in a snap.

This card nearly didn’t get made. I had the dog and his trick or treat pumpkin all colored sitting on my desk, only to be pushed aside for other projects. Once I ‘dug’ out from my other projects, there he was… just sitting there begging to be used. So, now… what to do, what to do… I was not sure what I wanted to do with him, so I just jumped in doing something.
 |  |
|
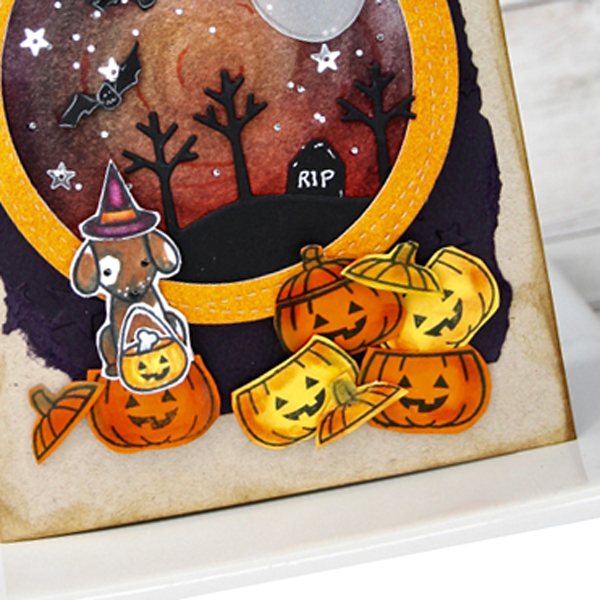
To catch you up, the previously colored dog and his trick or treat pumpkin was made by stamping onto white card stock with Memento Tuxedo Black ink and colored with Copic markers. I used Copic markers: C1,C5, C7, E23, E99 for the dog. To make the spots, I carefully left blank white spots, only highlighting the edges of the white spots with a C3 marker. Don’t forget his witches’ hat and pumpkin They were colored with V99, RV69, RV13.
I stamped and cut out bunches of pumpkins from the Marshmallow Chick card stock (yellow) and the Citrus Peanuts card stock. These two colored card stock papers have such nice weight and color that it makes it easy to make great looking pumpkins. I just smudged some distress inks (Spiced Marmalade for the yellow pumpkins and Barn Door for the orange ones) on the edges to give some character and depth to the pumpkins.
Next, I had a piece of paper left over from another project (isn’t great when you find a little treasure like that in your scrap bin?). I had created it by smearing lots of Spiced Marmalade distress ink on the paper and accenting it with bits of Wild Honey and Scattered Straw. This technique creates a subtle mottled effect. I cut a circle using the MFT Die-namics Wonky Stitched Circles. This made a great frame and focal point for the card. Foam tape was added to the back of the frame to pop it up…. I set it aside for the final assembly.
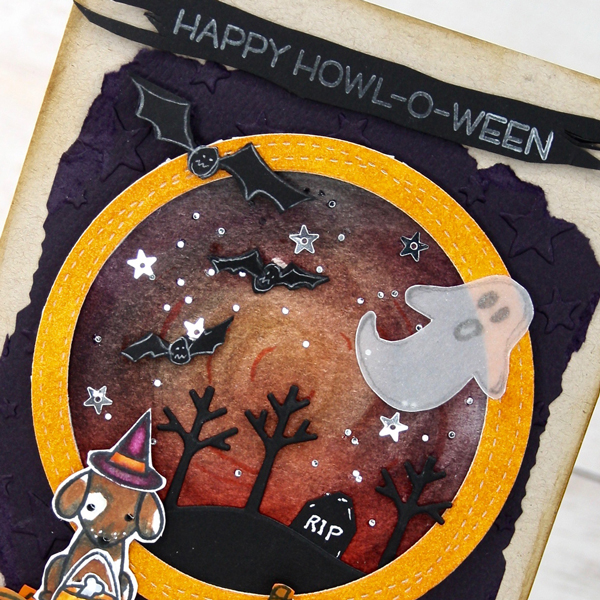
Now, that I had the frame, what to do with the center… With another piece of white card stock, I started with making a circle (my moon) with my blending tool and Wild Honey distress ink right in the center of the paper. I added a fiery horizon with Barn Door distress ink at the bottom of the ‘moon’. For the swirly look, I started adding colors, going around in a circle around the center with my blending tool and distress inks. First with Dried Marigold around the center, then working outward, I used Seedless Preserves and then on the very outside Black Soot. You can see too, that after all the coloring was done, I had a few sharper curved lines with a Spiced Marmalade distress marker. Adding the trees cut from Neenah Black card stock and the stitched hillside borders at the bottom gave a nice ground to the scene.
I was using a card base made from Neenah Desert Storm card stock. After placing the pieces so far on the card, it was looking a little plain. So, I dug around and found a scrap of a dark purple card stock. I embossed it with a 3D Star embossing folder and randomly tore the edges.
My card was still looking a bit unfinished. I decided that there was not any self-respecting Halloween card that didn’t have some bats and ghosts. Since I didn’t have a bat or ghost die or stamp (and luckily they are easy to draw) I cut out a ghost from vellum and drew with a chalk pencil (if you don’t have one of these… you’ve got to! – so handy to draw on dark papers) the bats on black paper. Oh, and don’t forget the tombstone. I just roughly cut a piece of black paper and added R.I.P. and outlines with a white gel pen.
To assemble the card, followed these steps:
- Starting with the Desert Storm card base, I smudged the edges with Vintage Photo distress ink and added the dark purple embossed card stock
- Cutting the moon scene in a circle to match with the orange wonky circle frame, I stuck the moon scene to the frame
- Peeled off the release paper from the foam tape of the circle and adhered to the purple card stock
- Finished the scene in the circle by adding silver star sequin and the tiny holes that come with it to the sky (a quickie glue pen is great for this), then attached the bats and ghost.
- Added foam tape to the orange and yellow pumpkins, arranged and stuck them down below the circle frame and added the dog on top of one of the pumpkins.
- I added the sentiments. I stamped the “Happy Halloween” with Picket Fence distress ink onto black card stock and cut randomly on all edges to give it a ghostly appearance.
At last, done.

Supply List:
 Howleween Stamp Set |
 Howloween Lawn Cuts |
 Stitched HIllside |
 Wonky Circles |
 Embossing Folder |
 Desert Storm card stock |
 Black Cardstock |
 |
 Chick Card Stock |
 Peanuts Card stock |
 Vellum Paper |
 Honey |
 Marmalade Distress Ink Pad |
 Marigold Distress Ink |
 Preserves Distress Ink Pad |
 Soot Distress Ink Pad |
 Door Distress Ink Pad |
 Photo Distress Ink Pad |
 Copic |
 Copic |
 copic |
 Copic |
 Copic |
 Copic |
 Copic |
 Copic |
 Copic |
 Gel Pen |
 Pencil |
 Black |
 Fence Distress |
 Tape |
 Glue Pen |
 Sequin |
