
Hi there,
We are so pleased to present another beautiful project by Heather Telford. She has created absolutely GORGEOUS flowers using the Bold Blooms stamp and die set by Papertrey Ink – Ink To Paper collection. These designs are so stunning there aren’t enough adjectives to describe them!
Heather has given step-by-step instructions below. So take a look. Then, pop over to her blog for oodles more inspiration.
I am happy to be connecting with you on the Foiled Fox blog today. I have not been surprised to see the crafty community reach out to one another to provide inspiration and encouragement while so many are isolated. I hope these spring blooms bring you some joy today and perhaps inspire your next quarantine craft project. Stay home, stay healthy and stay hopeful. I know some of you are not able to stay home as you are out there caring for others; thank you for all you do to keep people safe and well and household functioning.
Today’s cards feature the ‘Bold Blooms’ stamp set and coordinating dies from Ink to Paper plus a little sentiment from their ‘tagged’ sentiment set. When I work with smallish floral stamps I often feel like I am flower arranging. With real flowers, I don’t have a lot of skill so I’m happy when I get the stamped ones to look balanced.
The ‘bold blooms’ set has a nice range of flowers, some round, some side view, some tiny ones that could be centers for the larger flowers. There are also some single leaves, leaf sprays, and flower stems.
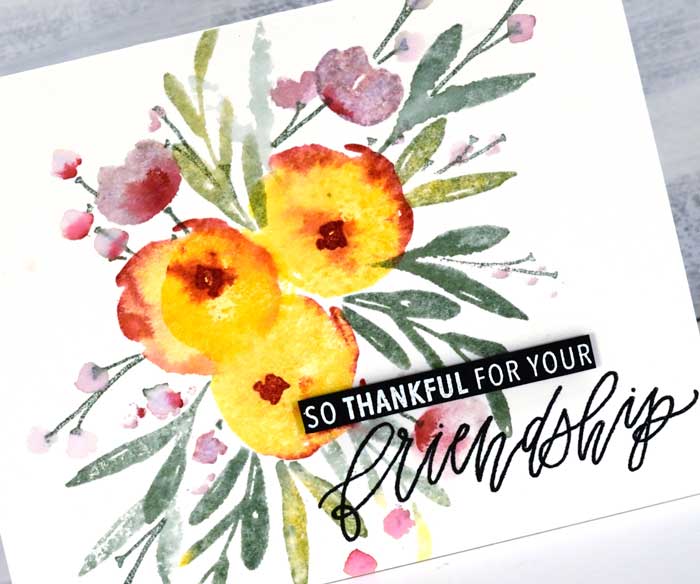
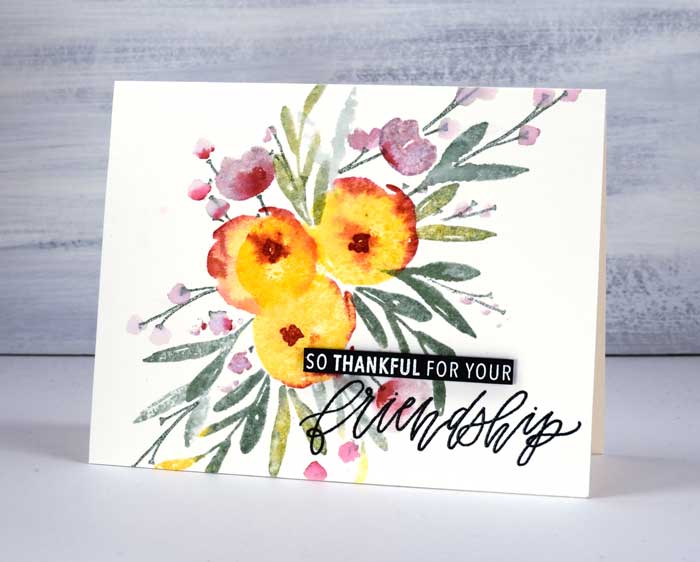
To create the single layer stamped card I started by inking the largest flowers in Papertrey Ink’s harvest gold and rolled the scarlet jewel ink along one edge. I spritzed the stamp before pressing it onto hot pressed watercolor paper. I overlapped three flowers then added centers with one of the tiny stamps in scarlet jewel ink. I added a mix of leaves and stems around the edges of the large flowers while the central flowers were masked with a post-it note. I used Ocean Tides and Pinefeather for the leaves and stems and paired winter wisteria with scarlet jewel for the smaller flowers. For all the stamping I inked the stamp, spritzed it lightly then stamped, that’s how I got the soft blended watercolor look. It sounds time-consuming but it’s not too bad. I didn’t use a stamp positioner for the floral part of the card because it was easier to position each element with an acrylic block.
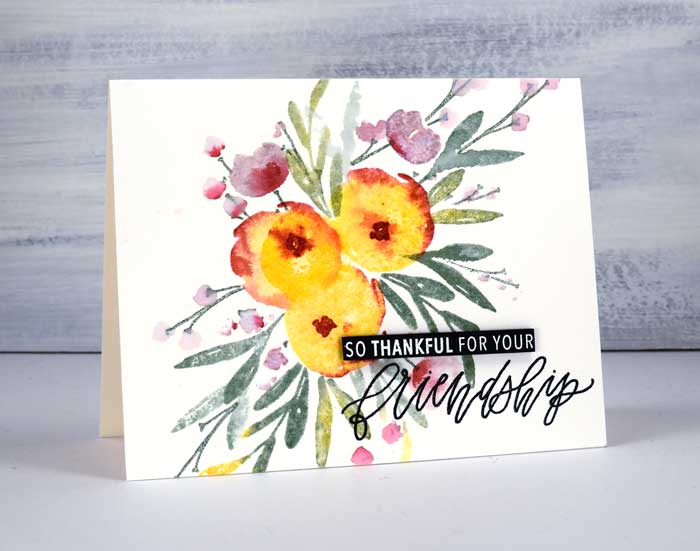
To finish the card I stamped sentiments from the Bold Blooms set, ‘friendship’ stamped directly over the florals with nocturne Versafine Clair ink, then clear embossed and the rest of the words embossed in Brutus Monroe ‘alabaster’ powder on a thin black strip of card stock.
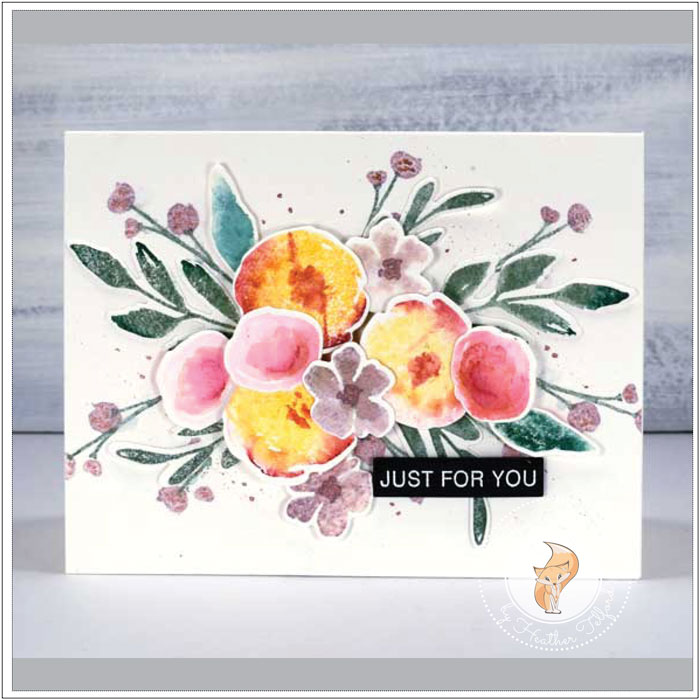
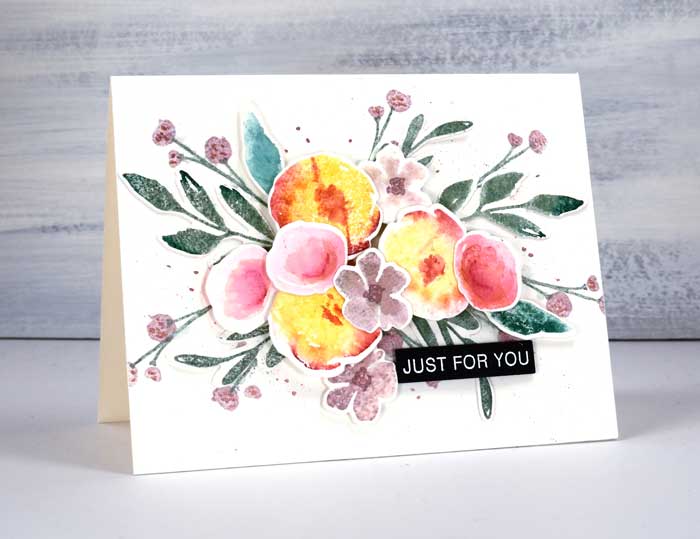
To create the layered card I kept the dies joined together and cut the whole panel three times from hot-pressed watercolor paper. That gave me multiple flowers and leaves to stamp and arrange. I used the same inks as I had for the first card and the same ink-spritz-stamp method. Once I had a good-sized bunch of inked die cuts I played around with the arrangement until I was happy with it. I realize it is almost the same arrangement as the other card but, as I mentioned earlier, ‘not the most talented at flower arranging!’. Before I started gluing things down I stamped some of the fine stems and little co-ordinating blooms on the main panel and added some splatter as well.
All that was left to do was to attach the flowers and leaves. I glued some directly on the panel then attached the next layer with a low profile foam tape and the top layer over that with some higher profile foam dots where needed. The sentiment for this card is from an Ink to Paper mini sentiment set ‘tagged’, once again embossed in white on black.
I really enjoyed arranging these flowers. Most of the floral stamping I do (and let’s face it I do a lot) is with larger floral stamps. When faced with the little ones I am initially intimidated but once I get going I find it very satisfying to build a design. I always start with the largest elements, position the medium-sized ones next then add the little delicate ones last; they are the filler.
I hope you are enjoying some creative time while you are quarantined. I’d love to hear what you are up to in the comments below.
More about Heather:

• • • • • • • •
Supply List:

The soft look of the inks on the stamp, spritzed with water, then applied to paper is lovely & really appeals to me. I do not arrange flowers well either, be they stamped or real. Thanks Karen.