Hi Creative Friends,
I had so much fun playing with this new stamp and die set by My Favorite Things called Gnome for the Holidays. It features adorable little gnomes in all sorts of funny poses.
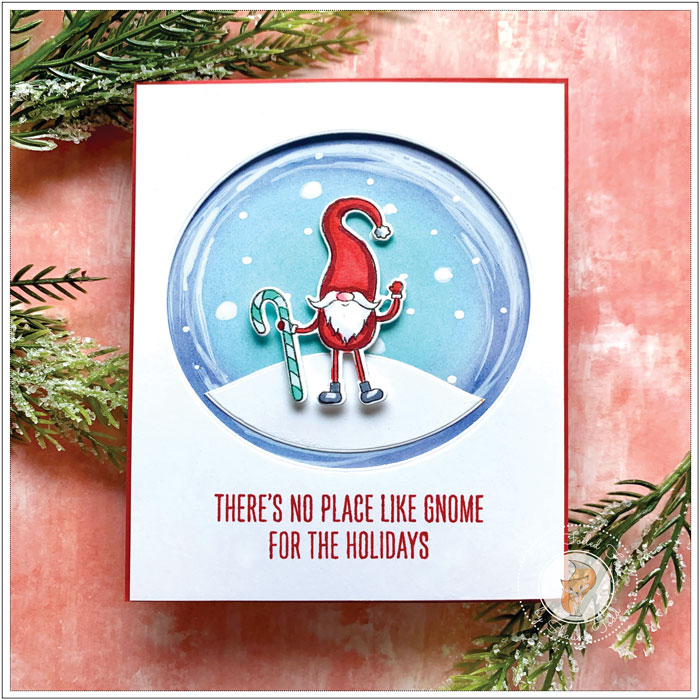
To start, I cut out all the gnomes with the matching die set, stamped each of them using an alcohol-friendly ink like MFT’s Extreme Hybrid black ink, then colored them with Copic markers. The coloring was pretty simple. I only used a few colors: R27, R39, R30, BG000, BG23, and finally C1 and C5 for his shoes and a touch of C1 for their beards.
With the gnomes done, I set them aside for a bit while I created the rest of the card. To do that, I cut a 3.5″ circle out of an A2 white card stock panel, then stamped one of the included sentiments with Pure Poppy red ink at the bottom of the panel.
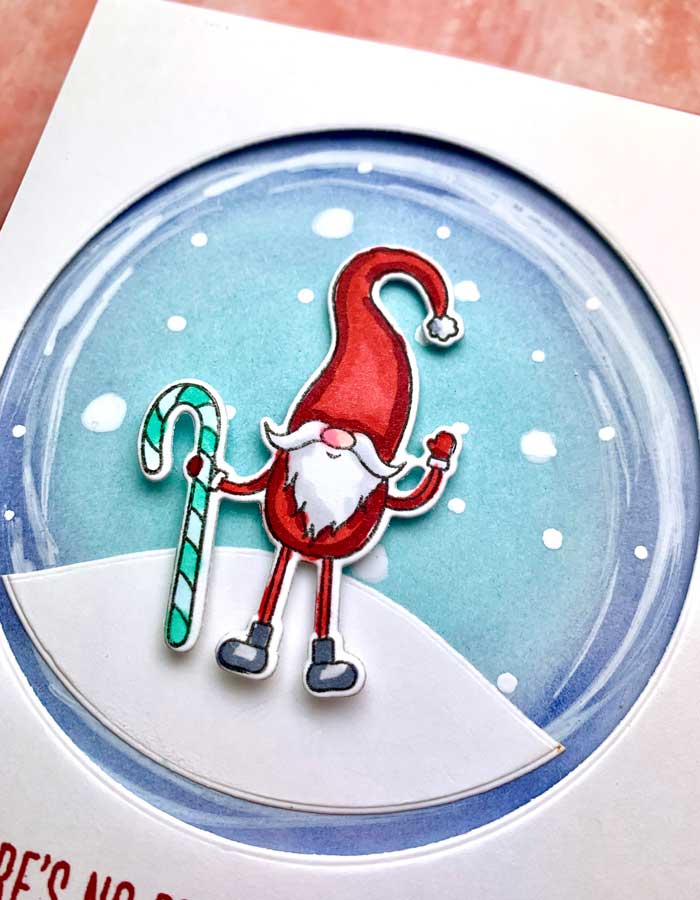
Next, I made the snowy hill for the gnomes to stand on. To do this, I cut a piece out of the leftover center circle using one of the Lawn Fawn Stitched Hillside border dies.
Next, I started on the circle’s background. To do this I traced the outline of the circle onto a piece of Bristol paper. I love the hard smooth surface of this paper. It makes blending sooooo much easier – by the way, you probably know, but not all Bristol papers are created equal. Make sure to choose one that has an ultra-smooth surface like Strathmore Bristol paper (see supply list below).
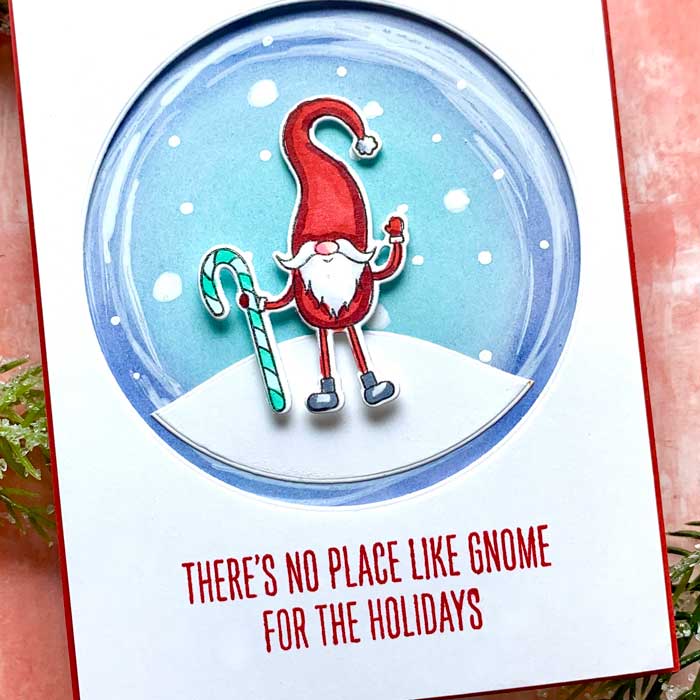
Now that I had the outline of the circle, I used it as a guide and blended Tumbled Glass distress ink over the whole circle. Then, I added Chipped Sapphire on the inside edge of the circle. It was looking a little stark like this but once I started adding swooshes of Dr. Ph Martin’s Bleedproof white ink with my brush, it all came together. To finish the background, I added dots of white ink for the snow, then let it all dry.
All the pieces were done so it was time to assemble. Using a white A2 card base I added a panel of Peppermint red card stock on top. Next, I positioned and glued the background circle in place. The sentiment panel was added with a bit of foam tape.
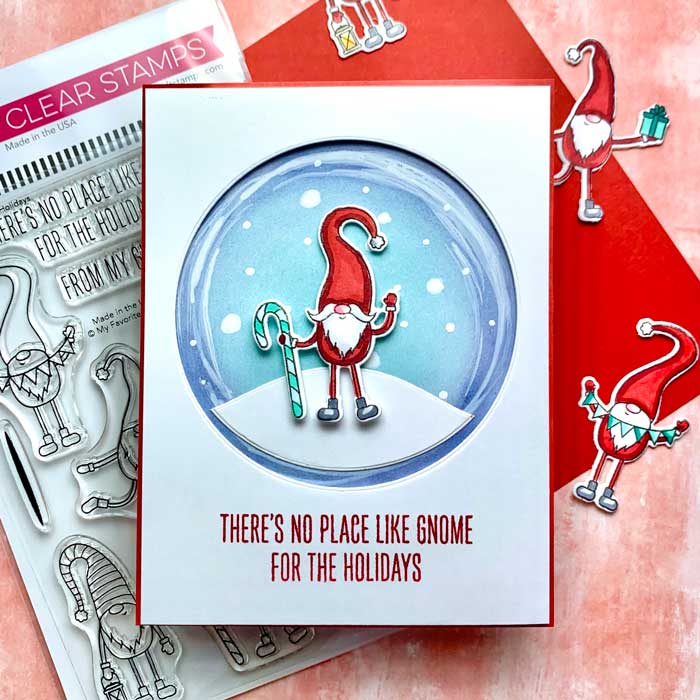
The only thing left was to add the snow hill I made earlier and add the gnomes. At first I thought I would add three but it was looking a bit crowded so I chose one and attached him in the center with foam tape.
And there you have it, all done! ♥
Goodies Used: