Happy Valentine’s Day!
Every year I make Valentine’s for my kids. But I never seem to start them ahead of time. It is always the mad scramble to get all my Valentines done and out the door on Valentine’s Day. This year is no exception!
So, if you find yourself in the same boat, here are 4 different quick and easy Valentines to whip up.
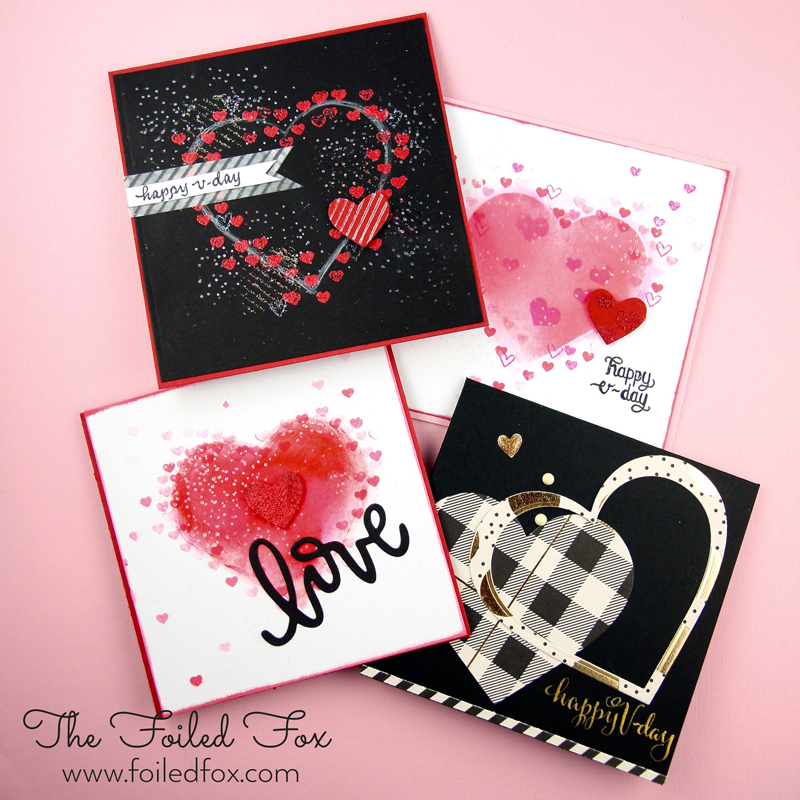
These cards so super easy to make. All of them are made using the same supplies (except the last one) so no need to drag out a ton of supplies. The cards were created using the Hero Arts Heart Infinity dies and a few heart stamps I had on hand.
Starting with the Love Valentine, I started with tracing a heart shape onto white cardstock. Then, using Candied Apple and Picked Raspberry Distress ink and a blending tool, I colored in the heart. With the same distress inks, I stamped solid hearts all over the perimeter and randomly about. To get the varied pink colors, I would ink the stamp and stamp the darker color, then stamp (without reinking) 2 more times. This first, second and third generation stamping gives the varied colors without having to use a bunch of different ink colors. To add a little sparkle and texture, I stamped tiny dots using the new Delicata White Shimmer ink and the Waffle Flower Mini Patterns stamp set. This new Delicata ink so sooooo fabulous!
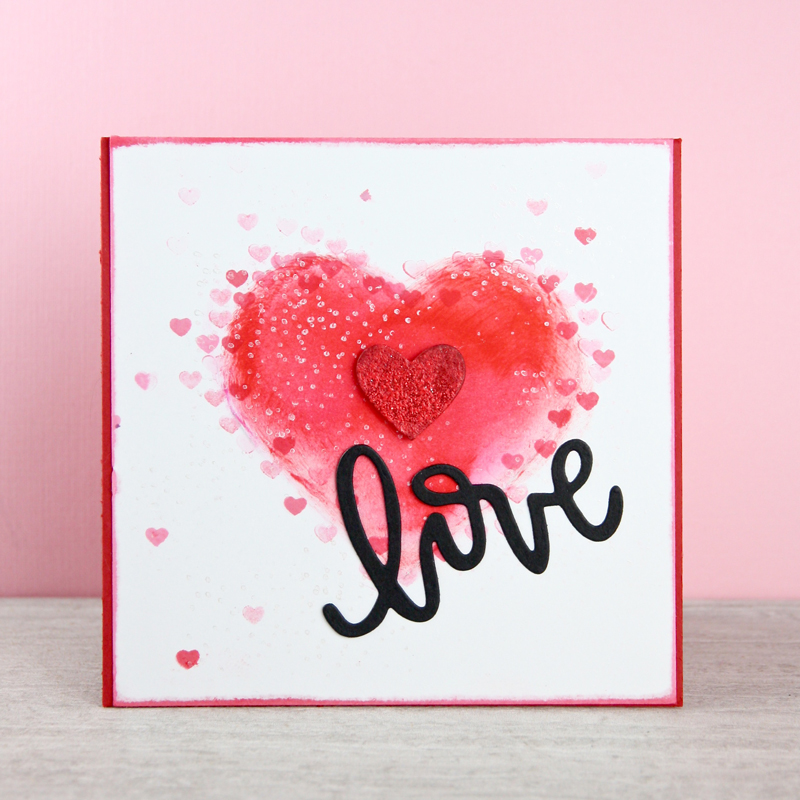
To finish the card, I cut out a small heart, stamped Versamark ink over the whole top and heat embossing Ranger’s Red Tinsel embossing powder. Then, mounted it with foam tape in the center. Finally, I cut a ‘love’ sentiment from the Neat & Tangled Love Notes die set and mounted on the panel. The top panel edges were rubbed through the ink pad to create a red edge and mounted onto a red card base.
![]()
For this card, I started with a black square card panel, traced a heart using a chalk pencil (one of my very favorite tools!!). Next, I stamped the little solid hearts about the perimeter of the heart using Versamark ink and heat embossing them with Rnager’s Red Tinsel embossing powder. Then, stamped again a few times with the open heart stamp with Versamark ink and heat embossed with white embossing powder.
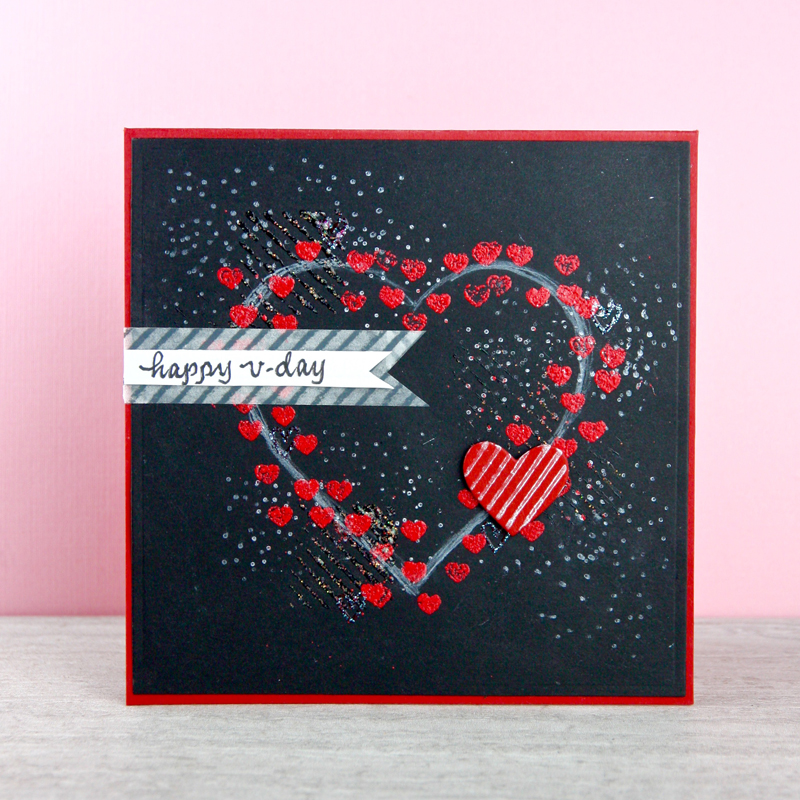
With the same Waffle Flower tiny dots stamp, I stamped lots of tiny dots using the same Delicata White Shimmer ink. I continued by die cutting from red cardstock and stamped with the diagonal line stamp from the same Waffle Flower set. You will notice too that I used this same diagonal line stamp to stamp a few times with the Moonstone Glimmer Paste. To do this, I simply spread a thin layer onto an acrylic block and stamped into it as if it was an ink pad. This gave the card panel a little texture and sparkle.
To finish up this card, a strip of diagonal stripes washi tape was placed and a “happy v-day” sentiment was added. The panel was mounted onto a red base and this one is done.
![]()
This next card was made a lot like the others. I started by cutting out a heart from a full-adhesive post-it note. This created a mask so I could color a crisp solid heart in the center using Worn Lipstick Distress ink and a blending tool. Once the large heart shape was colored, I randomly stamped hearts around and inside the big heart. I used the same inks and heart stamps as before, but added a few larger hearts too. You will notice too, that I just had to add a few tiny dots using the Delicata White Shimmer ink and Waffle Flower stamp. It is just so pretty I couldn’t resist!
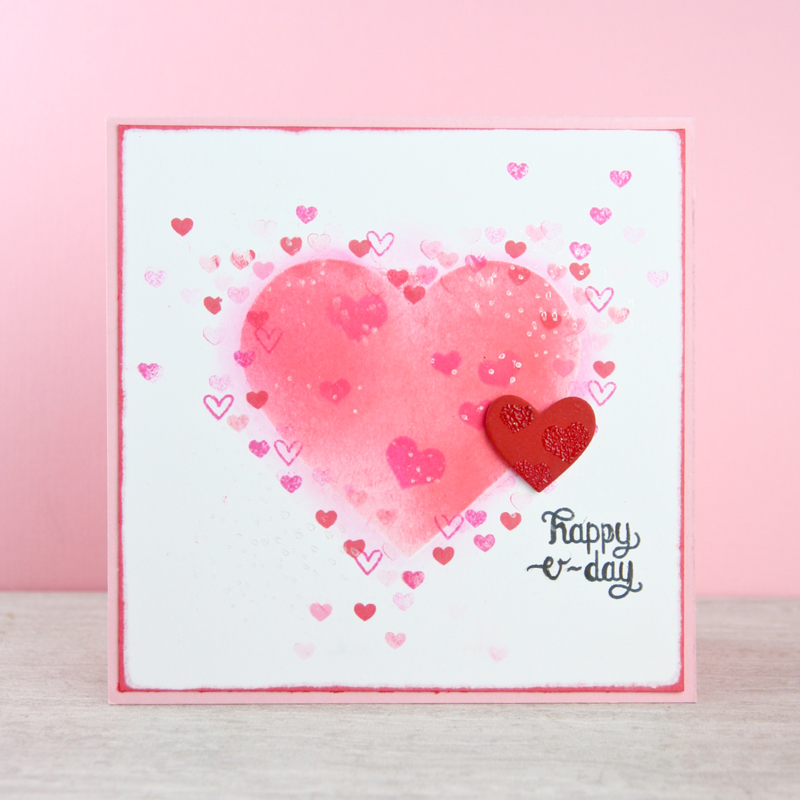
Once again, a die cut small red cardstock heart was used but this time I stamped it with the small heart stamp and heat embossed it with clear embossing powder to give a heart pattern to the solid red heart. It was adhered with foam tape and the sentiment was hand written with a Pigma Micron Pen.
In the final steps, the card panel was rubbed across the candied apple ink pad on all 4 edges and then mounted to a pink card base.
![]()
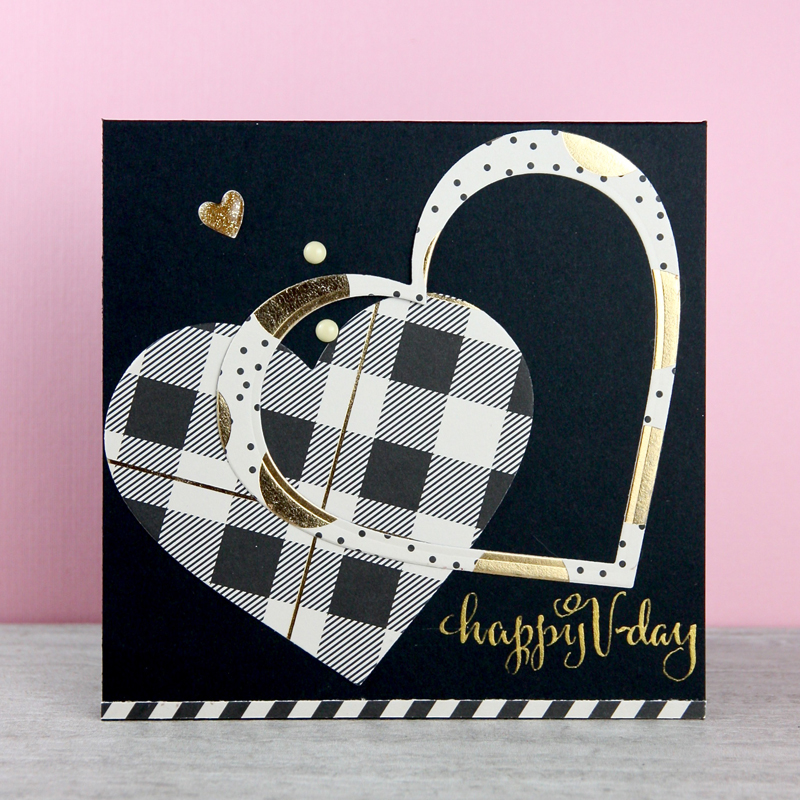
This last card is a departure from the others. My one daughter loves plaids and she is real fond of the blacks and grays you see in fashion today. So this card worked up in a snap!!
Using papers from the Yes, please paper pack and the Hero Arts Heart Infinity dies again, I cut out a solid and an outlined heart and mounted it onto a black card base. A narrow strip of diagonal paper was added to the bottom and a few embellishments from the Yes, please enameled hearts. This card was the fastest of all, and it is maybe my favorite!
So, there we are, all 4 cards done in no time!
![]()
Supply List:
 Arts Heart Infinity Dies |
 Flower Mini Patterns Stamp Set |
 Candy Cardstock |
 Solar White card stock |
 Paper |
 Black Cardstock |
 Eye Yes, Please Paper Pack |
 Apple Distress Ink Pad |
 Raspberry Distress Ink |
 Lipstick Distress Inkpad |
 Watermark Ink Pad |
 Tangled Love Notes |
 White Shimmer Ink pad |
 Red Tinsel Embossing Powder |
 Clear Embossing Powder |
 Moonstone Glimmer Paste |
 Tape |
 Eye Yes, Please Enamels |
 Chalk Pencil |
 Tool |

